
ਤੁਹਾਡੀਆਂ ਜੁਏਲਰੀ ਫ਼ੋਟੋਆਂ ਨੂੰ AI Retouching ਲਈ ਤਿਆਰ ਕਰੋ: Input Quality Guide
AI retouching ਦੀ ਗੁਣਵੱਤਾ ਤੁਹਾਡੀ input ਫ਼ੋਟੋ 'ਤੇ ਬਹੁਤ ਜ਼ਿਆਦਾ ਨਿਰਭਰ ਕਰਦੀ ਹੈ। ਜਾਣੋ ਕਿ ਸਭ ਤੋਂ ਵਧੀਆ AI retouching ਨਤੀਜਿਆਂ ਲਈ ਤੁਹਾਡੀਆਂ ਜੁਏਲਰੀ ਫ਼ੋਟੋਆਂ ਨੂੰ ਕਿਸ resolution, lighting, angle, ਅਤੇ background ਦੀ ਲੋੜ ਹੈ।
ਤਬਦੀਲੀ ਦੇਖੋ
ਇੱਕ ਰੀਟਚ ਕੀਤੀ ਗਹਿਣਿਆਂ ਦੀ ਫੋਟੋ, ਚਾਰ ਉਪਯੋਗੀ ਆਉਟਪੁੱਟ।
ਕੈਟਾਲਾਗ ਰੀਟਚਿੰਗ ਬੁਨਿਆਦ ਹੈ: ਸਾਫ਼ ਬੈਕਗ੍ਰਾਊਂਡ, ਪਾਲਿਸ਼ ਕੀਤੀਆਂ ਸਤਹਾਂ, ਸੰਭਾਲਿਆ ਡਿਜ਼ਾਈਨ. ਉਸ ਵਾਟਰਮਾਰਕ-ਰਹਿਤ ਆਉਟਪੁੱਟ ਤੋਂ, Instagram-ਸ਼ੈਲੀ ਸੀਨ, True-Scale Placement ਮਾਡਲ ਸ਼ਾਟ, ਅਤੇ 5-ਸਕਿੰਟ ਵਿਗਿਆਪਨ ਵੀਡੀਓ ਬਣਾਓ.
ਤੁਲਨਾ ਕਰਨ ਲਈ ਖਿੱਚੋ
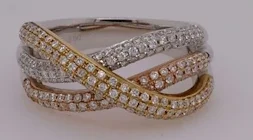
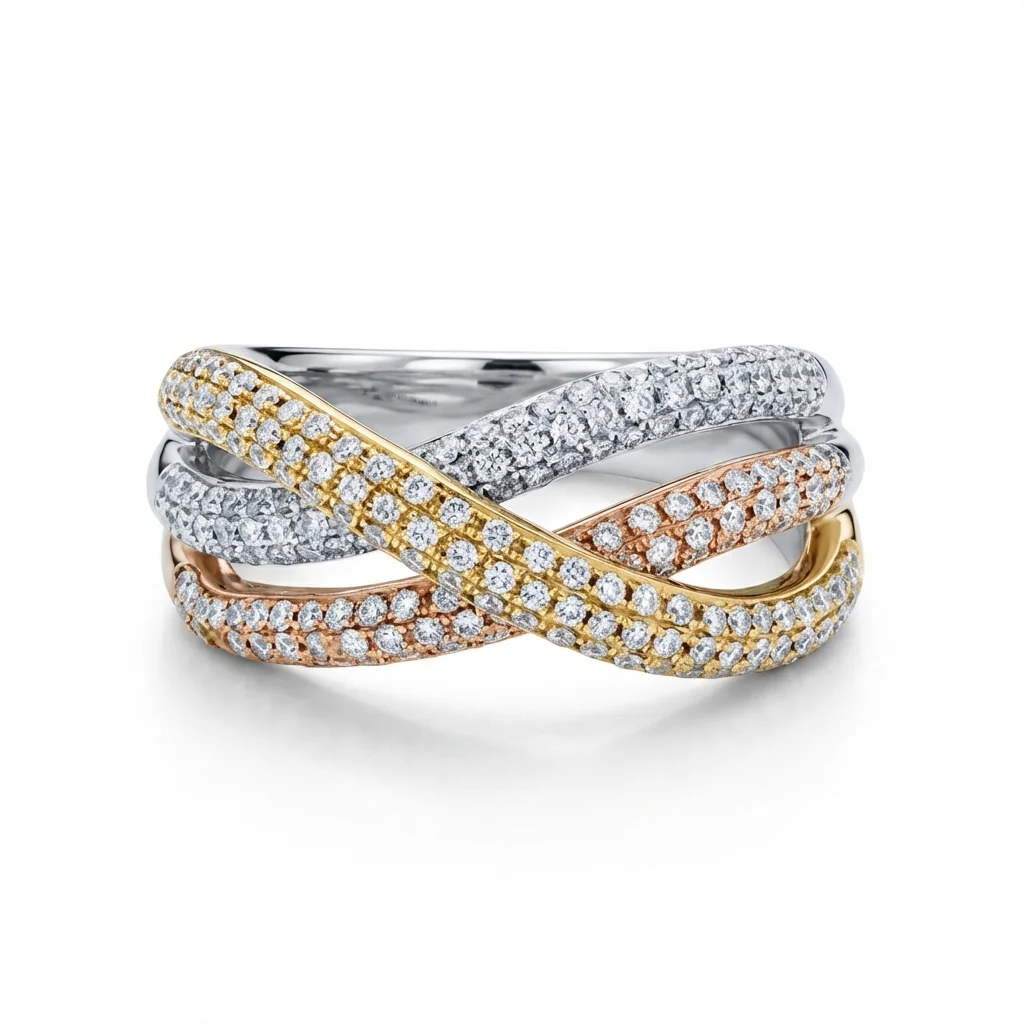
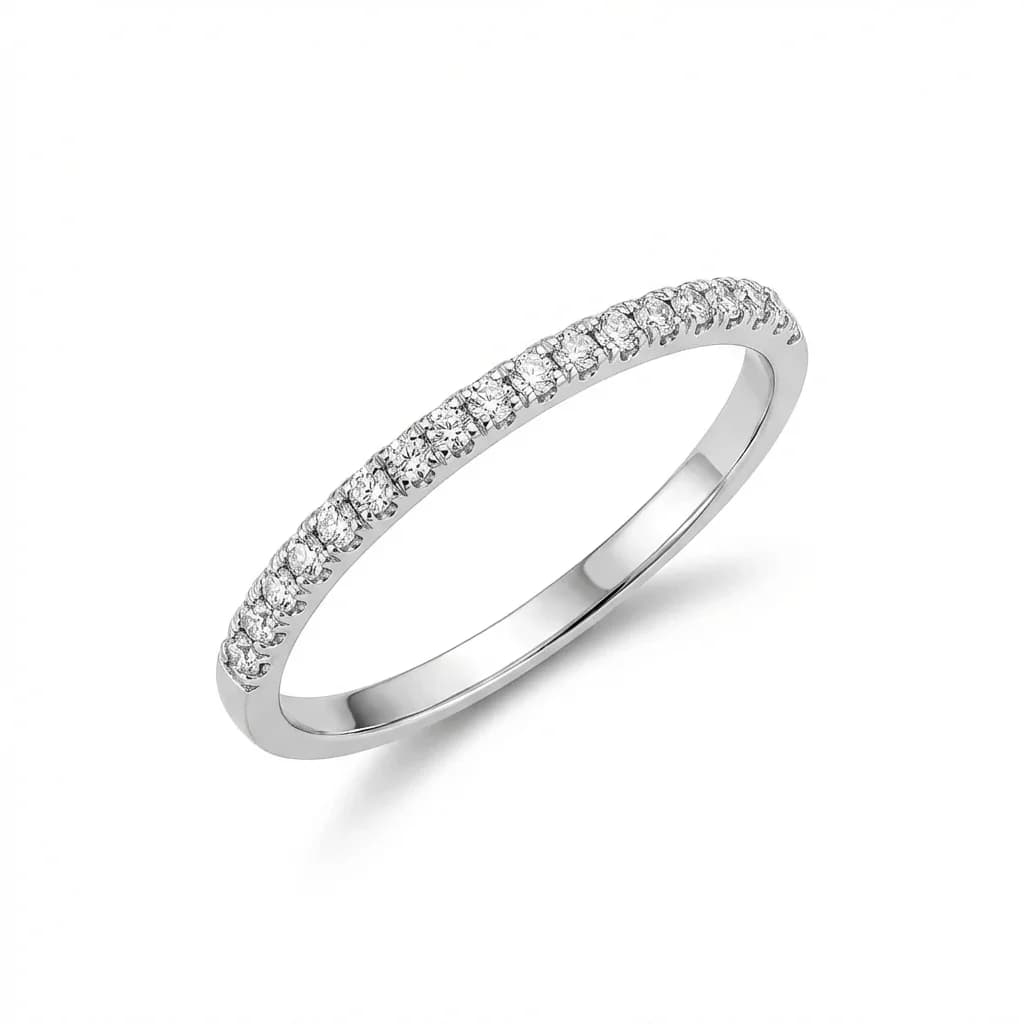
ਕੈਟਾਲਾਗ ਰੀਟਚਿੰਗ
ਪਾਲਿਸ਼ਡ ਧਾਤ, ਵਧੇ ਹੋਏ ਰਤਨਾਂ, ਅਤੇ ਮਾਰਕੀਟਪਲੇਸ-ਤਿਆਰ ਆਉਟਪੁੱਟ ਨਾਲ ਸਾਫ਼ ਚਿੱਟੇ-ਬੈਕਗ੍ਰਾਊਂਡ ਉਤਪਾਦ ਫੋਟੋਆਂ।
Instagram ਦ੍ਰਿਸ਼
ਰਚਨਾਤਮਕ ਪ੍ਰੌਪਸ, ਮੂਡ ਲਾਈਟਿੰਗ, ਅਤੇ ਬ੍ਰਾਂਡ ਕਹਾਣੀਕਾਰੀ ਦੇ ਨਾਲ ਸੰਪਾਦਕੀ-ਸ਼ੈਲੀ ਦੇ ਦ੍ਰਿਸ਼।
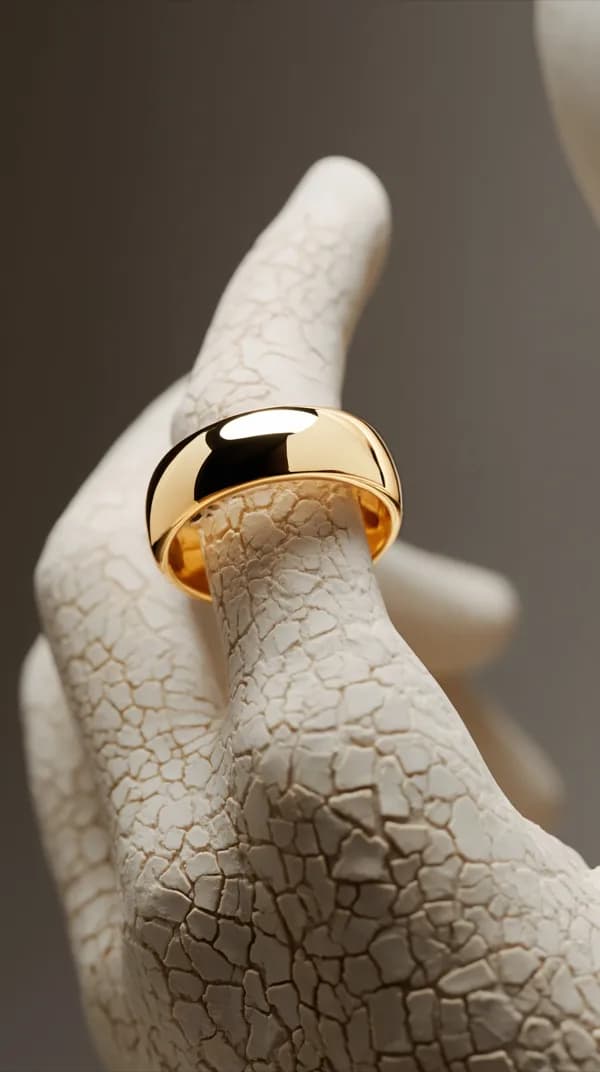
ਮਾਡਲ 'ਤੇ ਗਹਿਣੇ
ਆਪਣੀ ਸਟੀਕ ਅੰਗੂਠੀ, ਕੰਨ ਦੀ ਬਾਲੀ, ਹਾਰ, ਜਾਂ ਚੂੜੀ ਨੂੰ ਯਥਾਰਥਵਾਦੀ ਸਰੀਰ ਪਲੇਸਮੈਂਟ ਅਤੇ ਪਹਿਨੇ ਹੋਏ ਆਕਾਰ ਦੇ ਨਾਲ ਮਾਡਲ ਸੰਦਰਭ 'ਤੇ ਟ੍ਰਾਂਸਫਰ ਕਰੋ।
Input Quality ਤੁਹਾਡੇ ਦੁਆਰਾ ਵਰਤੇ ਜਾਣ ਵਾਲੇ AI Tool ਨਾਲੋਂ ਵਧੇਰੇ ਮਾਇਨੇ ਰੱਖਦੀ ਹੈ
ਭਲੇ ਹੀ ਸਭ ਤੋਂ ਵਧੀਆ AI retouching engine ਬਣ ਜਾਵੇ, ਪਰ ਇਹ ਉਹ detail ਪੈਦਾ ਨਹੀਂ ਕਰ ਸਕਦਾ ਜੋ source photo ਵਿੱਚ ਮੌਜੂਦ ਨਹੀਂ ਹੈ। ਇੱਕ blurry, underexposed, ਜਾਂ ਮਾੜੀ ਤਰ੍ਹਾਂ framed input ਇੱਕ blurry, ਡਾਰਕ, ਜਾਂ ਮਾੜੀ ਤਰ੍ਹਾਂ ਕੰਪੋਜ਼ਡ output ਪੈਦਾ ਕਰੇਗਾ, ਚਾਹੇ AI ਕਿੰਨਾ ਵੀ ਉਨੱਤ ਹੋਵੇ। Input ਨੂੰ ਸਹੀ ਕਰਨਾ ਤੁਹਾਡੇ ਨਤੀਜਿਆਂ ਨੂੰ ਬਿਹਤਰ ਬਣਾਉਣ ਲਈ ਸਭ ਤੋਂ ਪ੍ਰਭਾਵਸ਼ਾਲੀ ਕੰਮ ਹੈ।
ਬਹੁਤ ਸਾਰੇ ਜੁਏਲਰੀ ਵਿਕਰੇਤਾ ਸਹੀ AI retouching tool ਚੁਣਨ 'ਤੇ ਧਿਆਨ ਦਿੰਦੇ ਹਨ ਪਰ ਉਪਲੋਡ ਕੀਤੀਆਂ ਜਾਣ ਵਾਲੀਆਂ ਫ਼ੋਟੋਆਂ ਦੀ ਗੁਣਵੱਤਾ ਨੂੰ ਨਜ਼ਰਅੰਦਾਜ਼ ਕਰਦੇ ਹਨ। ਇਹ premium printers ਚੁਣਨ ਵਰਗਾ ਹੈ ਪਰ ਉਹਨਾਂ ਨੂੰ low-resolution files ਦਿੰਦੇ ਜਾਣਾ — output input ਦੁਆਰਾ limited ਹੈ।
AI retouching ਤੁਹਾਡੀ ਫ਼ੋਟੋ ਨੂੰ ਵਿਸ਼ਲੇਸ਼ਣ ਕਰਕੇ, ਜੁਏਲਰੀ ਦੇ ਟੁਕੜੇ ਨੂੰ ਸਮਝ ਕੇ, background ਨੂੰ ਹਟਾ ਕੇ, ਅਤੇ proper lighting, shadows, ਅਤੇ positioning ਨਾਲ ਇੱਕ catalog-ready version ਤਿਆਰ ਕਰਕੇ ਕੰਮ ਕਰਦਾ ਹੈ। ਇਸ ਪ੍ਰਕਿਰਿਆ ਦਾ ਹਰ ਪੜਾਅ AI ਦੀ ਸਮਰੱਥਾ 'ਤੇ ਨਿਰਭਰ ਕਰਦਾ ਹੈ ਕਿ ਵੋ ਟੁਕੜੇ ਨੂੰ ਸਾਫ਼-ਸਥਿਰ ਵੇਖ ਸਕੇ। ਜੇ input blurry ਹੈ, AI ਉਹ detail ਤੇਜ਼ ਨਹੀਂ ਕਰ ਸਕਦਾ ਜੋ ਕਦੇ capture ਹੀ ਨਹੀਂ ਹੋਈ। ਜੇ ਜੁਏਲਰੀ underexposed ਹੈ, AI ਨੂੰ guess ਕਰਨਾ ਪਵੇਗਾ ਕਿ ਧਾਤ ਦਾ ਰੰਗ ਕੀ ਹੈ। ਜੇ ਟੁਕੜਾ frame ਵਿੱਚ ਛੋਟਾ ਹੈ, AI ਦੇ ਕੋਲ actual jewelry data ਦੇ ਸਿਰਫ਼ ਕੁਝ ਸੌ pixels ਹੀ ਹਨ।
ਚੰਗੀ ਖਬਰ ਇਹ ਹੈ ਕਿ ਸਹੀ input photo ਤਿਆਰ ਕਰਨ ਲਈ ਕੋਈ ਮਹਿੰਗਾ equipment ਨਹੀਂ ਚਾਹੀਦਾ। ਇੱਕ ਆਧੁਨਿਕ smartphone ਚੰਗੀ lighting ਦੇ ਨਾਲ ਸ਼ਾਨਦਾਰ ਨਤੀਜੇ ਦਿੰਦਾ ਹੈ। ਇੱਕ ਚੰਗੇ ਅਤੇ ਮਾੜੇ AI retouching ਨਤੀਜੇ ਵਿੱਚ ਅਸਲ ਅੰਤਰ ਆਮ ਤੌਰ 'ਤੇ camera ਨਹੀਂ ਹੁੰਦਾ — ਇਹ lighting, angle, ਅਤੇ framing ਚੋਣਾਂ ਹਨ ਜੋ photographer ਨੇ ਕੀਆਂ।
Resolution ਅਤੇ File Format Requirements
ਘੱਟੋ-ਘੱਟ 2000 ਬਾ 2000 pixels 'ਤੇ ਸ਼ੂਟ ਕਰੋ। ਵਧੇਰੇ resolution AI ਨੂੰ ਵਧੇਰੇ detail ਦਿੰਦਾ ਹੈ, ਖਾਸ ਤੌਰ 'ਤੇ chain links ਅਤੇ pavé stones ਵਰਗੇ ਵਧੀਆ elements ਲਈ। JPEG, PNG, ਜਾਂ WebP format ਵਰਤੋ। Jewels Retouch ਵਰਗੇ AI tools ਆਮ ਤੌਰ 'ਤੇ 20MB ਤੱਕ ਦੇ file size ਨੂੰ ਸਵੀਕਾਰ ਕਰਦੇ ਹਨ।
Resolution ਸਿੱਧਾ ਅੱਗੇ ਵਧਣ ਵਾਲਾ ਹੈ: ਵਧੇਰੇ pixels ਦਾ ਮਤਲਬ AI ਨੂੰ ਕੰਮ ਕਰਨ ਲਈ ਵਧੇਰੇ detail ਹੈ।
ਲੰਬਾਈ ਦੇ ਪਾਸੇ ਘੱਟੋ-ਘੱਟ 2000 pixels। ਇਹ AI ਨੂੰ metal textures, gemstone facets, ਅਤੇ ਵਧੀਆ structural details ਨੂੰ accurately process ਕਰਨ ਲਈ ਕਾਫ਼ੀ data ਦਿੰਦਾ ਹੈ। ਜ਼ਿਆਦਾਤਰ smartphone cameras ਇਹ ਆਸਾਨੀ ਨਾਲ ਪਾਰ ਕਰ ਜਾਂਦੇ ਹਨ — ਇੱਕ iPhone ਬਾ ਡਿਫ਼ਾਲਟ 4032 ਬਾ 3024 pixels 'ਤੇ ਸ਼ੂਟ ਕਰਦਾ ਹੈ।
Ideal range 3000 ਤੋਂ 5000 pixels ਹੈ। ਇਹ cropping ਲਈ ਭਰਪੂਰ ਥਾਂ ਪ੍ਰਦਾਨ ਕਰਦਾ ਹੈ ਅਤੇ ਯਕੀਨੀ ਬਣਾਵਦਾ ਹੈ ਕਿ ਸਭ ਤੋਂ ਛੋਟੀ detail (prong tips, milgrain edges, hallmarks) ਸਾਫ਼ ਤਰੀਕੇ ਨਾਲ capture ਹੋ। 5000 pixels ਤੋਂ ਅੱਗੇ, ਤੁਹਾਨੂੰ diminishing returns ਮਿਲਦੇ ਹਨ — AI ਹੌਲੀ ਪ੍ਰਾਸੈਸ ਕਰਦਾ ਹੈ ਬਿਨਾ meaningful quality improvement ਦੇ।
File format ਤੁਹਾਡੇ ਸੋਚਿਆ ਦੁਆਰਾ ਘਟ ਮਾਇਨੇ ਰੱਖਦਾ ਹੈ। JPEG ਬਿਨਾ ਕਿਸੇ ਮਸਲੇ ਦੇ ਠੀਕ ਹੈ। PNG ਥੋੜ੍ਹਾ ਬਿਹਤਰ quality ਦਿੰਦਾ ਹੈ ਪਰ ਵੱਡੀਆਂ files। WebP ਵੀ ਸਵੀਕਾਰ ਕੀਤਾ ਜਾਂਦਾ ਹੈ। ਮੁੱਖ ਬਾਤ ਭਾਰੀ compression ਤੋਂ ਬਚਨਾ ਹੈ — ਜੇ JPEG ਦੇ ਰੂਪ ਵਿੱਚ ਸੁਰੱਖਿਅਤ ਕਰਦੇ ਹੋ, quality 90 ਜਾਂ ਵੱਧ ਵਰਤੋ।
Portrait mode ਜਾਂ software blur ਦੇ ਨਾਲ ਸ਼ੂਟ ਕਰਨ ਤੋਂ ਬਚੋ। Smartphone 'ਤੇ Portrait mode artificial background blur ਲਾਗੂ ਕਰਦਾ ਹੈ ਜੋ ਜੁਏਲਰੀ ਦੇ edges ਨੂੰ ਪ੍ਰਭਾਵਿਤ ਕਰ ਸਕਦਾ ਹੈ। Standard photo mode ਵਿੱਚ ਸ਼ੂਟ ਕਰੋ ਤਾਂ ਜੋ ਸਾਫ਼, ਸ਼ਾਰਪ edges ਮਿਲੋ ਜੋ AI ਬੈਕਗ੍ਰਾਉਂਡ ਤੋਂ accurately ਵੱਖ ਕਰ ਸਕੇ।
RAW shooters ਲਈ: upload ਕਰਨ ਤੋਂ ਪਹਿਲਾਂ JPEG ਜਾਂ PNG ਵਿੱਚ convert ਕਰੋ। AI retouching tools standard image formats ਨਾਲ ਕੰਮ ਕਰਦੇ ਹਨ, camera-specific RAW files ਨਾਲ ਨਹੀਂ। ਆਪਣੀ RAW file ਨੂੰ basic exposure correction ਨਾਲ process ਕਰੋ ਪਰ heavy editing add ਨਾ ਕਰੋ — AI creative retouching handle ਕਰਦਾ ਹੈ।
ਰੋਸ਼ਨੀ: ਸਭ ਤੋਂ ਮਹੱਤਵਪੂਰਨ ਕਾਰਕ
ਉੱਪਰ ਤੋਂ ਅਤੇ ਥੋੜ੍ਹਾ ਅੱਗੇ ਨਰਮ, ਫੈਲੀ ਹੋਈ ਰੋਸ਼ਨੀ ਦੀ ਵਰਤੋਂ ਕਰੋ। ਸਿੱਧੇ ਫਲੈਸ਼ (ਧਾਤ 'ਤੇ ਕਠੋਰ ਦਾਗ ਬਣਾਉਂਦਾ ਹੈ) ਅਤੇ ਸਖਤ ਪ੍ਰਭਾਵੀ ਰੋਸ਼ਨੀ (ਡੂੰਘੀਆਂ ਛਾਇਆਂ ਬਣਾਉਂਦੀ ਹੈ) ਤੋਂ ਬਚੋ। ਸਫੇਦ ਕਾਗਜ਼ ਦੀ ਚਾਦਰ ਦੇ ਨਾਲ ਉੱਤਰ-ਮੁਖੀ ਖਿੜਕੀ ਬਹੁਤ ਵਧੀਆ ਨਤੀਜੇ ਦਿੰਦੀ ਹੈ। $30 ਦਾ LED ਸਾਫਟਬਾਕਸ ਲਗਾਤਾਰ ਘਰ ਦੇ ਅੰਦਰ ਸ਼ੂਟਿੰਗ ਲਈ ਕੰਮ ਆਉਂਦਾ ਹੈ।
ਰੋਸ਼ਨੀ ਇਸ ਗੱਲ ਨਿਰਧਾਰਤ ਕਰਦੀ ਹੈ ਕਿ AI ਤੁਹਾਡੇ ਜ਼ੁਆਨ ਦੀ ਧਾਤ ਦੀ ਕਿਸਮ, ਮਣੀਆਂ ਦਾ ਰੰਗ, ਅਤੇ ਸਤਹ ਦੀ ਵਿਸਥਾਰ ਠੀਕ ਤਰਾਂ ਪੜ੍ਹ ਸਕਦੀ ਹੈ। ਖਰਾਬ ਰੋਸ਼ਨੀ AI ਨੂੰ ਅੰਦਾਜ਼ਾ ਲਗਾਉਣ ਲਈ ਮਜਬੂਰ ਕਰਦੀ ਹੈ — ਅਤੇ ਇਹ ਗਲਤ ਅੰਦਾਜ਼ਾ ਲਗਾਵੇਗਾ।
ਨਰਮ, ਫੈਲੀ ਹੋਈ ਰੋਸ਼ਨੀ ਜ਼ਰੂਰੀ ਹੈ। ਸਿੱਧੀ ਰੋਸ਼ਨੀ ਪਾਲਿਸ਼ ਕੀਤੀ ਧਾਤ 'ਤੇ ਕਠੋਰ ਪ੍ਰਗਟਾਵੀ ਹਾਈਲਾਈਟ ਬਣਾਉਂਦੀ ਹੈ ਜੋ AI ਨੂੰ ਉਲਝਾ ਦਿੰਦਾ ਹੈ। ਸਿਸਟਮ ਨਹੀਂ ਦੱਸ ਸਕਦਾ ਕਿ ਤੇਜ਼ ਸਫੇਦ ਆਕਾਰ ਹੀਰਾ ਹੈ ਜਾਂ ਰੋਸ਼ਨੀ ਦਾ ਪ੍ਰਤਿਬਿੰਬ। ਖਿੜਕੀ ਦੇ ਨੇੜੇ ਸ਼ੂਟ ਕਰਕੇ ਜਾਂ ਸਾਫਟਬਾਕਸ ਦੀ ਵਰਤੋਂ ਕਰਕੇ ਰੋਸ਼ਨੀ ਨੂੰ ਫੈਲਾਓ। ਇੱਥੇ ਤੱਕ ਕਿ ਰੋਸ਼ਨੀ ਸਰੋਤ ਅਤੇ ਜ਼ੁਆਨ ਦੇ ਵਿਚਕਾਰ ਰੱਖੀ ਸਫੇਦ ਕਾਗਜ਼ ਦੀ ਇੱਕ ਸਾਧਾਰਨ ਸ਼ੀਟ ਤੇਜ਼ੀ ਨਾਲ ਕੰਮ ਆਉਂਦੀ ਹੈ।
ਉੱਪਰ ਤੋਂ ਅਤੇ ਥੋੜ੍ਹਾ ਅੱਗੇ ਲਾਈਟ ਕਰੋ। ਇਹ ਪੇਸ਼ੇਵਰ ਸਟੂਡੀਓ ਰੋਸ਼ਨੀ ਨੂੰ ਨਕਲ ਕਰਦਾ ਹੈ ਅਤੇ AI ਨੂੰ ਟੁਕੜੇ ਦੀ ਤਿੰਨ-ਅਯਾਮੀ ਸ਼ਕਲ ਦੀ ਸਪਸ਼ਟ ਜਾਣਕਾਰੀ ਦਿੰਦਾ ਹੈ। ਪਾਸੇ ਤੋਂ ਲਾਈਟ ਜ਼ੁਆਨ ਦੁਆਰਾ ਲੰਬੀ ਛਾਇਆ ਬਣਾਉਂਦੀ ਹੈ। ਹੇਠੋਂ ਲਾਈਟ ਅਨੁਛੱਤਰ ਸਿੱਧਿਆਂ ਲਈ ਛਾਇਆ ਬਣਾਉਂਦੀ ਹੈ। ਸਿੱਧੀ ਉੱਪਰੀ ਰੋਸ਼ਨੀ ਸਵੀਕਾਯਿਕ ਹੈ ਪਰ ਲੰਬਵਤ ਸਤਹ 'ਤੇ ਹਨੇਰੇ ਖੇਤਰ ਬਣਾ ਸਕਦੀ ਹੈ।
ਸਿੱਧੇ ਕੈਮਰੇ ਦੇ ਫਲੈਸ਼ ਤੋਂ ਬਚੋ। ਆਨ-ਕੈਮਰਾ ਫਲੈਸ਼ ਬਰਾਬਰ ਉਥੇ ਇੱਕ ਤੇਜ਼ ਬਿੰਦੂ ਪੈਦਾ ਕਰਦਾ ਹੈ ਜਿੱਥੇ ਕੈਮਰਾ ਸਤਰ ਕਰ ਰਿਹਾ ਹੈ, ਨਿਕਟਤਮ ਧਾਤ ਦੀ ਸਤਹ 'ਤੇ ਬਹੁਤ ਤਿੱਖਾ ਪ੍ਰਗਟਾਵੀ ਅਤੇ ਟੁਕੜੇ ਪਿੱਛੇ ਗਹਰੀ ਛਾਇਆ ਬਣਾਉਂਦਾ ਹੈ। ਇਹ ਜ਼ੁਆਨ ਫੋਟੋਗ੍ਰਾਫੀ ਵਿੱਚ ਸਭ ਤੋਂ ਆਮ ਲਾਇਟਿੰਗ ਗਲਤੀ ਹੈ। AI ਨੂੰ ਇੱਕ ਫੋਟੋ ਮਿਲਦੀ ਹੈ ਜਿੱਥੇ ਅੱਧਾ ਟੁਕੜਾ ਸਫੇਦ ਅਤੇ ਦੂਜਾ ਅੱਧਾ ਹਨੇਰੇ ਵਿੱਚ ਹੈ — ਚੰਗੇ ਰੂਪਾਂ ਲਈ ਇੱਕ ਅਸੰਭਵ ਸ਼ੁਰੂਆਤ।
ਰੰਗ ਦੀ ਤਾਪਮਾਨ ਮਾਇਨੇ ਰੱਖਦੀ ਹੈ। ਦਿਨ ਦੀ ਰੋਸ਼ਨੀ ਜਾਂ ਤਟਸਥ ਸਫੇਦ ਰੋਸ਼ਨੀ (5000 ਤੋਂ 5500K) AI ਨੂੰ ਧਾਤ ਦੇ ਰੰਗ ਬਾਰੇ ਸਭ ਤੋਂ ਸਹੀ ਜਾਣਕਾਰੀ ਦਿੰਦੀ ਹੈ। ਨਿਰੜਕ ਟੰਗਸਟਨ ਰੋਸ਼ਨੀ ਚਾਂਦੀ ਨੂੰ ਪੀਲਾ ਦਿਖਾਉਂਦੀ ਹੈ। ਠੰਡੀ ਫਲੋਰੋਸੈਂਟ ਰੋਸ਼ਨੀ ਸੋਨਾ ਨੂੰ ਸਬਜ਼ਾ ਦਿਖਾਉਂਦੀ ਹੈ। ਜੇ ਤੁਸੀਂ ਆਭਿਜਾਤ ਰੋਸ਼ਨੀ ਦੀ ਵਰਤੋਂ ਕਰ ਰਹੇ ਹੋ, ਜਾਂਚ ਕਰੋ ਕਿ ਇਹ ਦਿਨ ਦੇ ਵਜ਼ਨ ਵਾਲੀ ਹੈ।
ਤੁਹਾਨੂੰ ਮਹਿੰਗੀ ਸਾਧ-ਸਮਗ੍ਰੀ ਦੀ ਲੋੜ ਨਹੀਂ ਹੈ। ਖਿੜਕੀ ਦੀ ਚੱਟਰੀ 'ਤੇ ਅਪ੍ਰਤੱਖ ਦਿਨ ਦੀ ਰੋਸ਼ਨੀ, ਇੱਕ ਸਫੇਦ ਰੁਖ (ਕਾਗਜ਼ ਜਾਂ ਫੋਮ ਬੋਰਡ), ਅਤੇ ਇੱਕ ਸਮਾਰਟਫੋਨ ਉਹ ਇੰਪੁਟ ਪੈਦਾ ਕਰਦਾ ਹੈ ਜੋ Jewels Retouch ਵਰਗਾ AI ਟੂਲ ਕੈਟੇਲਾਗ-ਮਾਨਸ ਨਤੀਜਾ ਵਿੱਚ ਬਦਲ ਸਕਦਾ ਹੈ। AI ਪੇਸ਼ਾਵਰ ਸਮਾਪਤੀ ਸੰਭਾਲਦਾ ਹੈ — ਤੁਹਾਨੂੰ ਸਿਰਫ ਇੱਕ ਸਪਸ਼ਟ, ਚੰਗੀ ਤਰਾਂ ਲਾਈਟ ਕੀਤੀ ਸ਼ੁਰੂਆਤ ਪੁਆਇੰਟ ਦੇਣੀ ਹੈ।
ਕੋਣ ਅਤੇ ਸਥਿਤੀ: ਆਪਣੀ ਸੰਦਰਭ ਸ਼ੈਲੀ ਨਾਲ ਮੇਲ ਕਰੋ
ਸਭ ਤੋਂ ਬਹੁਮੁਖੀ ਨਤੀਜਿਆਂ ਲਈ ਉੱਪਰ ਤੋਂ 30 ਤੋਂ 45 ਡਿਗਰੀ ਕੋਣ 'ਤੇ ਫੋਟੋ ਲਿਓ। ਕੋਣ ਆਪਣੀ ਸੰਦਰਭ ਸ਼ੈਲੀ ਨਾਲ ਮੇਲ ਖਾਣਾ ਚਾਹੀਦਾ ਹੈ ਜਿਸ ਨੂੰ ਤੁਸੀਂ AI ਨੂੰ ਨਕਲ ਕਰਨਾ ਚਾਹਦੇ ਹੋ। ਯਕੀਨੀ ਬਣਾਓ ਕਿ ਜ਼ੁਆਨ ਕੁਦਰਤੀ ਤਰਾਂ ਬੈਠਾ ਹੈ — ਛੱਲੇ ਸਿੱਧੇ ਅਤੇ ਥੋੜ੍ਹਾ ਕੋਣਾਬਾਧ, ਗਲੀ ਫਲੈਟ ਜਾਂ ਲੁੰਨੀ, ਸਾਥ ਅਨੁਰਾਗ ਅਤੇ ਨਿਰਦਾ ਵੱਖ ਕਰਕੇ।
ਜਿਸ ਕੋਣ 'ਤੇ ਤੁਸੀਂ ਫੋਟੋ ਲਿਓ ਉਹ ਤੁਹਾਡੇ ਸੰਦਰਭ ਜਾਂ ਚਾਹੁਆ ਕੈਟੇਲਾਗ ਸ਼ੈਲੀ ਦੇ ਕੋਣ ਨਾਲ ਮੇਲ ਖਾਣਾ ਚਾਹੀਦਾ ਹੈ। Jewels Retouch ਵਰਗੇ AI ਰਿਟੱਚਿੰਗ ਟੂਲ ਸ਼ੈਲੀ ਹਵਾਲਾ ਸਿਸਟਮ ਦੀ ਵਰਤੋਂ ਕਰਦੇ ਹਨ — ਤੁਸੀਂ ਇੱਕ ਹਵਾਲਾ ਚਿੱਤਰ ਅਪਲੋਡ ਕਰਦੇ ਹੋ ਅਤੇ ਹਰ ਬਾਅਦ ਵਾਲੀ ਫੋਟੋ ਉਸੇ ਸ਼ੈਲੀ ਨਾਲ ਤਿਆਰ ਕੀਤੀ ਜਾਂਦੀ ਹੈ, ਕੋਣ, ਸਥਿਤੀ, ਅਤੇ ਰਚਨਾ ਸਮੇਤ।
30 ਤੋਂ 45 ਡਿਗਰੀ ਕੋਣ ਉੱਪਰ ਤੋਂ ਜ਼ਿਆਦਾਤਰ ਜ਼ੁਆਨ ਕਿਸਮਾਂ ਲਈ ਮਿਆਰੀ ਕੈਟੇਲਾਗ ਕੋਣ ਹੈ। ਇਹ ਟੁਕੜੇ ਦੇ ਸਾਥ ਅਤੇ ਸਾਹਮਣੇ ਨੂੰ ਰੱਖਦਾ ਹੈ, ਦਰਸ਼ਕ ਨੂੰ ਤਿੰਨ-ਅਯਾਮੀ ਸ਼ਕਲ ਦੀ ਸਪਸ਼ਟ ਸਮਝ ਦਿੰਦਾ ਹੈ। ਇਹ ਕੋਣ ਫਲੈਟ ਧਾਤ ਦੀ ਸਤਹ 'ਤੇ ਸਮੱਸਿਆ ਆਮ ਕਰਦਾ ਹੈ।
ਛੱਲੇ ਖੜ੍ਹਾ ਹੋਣਾ ਚਾਹੀਦਾ ਹੈ, ਥੋੜ੍ਹਾ ਕੈਮਰੇ ਤੱਕ ਕੋਣਾਬਾਧ। ਛੱਲਿਆਂ ਨੂੰ ਸਮਤਲ ਪਾਸੇ ਫਿਰ ਨਾ ਰੱਖੋ — ਇਹ ਸਥਾਪਨਾ ਨੂੰ ਲੁਕਾਉਂਦਾ ਹੈ ਅਤੇ ਟੁਕੜੇ ਨੂੰ ਇੱਕ ਸਾਧਾਰਨ ਬੈਂਡ ਦਿਖਾਉਂਦਾ ਹੈ। ਛੱਲੀ ਨੂੰ ਸਹੀ ਕੋਣ 'ਤੇ ਖੜ੍ਹਾ ਰੱਖਣ ਲਈ ਛੱਲੀ ਦੇ ਪਿੱਛੇ ਸੰਗ੍ਰਹਾਲਾ ਪੁਟੀ ਜਾਂ ਰਾਣੀ ਦਾ ਪਨ ਵਰਤੋ।
ਨੈਕਲੇਸ ਅਤੇ ਜੰਜੀਰਾਂ ਨੂੰ ਇਨਕੀ ਸ਼ਕਲ ਦਿਖਾਉਣ ਲਈ ਚਪੇਟੇ ਹੋਣੇ ਚਾਹੀਦੇ ਹਨ। ਉਲਝੀ ਜਾਂ ਬੰਡਲ ਜੰਜੀਰਾਂ ਤੋਂ ਬਚੋ। ਅਮਲਜ ਦੇ ਲਈ, ਜੰਜੀਰ ਨੂੰ ਅਮਲਜ ਉੱਪਰ ਕੋਮਲ ਵਕ੍ਰ ਵਿੱਚ ਸਥਾਪਿਤ ਕਰੋ ਤਾਂ ਜੋ ਨਿਰਪੇਖ ਪੁਰਾ ਟੁਕੜਾ ਸਮਝੇ। ਕ੍ਲਸਪ ਨੂੰ ਬਾਹਰ ਰੱਖੋ ਜਦ ਤੱਕ ਇਹ ਇੱਕ ਡਿਜ਼ਾਇਨ ਵਿਸ਼ੇਸਤਾ ਨਹੀਂ ਹੈ।
ਆਰਿੰਗ ਨੂੰ ਮੇਲ ਕਰਕੇ ਤਿਆਰ ਕਰੇ ਜਾਣੇ ਚਾਹੀਦੇ ਹਨ। ਦੋਵਾਂ ਆਰਿੰਗ ਨੂੰ ਬਰਾਬਰ ਨਿਰਪੇਖ ਵੱਖ ਨਾਲ ਫੋਟੋ ਲਿਓ। ਉਨ੍ਹਾਂ ਨੂੰ ਉਸੇ ਕੋਣ 'ਤੇ ਸਥਾਪਿਤ ਕਰੋ — ਖੱਬੇ ਅਤੇ ਸਜੇ ਆਰਿੰਗ ਦੇ ਵਿਚਕਾਰ ਮੇਲ ਨਾ ਖਾ ਕੋਣ AI ਪ੍ਰਕਿਰਿਆ ਤੋਂ ਬਾਅਦ ਵੀ ਅਣਪ੍ਰਭਾਵਸ਼ਾਲੀ ਦਿਖਾਈ ਦਿੰਦਾ ਹੈ।
ਕੰਗਣ ਇੱਕ ਚੱਕਰ ਜਾਂ ਕੋਮਲ ਓਵਲ ਵਿੱਚ ਖਦੀ ਜਾ ਸਕਦੀ ਹੈ। ਨਕਲੀ ਕੁੰਡਲਾਂ ਲਈ, ਅਗ੍ਰਭਾਗ ਵੇਖਾਉਣ ਵਾਲੇ ਕੋਣ 'ਤੇ ਫੋਟੋ ਲਿਓ ਅਤੇ ਤਿੰਨ-ਅਯਾਮੀ ਰੂਪ। ਲਚਕਦਾਰ ਕੰਗਣ ਲਈ, ਲਿੰਕ ਨੂੰ ਸਾਫ਼ ਨਾਲ ਪ੍ਰਬੰਧ ਕਰੋ, ਅਤਿਆਚ ਛੱਡੋ।
ਮੁਡੀ ਅਤੇ ਸਤਹ: ਕੀ 'ਤੇ ਸ਼ੂਟ ਕਰਨਾ ਹੈ
ਇੱਕ ਸਾਧਾਰਨ ਸਫੇਦ ਜਾਂ ਹਲਕਾ ਸਲੇਟੀ ਸਤਹ 'ਤੇ ਸ਼ੂਟ ਕਰੋ। ਬਟੀ ਸਤਹ, ਰੰਗੀ ਮੁਡੀ, ਅਤੇ ਪ੍ਰਤਿਫਲਿਤ ਮੌਜਿਨ ਤੋਂ ਬਚੋ। ਸਾਧਾਰਨ ਸਫੇਦ ਕਾਗਜ਼ ਜਾਂ ਫੋਮ ਬੋਰਡ ਮੁਕੰਮਲ ਕੰਮ ਕਰਦਾ ਹੈ। AI ਤੁਹਾਡੀ ਅਸਲ ਮੁਡੀ ਨੂੰ ਹਟਾਵੇਗਾ ਅਤੇ ਬਦਲੇਗਾ — ਤੁਹਾਡਾ ਕੰਮ ਉਹ ਹਟਾਓ ਜਿੰਨਾ ਸੁਚਿੱਰ ਹੋਵੇ।
AI ਤੁਹਾਡੀ ਅਸਲ ਮੁਡੀ ਨੂੰ ਹਟਾਉਂਦਾ ਹੈ ਅਤੇ ਇੱਕ ਸਾਫ, ਕੈਟੇਲਾਗ-ਮਾਨਸ ਨਤੀਜੇ ਨਾਲ ਬਦਲਦਾ ਹੈ। ਪਰ ਜਿੰਨਾ ਸਾਫ਼ ਤੁਹਾਡੀ ਅਸਲ ਮੁਡੀ ਹੈ, ਆਈ ਹਰ ਹੱਦ ਨਾਲ ਜ਼ੁਆਨ ਅਲਗ ਕਰ ਸਕਦਾ ਹੈ।
ਸਲੀਨ ਸਫੇਦ ਕਾਗਜ਼ ਆਦਰਸ਼ ਹੈ। ਇਹ ਜ਼ਿਆਦਾਤਰ ਜ਼ੁਆਨ (ਜੋ ਧਾਤਵੀ ਅਤੇ ਪ੍ਰਾਂਧ) ਦੇ ਵਿਰੁੱਧ ਵੱਧ ਤੋਂ ਵੱਧ ਕੰਟਰਾਸਟ ਦਰ ਕਰਦਾ ਹੈ, AI ਨੂੰ ਦੁਨੂ ਲਾਕੇ ਖੋਜ ਕਰਨਾ ਆਸਾਨ ਬਣਾਉਂਦਾ ਹੈ। ਕਿਸੇ ਵੀ ਕਲਾ ਦੁੱਕਾਨ ਤੋਂ ਸਲੀਨ ਸਫੇਦ ਫੋਮ ਬੋਰਡ ਬਿਲਕੁਲ ਖਰਾ ਹੈ ਅਤੇ ਇੱਕ ਛੋਟੀ ਸ਼ੂਟਿੰਗ ਸਤਹ ਬਣਾਉਣ ਲਈ ਨਿਰਿਮ ਹੈ।
ਹਲਕਾ ਸਲੇਟੀ ਸਵੀਕਾਯਿਕ ਹੈ। ਕੁਝ ਫੋਟੋਗ੍ਰਾਫਾਂ ਨੂੰ ਹਲਕਾ ਸਲੇਟੀ ਪਸੰਦ ਹੈ ਕਿਉਂਕਿ ਸ਼ੁੱਧ ਸਫੇਦ ਜਗੱਰ ਮੁੱਦੇ ਬਣਾ ਸਕਦਾ ਹੈ — ਕੈਮਰਾ ਚਮਕਦਾਰ ਮੁਸੀਬਤ ਨੂੰ ਭਰਦਾ ਹੋਇਆ ਜ਼ੁਆਨ ਨੂੰ ਰਾਖ ਕਰ ਸਕਦਾ ਹੈ। ਹਲਕਾ ਸਲੇਟੀ ਇਹ ਸਰਿਆ ਦਸ ਅਤੇ ਚੰਗੇ ਕੰਟਰਾਸਟ ਪ੍ਰਦਾਨ ਕਰਦਾ ਹੈ।
ਰੰਗੀ ਮੁਡੀ ਤੋਂ ਬਚੋ। ਰੰਗੀ ਸਤਹ ਆਪਣਾ ਰੰਗ ਪਾਲਿਸ਼ ਕੀਤੀ ਧਾਤ 'ਤੇ ਪ੍ਰਤਿਬਿੰਬਿਤ ਕਰਦਾ ਹੈ। ਇੱਕ ਨੀਲੀ ਮੁਡੀ ਚਾਂਦੀ ਦੀ ਸਤਹ ਨੂੰ ਨੀਲੀ ਕਰ ਦੇਵੇਗੀ। ਇੱਕ ਨਿਰਲ ਲੱਕੜ ਦੀ ਮੁਡੀ ਸਫੇਦ ਸੋਨੇ ਨੂੰ ਸੰਤਰੀ ਟੋਨ ਜੋੜ ਸਕਦੀ ਹੈ। AI ਨੂੰ ਫਿਰ ਅਸਲ ਧਾਤ ਦੇ ਰੰਗ ਦਾ ਅਨੁਮਾਨ ਲਗਾਣਾ ਪੜਦਾ ਹੈ, ਜੋ ਅਦਵੀ ਪਰਿਚਾਯੀ ਕਰਦਾ ਹੈ।
ਬਟੀ ਸਤਹ ਤੋਂ ਬਚੋ। ਕਪਿਛੋ ਬਨਕਾਵਟਾਂ, ਲੱਕੜ ਦੀ ਵੰਡ, ਸੰਮ ਨਮੂਨੇ — ਇਹ AI ਲਈ ਜਟਿਲ ਸੀਮਾ ਸ਼ਕਾਰ ਚੁਨੌਤੀ ਬਣਾਤੇ ਹਨ। ਸਿਸਟਮ ਅੰਤਮ ਨਤੀਜੇ ਵਿੱਚ ਬਟੀ ਦਾ ਕੁਝ ਸ਼ਾਮਿਲ ਕਰ ਸਕਦਾ ਹੈ ਜਾਂ ਜ਼ੁਆਨ ਦੀ ਸੀਮਾ ਕਲਿਪ ਕਰ ਸਕਦਾ ਹੈ ਜੋ ਬਟੀ ਨਾਲ ਮਿਲ ਜਾਂਦੀ ਹੈ।
ਆਈਨੇ, ਕੱਚ, ਅਤੇ ਮਿਜ-ਦੁਬਾਰਾ ਸਤਹ ਤੋਂ ਬਚੋ। ਅਪ੍ਰਤੱਖ ਅਤੇ ਖਿੜਕੀਆਂ ਸ਼ੀਸ਼ੇ ਜ਼ੁਆਨ ਦੇ ਹੇਠ ਇੱਕ ਪ੍ਰਗਟਾਵੀ ਬਣਾਉਂਦਾ ਹੈ। AI ਤੁਹਾਡੇ ਜ਼ੁਆਨ ਦੇ ਆਕਾਰ ਅਤੇ ਸੀਮਾ ਬਾਰੇ ਦੁਬਵਿਸ਼ਨਾਯੂ ਪ੍ਰਗਾਸ਼ ਅਤੇ ਪ੍ਰਸੂਚਨਾ ਹੋ ਸਕਦਾ ਹੈ।
ਸਤਹ ਨੂੰ ਸਾਫ਼ ਰੱਖੋ। ਧੂੜ, ਫਿੰਗਰਪ੍ਰਿੰਟ, ਸਵਿਛਾਵ, ਅਤੇ ਸ਼ਟਪਿੰਟ ਸ਼ੂਟਿੰਗ ਸਤਹ ਫੋਟੋ ਵਿੱਚ ਦਿਖ ਸਕਦੀ ਹੈ। ਜਦਕਿ AI ਨਿਚਲੀ ਸਫਾਈ ਸਾਨ ਸਕਦਾ ਹੈ, ਕਿਉਂ ਇਸਨੂੰ ਅਤਿਰਿਕਤ ਕੰਮ ਦਿਓ? ਹਰ ਸਸਲ ਤੋਂ ਪਹਿਲਾ ਸਤਹ ਪੋੰਛ ਦਿਓ।
ਅਪ਼ਲੋਡ ਤੋਂ ਪਹਿਲਾਂ ਫ਼ਰੇਮਿੰਗ ਅਤੇ ਕੰਪੋਜ਼ੀਸ਼ਨ
ਜੁਵੈਲਰੀ ਨੂੰ ਫ਼ਰੇਮ ਦਾ 60 ਤੋਂ 80 ਪ੍ਰਤੀਸ਼ਤ ਭਰਨਾ ਚਾਹੀਦਾ ਹੈ। ਟੁਕੜੇ ਦੁਆਲੇ ਕੁਝ ਥਾਂ ਛੱਡੋ ਤਾਂ ਜੋ AI ਕੰਮ ਕਰ ਸਕੇ, ਪਰ ਬਹੁਤ ਦੂਰ ਤੋਂ ਸ਼ੂਟ ਨਾ ਕਰੋ ਜਿਥੇ ਜੁਵੈਲਰੀ ਬਹੁਤ ਛੋਟੀ ਦਿਖਾਈ ਦੇ। ਅਪ਼ਲੋਡ ਕਰਨ ਤੋਂ ਪਹਿਲਾਂ ਢਿੱਲੀ ਫ਼ਸਲ ਕਰੋ — AI ਅੰਤਮ ਕਮਪੋਜ਼ੀਸ਼ਨ ਨੂੰ ਸੰਭਾਲਦਾ ਹੈ।
ਜੁਵੈਲਰੀ ਕਿੰਨੀ ਫ਼ਰੇਮ ਭਰਦੀ ਹੈ ਇਹ ਸਿੱਧੇ ਤੌਰ 'ਤੇ ਪ੍ਰਭਾਵਿਤ ਕਰਦਾ ਹੈ ਕਿ AI ਕੋਲ ਕੰਮ ਕਰਨ ਲਈ ਕਿੰਨੇ ਵੇਰਵੇ ਹਨ।
ਜੁਵੈਲਰੀ ਦੇ ਨਾਲ ਫ਼ਰੇਮ ਦਾ 60 ਤੋਂ 80 ਪ੍ਰਤੀਸ਼ਤ ਭਰੋ। ਜੇ ਤੁਸੀਂ ਅਜਿਹਾ ਸ਼ੂਟ ਕਰਦੇ ਹੋ ਕਿ ਟੁਕੜਾ ਸਿਰਫ਼ ਫ਼ਰੇਮ ਦਾ 10 ਤੋਂ 20 ਪ੍ਰਤੀਸ਼ਤ ਭਰੇ, ਤਾਂ ਅਸਲ ਜੁਵੈਲਰੀ ਡੈਟਾ ਸਿਰਫ਼ ਕੁਝ ਸੌ ਪਿਕਸਲ ਹਨ — ਇਹ AI ਲਈ ਸਬੂਤ ਵਿਸਥਾਰ ਨੂੰ ਸਹੀ ਤਰ੍ਹਾਂ ਪ੍ਰਕਿਰਿਆ ਕਰਨ ਲਈ ਕਾਫ਼ੀ ਨਹੀਂ ਹੈ। ਇੰਨਾ ਨੇੜੇ ਆਓ ਕਿ ਟੁਕੜਾ ਸਪੱਸ਼ਟ ਤੌਰ 'ਤੇ ਫ਼ੋਟੋ ਦਾ ਪ੍ਰਮੁੱਖ ਤੱਤ ਹੋ।
ਟੁਕੜੇ ਦੁਆਲੇ ਕੁਝ ਮਾਰਜਿਨ ਛੱਡੋ। ਇੰਨਾ ਤੰਗ ਕਟ ਨਾ ਕਰੋ ਕਿ ਜੁਵੈਲਰੀ ਫ਼ਰੇਮ ਦੇ ਕਿਨਾਰੇ ਨੂੰ ਛੂਹੇ। AI ਨੂੰ ਸਾਫ਼ ਕਿਨਾਰੇ, ਸ਼ੇਡ ਅਤੇ ਪ੍ਰਤਿਫਲਨ ਬਣਾਉਣ ਲਈ ਟੁਕੜੇ ਦੁਆਲੇ ਪਿਛਲਾ ਖੇਤਰ ਚਾਹੀਦਾ ਹੈ। ਹਰੇਕ ਪਾਸੇ ਲਗਭਗ 10 ਤੋਂ 20 ਪ੍ਰਤੀਸ਼ਤ ਦਾ ਮਾਰਜਿਨ ਆਦਰਸ਼ ਹੈ।
ਬਿਲਕੁਲ ਕੇਂਦਰੀ ਸਥਿਤੀ ਜਾਂ ਕਮਪੋਜ਼ੀਸ਼ਨ ਲਈ ਚਿੰਤਾ ਨਾ ਕਰੋ। AI ਜੁਵੈਲਰੀ ਜਾਂਚ ਪ੍ਰਕਿਰਿਆ ਦੇ ਹਿੱਸੇ ਦੇ ਤੌਰ 'ਤੇ ਅੰਤਮ ਸਥਿਤੀ ਅਤੇ ਕਮਪੋਜ਼ੀਸ਼ਨ ਸੰਭਾਲਦਾ ਹੈ। ਤੁਹਾਡਾ ਕੰਮ ਟੁਕੜਾ ਸਪੱਸ਼ਟ ਰੂਪ ਵਿੱਚ ਅਤੇ ਚੰਗੀ ਤਸੀਲੀ ਦੇ ਨਾਲ ਕੈਪਚਰ ਕਰਨਾ ਹੈ — AI ਬਾਕੀ ਕੰਮ ਕਰਦਾ ਹੈ।
ਇੱਕ ਫ਼ੋਟੋ ਵਿੱਚ ਇੱਕ ਟੁਕੜਾ। ਜਦੋਂ ਤੱਕ ਤੁਸੀਂ ਖਾਸ ਤੌਰ 'ਤੇ ਸਮੂਹ ਕਮਪੋਜ਼ੀਸ਼ਨ ਬਣਾ ਰਹੇ ਨਹੀਂ ਹੋ (ਵੱਧ ਟੁਕੜਿਆਂ ਨੂੰ ਇਕਠਾ ਕੀਤਾ ਹੋਇਆ), ਹਰੇਕ ਟੁਕੜੇ ਨੂੰ ਵਿਅਕਤੀ ਤੌਰ 'ਤੇ ਫ਼ੋਟੋਗ੍ਰਾਫ਼ ਕਰੋ। ਇਹ AI ਨੂੰ ਸਭ ਤੋਂ ਸਪੱਸ਼ਟ ਸੰਭਵ ਇਨਪੁਟ ਦਿੰਦਾ ਹੈ ਅਤੇ ਕਿਸ ਤੱਤ ਨੂੰ ਪ੍ਰਕਿਰਿਆ ਕਰਨਾ ਹੈ ਇਸ ਬਾਰੇ ਉਲਝਨ ਤੋਂ ਬਚਾਉਂਦਾ ਹੈ।
ਕੀਮਤ ਦੇ ਟੈਗ, ਸਟੈਂਡ ਅਤੇ ਪ੍ਰੋਪਸ ਹਟਾਓ। ਫ਼ੋਟੋ ਵਿੱਚ ਕੋਈ ਵੀ ਗੈਰ-ਜੁਵੈਲਰੀ ਤੱਤ ਅਜਿਹਾ ਹੈ ਜਿਸ ਨੂੰ AI ਨੂੰ ਪਛਾਣਨਾ ਅਤੇ ਕੰਮ ਕਰਨਾ ਪਵੇ। ਹੈਂਗ ਟੈਗ, ਕੀਮਤ ਸਟਿਕਰ, ਰਿੰਗ ਸਟੈਂਡ ਅਤੇ ਡਿਸਪਲੇ ਪ੍ਰੋਪਸ ਸ਼ੂਟ ਕਰਨ ਤੋਂ ਪਹਿਲਾਂ ਹਟਾਓ। AI ਸਭ ਤੋਂ ਚੰਗੀ ਤਰ੍ਹਾਂ ਕੰਮ ਕਰਦਾ ਹੈ ਜਦੋਂ ਫ਼ਰੇਮ ਵਿੱਚ ਸਿਰਫ਼ ਜੁਵੈਲਰੀ ਹੋ ਸਧਾਰਨ ਬੈਕਗ੍ਰਾਊਂਡ 'ਤੇ।
ਤੇਜ਼ ਚੈਕਲਿਸ਼ਟ: ਅਪ਼ਲੋਡ ਤੋਂ ਪਹਿਲਾਂ
ਰੈਜ਼ੋਲਿਊਸ਼ਨ 2000px ਜਾਂ ਵਧੇਰੇ, ਨਰਮ ਵਿਸ਼ਰਾਮ ਰੌਸ਼ਨੀ, 30 ਤੋ 45 ਡਿਗਰੀ ਐਂਗਲ, ਸਧਾਰਨ ਚਿੱਟਾ ਜਾਂ ਸਲੇਟੀ ਬੈਕਗ੍ਰਾਊਂਡ, ਜੁਵੈਲਰੀ ਫ਼ਰੇਮ ਦਾ 60 ਤੋਂ 80 ਪ੍ਰਤੀਸ਼ਤ ਭਰਦੀ ਹੈ, ਕੋਈ ਫਲੈਸ਼ ਨਹੀਂ, ਕੋਈ ਪੋਰਟ੍ਰੇਟ ਮੋਡ ਨਹੀਂ, ਕੋਈ ਪ੍ਰੋਪਸ ਜਾਂ ਟੈਗ ਨਹੀਂ, ਸਾਫ਼ ਸਤ੍ਹਾ, ਇੱਕ ਟੁਕੜਾ ਫ਼ੋਟੋ ਪ੍ਰਤੀ।
ਆਪਣੀ ਗਹਿਣਾ ਫੋਟੋ ਨੂੰ Jewels Retouch ਵਰਗੇ AI ਰੀਟਚਿੰਗ ਟੂਲ ਤੇ ਅੱਪਲੋਡ ਕਰਨ ਤੋਂ ਪਹਿਲਾਂ, ਇਸ ਛੋਟੀ ਚੈਕਲਿਸਟ ਨੂੰ ਦੇਖੋ:
ਰੈਜ਼ੋਲੂਸ਼ਨ: ਸਭ ਤੋਂ ਲੰਬੇ ਪਾਸੇ ਘੱਟੋ-ਘੱਟ 2000 ਪਿਕਸਲ. ਆਪਣੀਆਂ ਕੈਮਰਾ ਸੈਟਿੰਗਾਂ ਜਾਂਚੋ — ਜ਼ਿਆਦਾਤਰ ਸਮਾਰਟਫੋਨ ਡਿਫਾਲਟ ਰੂਪ ਵਿੱਚ ਇਹ ਜਾਂ ਇਸ ਤੋਂ ਵੱਧ ਰੱਖਦੇ ਹਨ.
ਰੌਸ਼ਨੀ: ਨਰਮ ਅਤੇ ਫੈਲੀ ਹੋਈ. ਕੋਈ ਸਖ਼ਤ ਛਾਂ ਨਹੀਂ, ਕੋਈ ਬਹੁਤ ਜ਼ਿਆਦਾ ਚਮਕਦਾਰ ਹਾਈਲਾਈਟ ਨਹੀਂ. ਜੇ ਤੁਸੀਂ ਪੀਸ ਦੇ ਪਿੱਛੇ ਸਪਸ਼ਟ ਸਖ਼ਤ ਛਾਂ ਵੇਖ ਸਕਦੇ ਹੋ, ਰੌਸ਼ਨੀ ਬਹੁਤ ਸਖ਼ਤ ਹੈ.
ਐਂਗਲ: ਉੱਪਰੋਂ 30 ਤੋਂ 45 ਡਿਗਰੀ, ਤੁਹਾਡੀ ਰੈਫਰੈਂਸ ਸਟਾਈਲ ਨਾਲ ਮੇਲ ਖਾਂਦਾ. ਸਾਰੀਆਂ ਉਤਪਾਦ ਫੋਟੋਆਂ ਵਿੱਚ ਇਕਸਾਰ ਐਂਗਲ.
ਬੈਕਗ੍ਰਾਊਂਡ: ਸਾਧਾਰਣ ਚਿੱਟਾ ਜਾਂ ਹਲਕਾ ਸਲੇਟੀ. ਕੋਈ ਟੈਕਸਚਰ ਨਹੀਂ, ਕੋਈ ਰੰਗ ਨਹੀਂ, ਕੋਈ ਰਿਫਲੈਕਟਿਵ ਸਤਹ ਨਹੀਂ.
ਫ੍ਰੇਮਿੰਗ: ਗਹਿਣਾ ਫ੍ਰੇਮ ਦਾ 60 ਤੋਂ 80 ਪ੍ਰਤੀਸ਼ਤ ਭਰੇ. ਮਾਰਜਿਨ ਛੱਡੋ ਪਰ ਬਹੁਤ ਦੂਰੋਂ ਸ਼ੂਟ ਨਾ ਕਰੋ.
ਫਲੈਸ਼: ਬੰਦ. ਗਹਿਣਿਆਂ ਲਈ ਹਮੇਸ਼ਾ ਬੰਦ.
ਕੈਮਰਾ ਮੋਡ: ਸਟੈਂਡਰਡ ਫੋਟੋ ਮੋਡ. ਕੋਈ ਪੋਰਟਰੇਟ ਮੋਡ ਨਹੀਂ, ਕੋਈ HDR ਨਹੀਂ, ਕੋਈ ਫਿਲਟਰ ਨਹੀਂ.
ਸਫਾਈ: ਕੋਈ ਕੀਮਤ ਟੈਗ ਨਹੀਂ, ਕੋਈ ਸਟੈਂਡ ਨਹੀਂ, ਕੋਈ ਲਿੰਟ ਨਹੀਂ, ਪੀਸ ਤੇ ਕੋਈ ਦਿਖਣ ਵਾਲੇ ਉਂਗਲਾਂ ਦੇ ਨਿਸ਼ਾਨ ਨਹੀਂ.
ਪੀਸ ਗਿਣਤੀ: ਸਟੈਂਡਰਡ ਰੀਟਚਿੰਗ ਲਈ ਪ੍ਰਤੀ ਫੋਟੋ ਇੱਕ ਪੀਸ.
ਜਦੋਂ ਇਹ ਸ਼ਰਤਾਂ ਪੂਰੀਆਂ ਹੁੰਦੀਆਂ ਹਨ, Jewels Retouch ਵਰਗੇ AI ਟੂਲ 60 ਸਕਿੰਟ ਤੋਂ ਘੱਟ ਵਿੱਚ ਸਮਾਰਟਫੋਨ ਫੋਟੋ ਨੂੰ ਕੈਟਾਲਾਗ-ਤਿਆਰ ਚਿੱਤਰ ਵਿੱਚ ਬਦਲ ਸਕਦੇ ਹਨ. AI ਬੈਕਗ੍ਰਾਊਂਡ ਬਦਲਣਾ, ਛਾਂ ਬਣਾਉਣਾ, ਰੰਗ ਸੁਧਾਰਨਾ, ਅਤੇ ਵੇਰਵਾ ਸੁਧਾਰਣਾ ਸੰਭਾਲਦਾ ਹੈ. ਤੁਹਾਡੀ ਇਨਪੁੱਟ ਗੁਣਵੱਤਾ ਇਹ ਨਿਰਧਾਰਤ ਕਰਦੀ ਹੈ ਕਿ AI ਕਿੰਨਾ ਵਧੀਆ ਕਰ ਸਕਦਾ ਹੈ — ਇਸ ਲਈ ਇਸਨੂੰ ਮਹੱਤਵਪੂਰਨ ਬਣਾਓ.
3 ਵਾਟਰਮਾਰਕ ਵਾਲੇ ਪ੍ਰੀਵਿਊ ਅਤੇ 1 HD ਡਾਊਨਲੋਡ ਨਾਲ Jewels Retouch ਮੁਫ਼ਤ ਅਜ਼ਮਾਓ — ਕ੍ਰੈਡਿਟ ਕਾਰਡ ਦੀ ਲੋੜ ਨਹੀਂ. ਆਪਣੀ ਸਭ ਤੋਂ ਵਧੀਆ ਤਿਆਰ ਕੀਤੀ ਫੋਟੋ ਅਤੇ ਸਭ ਤੋਂ ਖਰਾਬ ਫੋਟੋ ਅੱਪਲੋਡ ਕਰੋ, ਅਤੇ ਵੇਖੋ ਕਿ ਇਨਪੁੱਟ ਗੁਣਵੱਤਾ ਨਤੀਜੇ ਨੂੰ ਕਿਵੇਂ ਪ੍ਰਭਾਵਿਤ ਕਰਦੀ ਹੈ.

