
Persediaan Pencahayaan Fotografi Barang Kemas di Rumah: Panduan Bajet 2026
Anda tidak memerlukan pencahayaan mahal untuk memfotografi barang kemas secara profesional di rumah. Berikut adalah 5 persediaan praktikal dari $0 hingga $100 yang mana-mana penjual boleh bina hari ini.
Lihat Transformasi
Satu foto barang kemas yang telah disentuh semula, empat output berguna.
Retouching katalog ialah asas: latar belakang bersih, permukaan digilap, reka bentuk dikekalkan. Daripada output tanpa tera air itu, cipta adegan gaya Instagram, gambar model True-Scale Placement, dan video iklan 5 saat.
Seret untuk membandingkan

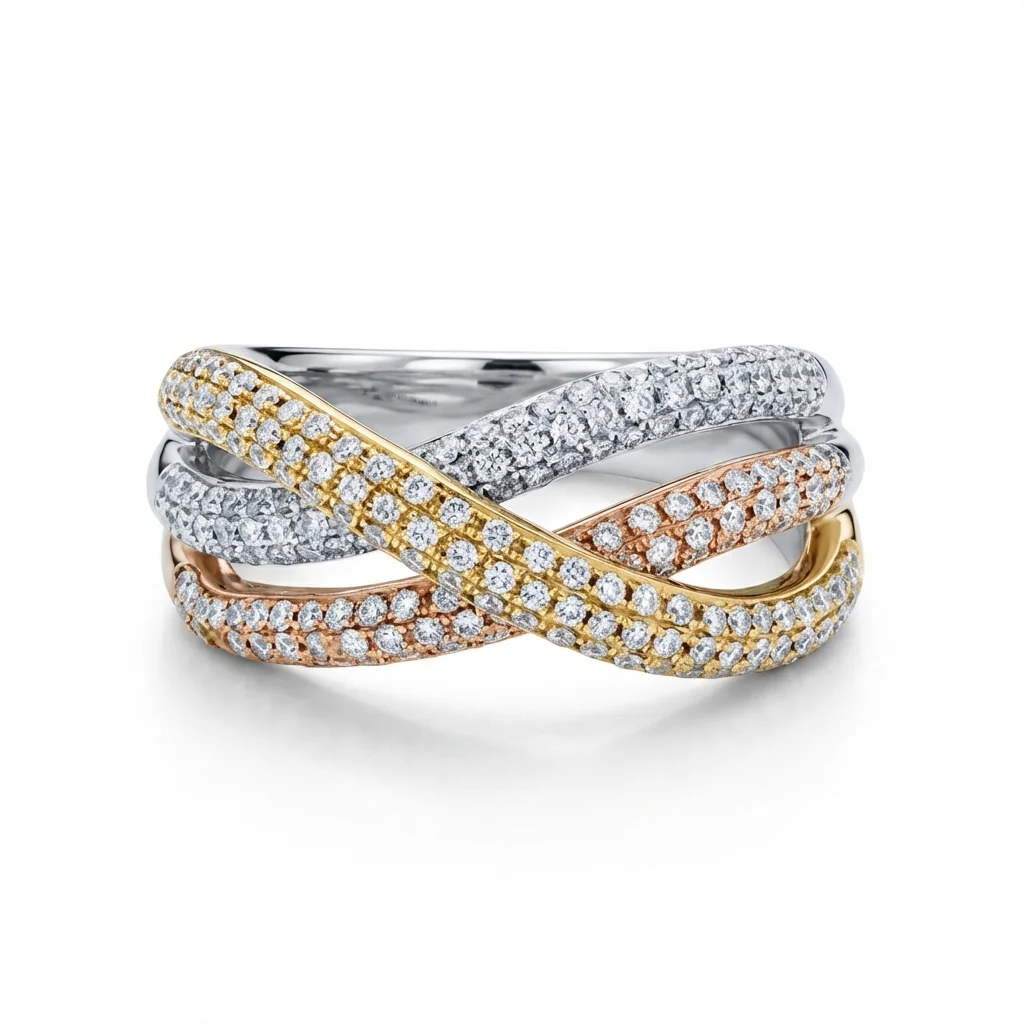
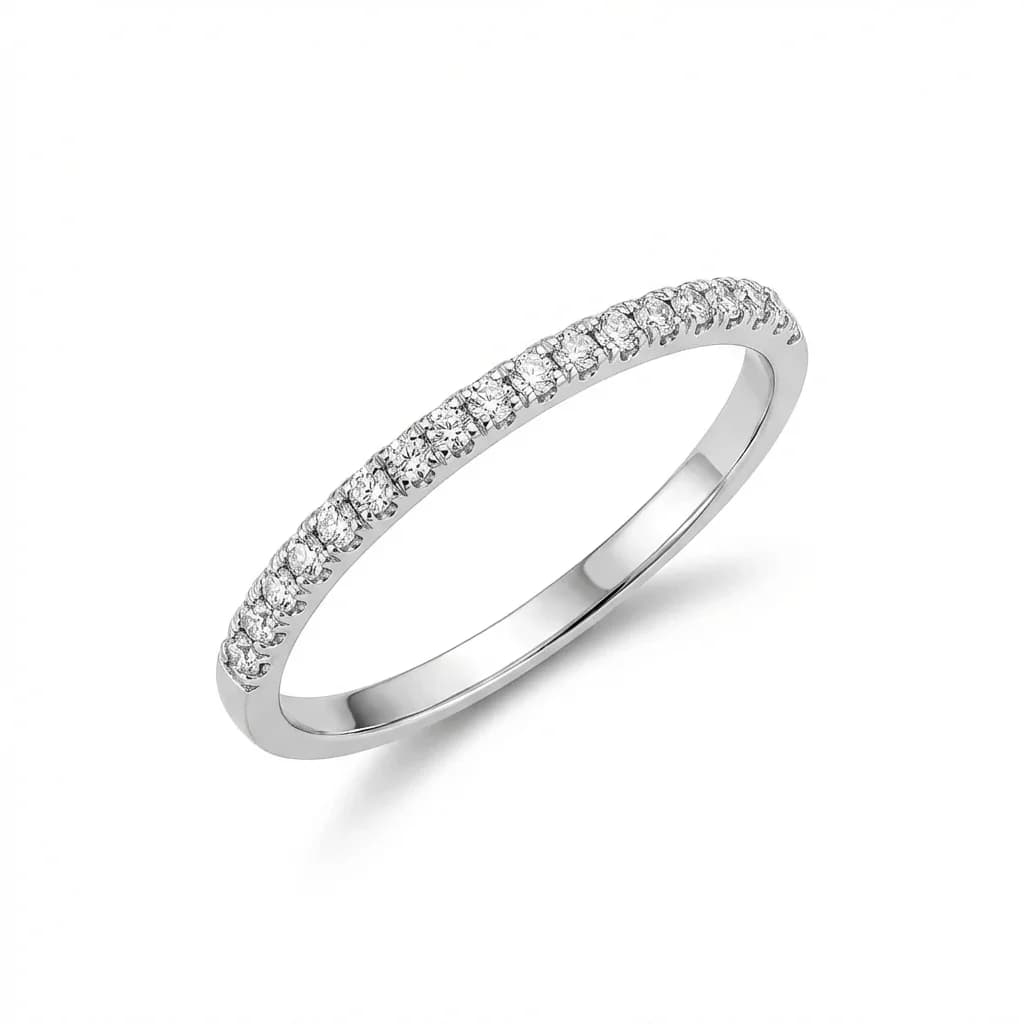
Retouching Katalog
Foto produk berlatar belakang putih bersih dengan logam berkilat, batu yang dipertingkat, dan output sedia untuk pasaran.
Suasana Instagram
Suasana bergaya editorial dengan props kreatif, pencahayaan bersuasana, dan penceritaan yang sesuai dengan jenama.
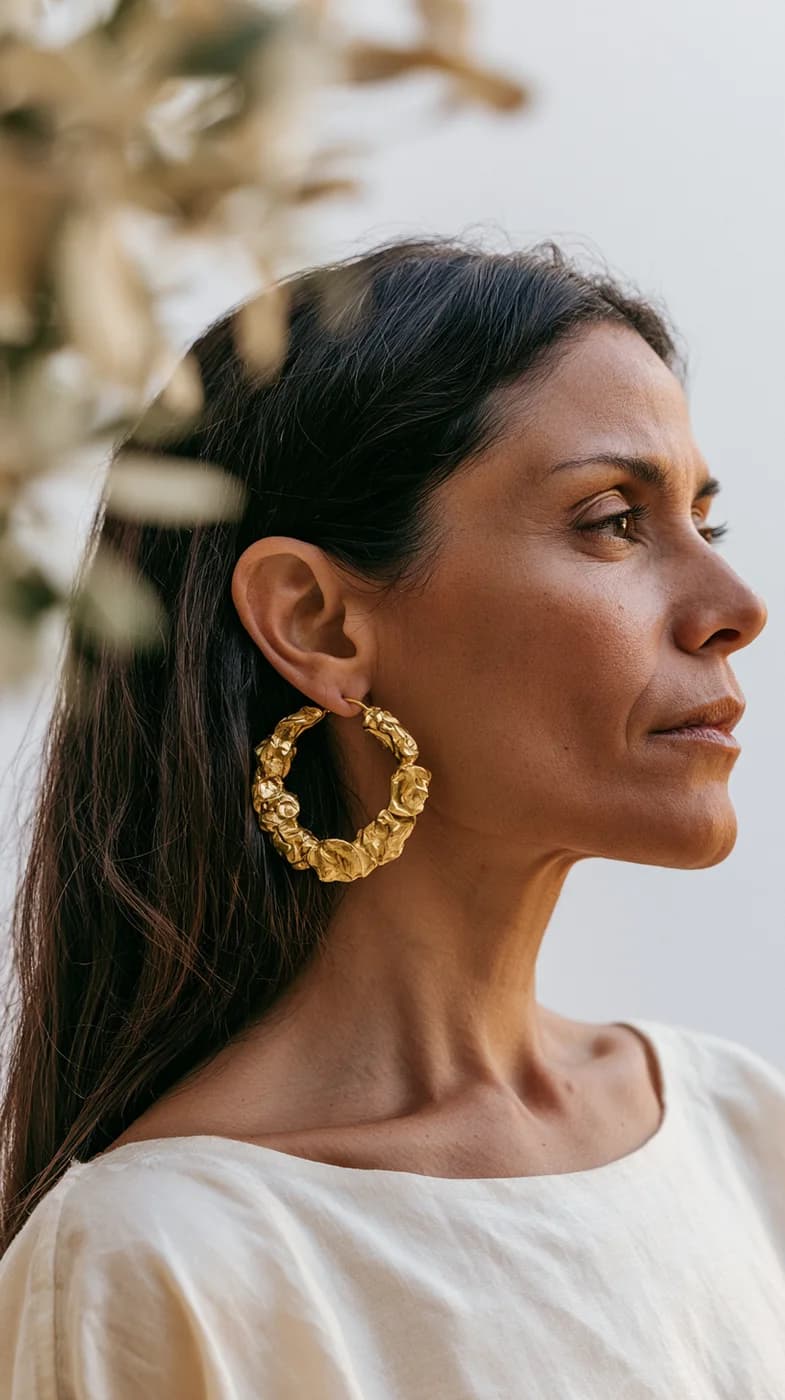
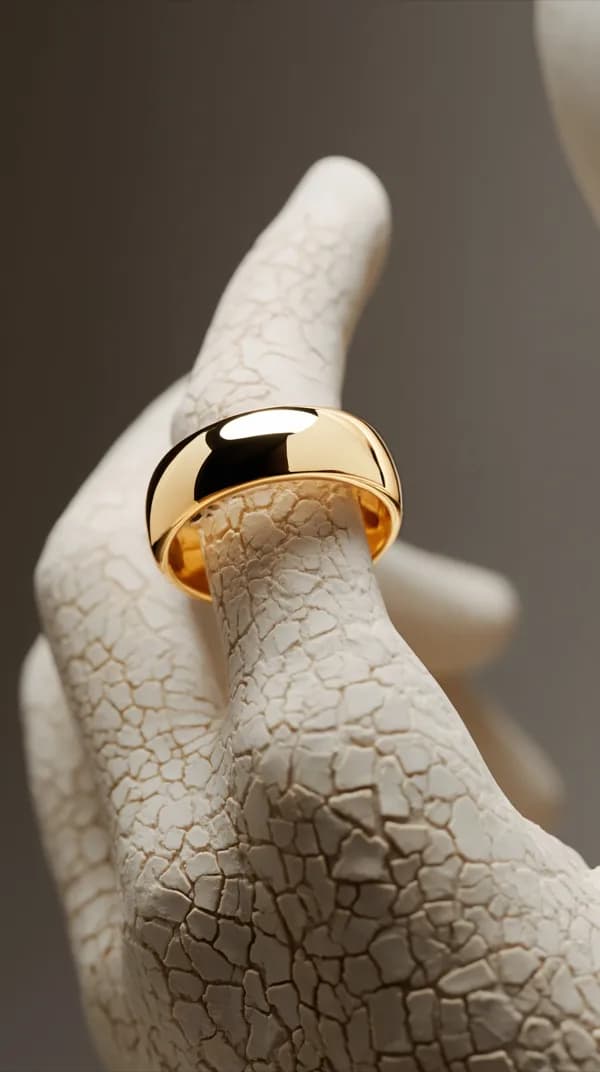
Perhiasan pada Model
Pindahkan cincin, anting-anting, rantai leher, atau gelang anda yang sebenar ke rujukan model dengan penempatan pada tubuh yang realistik dan skala pemakaian yang tepat.
Apakah yang menjadikan pencahayaan barang kemas begitu mencabar berbanding produk lain?
Masuk ke mana-mana forum fotografi produk dan anda akan jumpa penjual yang berjaya memfotografi pakaian, lilin, penjagaan kulit, dan barangan rumah dengan telefon mudah dan tingkap sahaja — tetapi terus bergelut apabila mereka mencuba pendekatan yang sama dengan barang kemas. Sebabnya berkaitan dengan fizik.
Permukaan barang kemas — logam digilap, batu permata berfaset, enamel berkilat tinggi — adalah pemantul spekular. Tidak seperti produk matte yang menyebarkan cahaya ke semua arah, permukaan spekular memantulkan cahaya pada sudut yang tepat. Ini bermakna satu sumber cahaya titik menghasilkan satu titik terang yang menyilaukan, menghapuskan butiran permukaan di kawasan itu dan meninggalkan semua yang lain kurang cahaya. Bahagian lain tidak bersinar — ia hanya kelihatan gelap dan rata sementara satu kawasan kecil terlalu terang sepenuhnya.
Batu permata menambah lapisan kerumitan lagi. Berlian dan batu berfaset lain hanya menunjukkan kilauan mereka — percikan dan api yang menjadikannya bernilai — apabila cahaya masuk pada sudut tertentu dan keluar pada sudut lain. Persediaan yang dioptimumkan untuk menunjukkan tekstur logam mungkin membunuh prestasi optik batu permata sepenuhnya. Persediaan yang menghasilkan percikan menakjubkan dalam berlian mungkin meratakan dan mematikan tetapan emas di sekelilingnya. Mencari pencahayaan yang melayan kedua-duanya serentak memang benar-benar sukar.
Saiz juga menjadi faktor. Kebanyakan barang kemas bersaiz kecil — cincin di bawah diameter 20mm, loket di bawah 30mm, subang lebih kecil lagi. Apabila anda bekerja pada skala ini, jarak antara sumber cahaya dan subjek menentukan kualiti cahaya sepenuhnya. Gerakkan softbox 6 inci dan ia berubah daripada besar (berbanding subjek) dan lembut kepada kecil dan keras. Barang kemas memaksa anda berfikir tentang saiz sumber cahaya berbanding saiz subjek dengan lebih teliti daripada mana-mana kategori produk lain.
Akhir sekali, barang kemas menunjukkan setiap zarah habuk, setiap cap jari, dan setiap calar kerana sifat yang sama yang menjadikan pencahayaan sukar — pantulan tinggi, sudut cahaya tepat — juga menjadikan setiap ketidaksempurnaan permukaan kelihatan. Pencahayaan baik untuk barang kemas bukan sekadar menjadikannya cantik; ia tentang mengawal apa yang cahaya dedahkan.
Bagaimana cara mencipta persediaan cahaya semula jadi $0 untuk fotografi barang kemas?
Persediaan cahaya semula jadi $0 bukanlah kompromi — ia sebenarnya persediaan pilihan bagi ramai jurugambar barang kemas profesional yang bekerja dengan barang halus, buatan tangan, atau vintaj di mana matlamatnya adalah menunjukkan watak dan kehangatan berbanding ketepatan klinikal.
Berikut persediaan lengkapnya. Cari tingkap yang mendapat cahaya tidak langsung — idealnya menghadap utara jika anda di hemisfera utara, atau mana-mana tingkap yang tidak menerima cahaya matahari langsung pada waktu penggambaran anda. Langit mendung adalah sahabat terbaik anda: awan bertindak sebagai penyebar semula jadi yang besar, menyebarkan cahaya matahari ke seluruh langit dan memberikan anda sumber cahaya yang besar dan sekata tanpa bayang berarah yang keras.
Letakkan permukaan penggambaran anda — sekeping papan busa putih, kertas kesan marmar, atau papan kayu putih ringkas — kira-kira 1-2 kaki dari tingkap. Barang kemas anda diletakkan di tengah permukaan ini. Tingkap harus di sebelah kiri atau kanan anda, jangan sesekali di belakang anda atau tepat di hadapan anda. Pencahayaan sisi dari tingkap menghasilkan bayang lembut yang memberikan dimensi kepada barang kemas.
Sekarang potong sekeping kad stok putih atau gunakan sekeping lagi papan busa dan letakkan di sebelah bertentangan barang kemas dari tingkap, disengetkan sedikit ke arah barang kemas. Ini adalah pemantul anda — ia melantunkan cahaya tingkap kembali ke bahagian gelap barang kemas, mengurangkan kontras keras tanpa menghapuskan bayang yang memberi kedalaman.
Untuk barang sangat kecil seperti cincin atau subang kancing, mendekat sambil mengekalkan kedalaman medan yang baik boleh menjadi cabaran dengan kamera telefon. Aktifkan mod potret atau mod makro jika telefon anda ada, atau cuba letakkan kanta makro klip (tersedia di bawah $15) pada kamera telefon anda. Letakkan telefon pada tripod kecil atau sandarkan pada objek stabil — memegang tangan pada jarak makro menghasilkan kabur.
Persediaan tingkap mempunyai satu batasan ketara: konsistensi. Cahaya berubah sepanjang hari dan mengikut musim. Jika anda perlu memfoto semula sesuatu barang berminggu-minggu kemudian dan memadankan imej asal, cahaya semula jadi menjadikan ini sukar. Catatkan masa hari dan keadaan cuaca apabila anda mendapat hasil yang baik, dan cuba tiru keadaan tersebut untuk sesi akan datang.
Untuk hasil terbaik, tangkap gambar dalam tempoh 2-3 jam selepas matahari terbit atau sebelum matahari terbenam untuk barang kemas logam hangat, dan semasa keadaan mendung tengah hari untuk perak dan logam putih.
Bagaimana cara membina kotak cahaya DIY $20-50 untuk fotografi barang kemas?
Kotak cahaya menyelesaikan dua masalah terbesar fotografi barang kemas serentak: ia menyebarkan cahaya keras menjadi pencahayaan sekata, dan ia mengawal apa yang dipantulkan oleh barang kemas dengan mengelilinginya dengan permukaan putih neutral.
Berikut cara membinanya dari awal. Cari kotak kadbod yang sekurang-kurangnya 40x40x40 cm — lebih besar lebih baik untuk fotografi kerana ia memberikan lebih ruang kerja dan menghasilkan cahaya lebih lembut berbanding subjek anda. Potong tiga tingkap segi empat besar di sisi kiri, sisi kanan, dan bahagian atas kotak, tinggalkan sempadan sekurang-kurangnya 5cm di sekeliling setiap tingkap. Tutup tingkap ini dengan kertas tisu putih, kertas surih, atau bahan penyebaran ripstop, diikat dengan pita. Bahagian bawah dan belakang kotak kekal kadbod pepejal — lapik bahagian bawah dengan papan busa putih atau kertas putih matte sebagai permukaan penggambaran anda.
Sekarang letakkan dua sumber cahaya — boleh jadi lampu meja ringkas dengan mentol cahaya siang, atau panel LED — satu di setiap sisi kotak, diletakkan di luar tingkap kertas tisu. Kertas tisu menyebarkan cahaya, menghasilkan pencahayaan sekata di seluruh dalaman kotak. Barang kemas anda diletakkan di tengah, dikelilingi cahaya putih lembut dari kedua-dua sisi dan atas.
Untuk lubang penggambaran, potong bulatan kecil di bahagian hadapan kotak cukup besar untuk memasukkan kanta kamera anda. Ini mengekalkan kamera di luar kotak sambil membolehkan anda memfotografi terus ke dalam. Butiran penting: lubang penggambaran harus cukup kecil supaya kamera tidak kelihatan dalam pantulan barang kemas.
Kotak cahaya boleh lipat siap bina dalam julat $20-30 dari Amazon atau AliExpress melakukan kerja yang sama dan boleh dilipat rata untuk penyimpanan. Cari yang menyertakan jalur lampu LED dalam pakej — kit pembelian tunggal ini memberikan anda segala yang diperlukan dengan kos di bawah $40.
Batasan mana-mana persediaan kotak cahaya adalah ia menghasilkan cahaya rata dan sekata yang menunjukkan butiran permukaan dengan baik tetapi tidak menghasilkan kilauan dramatik dalam batu permata berfaset. Untuk barang kemas berlian di mana kilauan adalah titik jualan, anda perlu mengubahsuai persediaan dengan memperkenalkan sumber cahaya keras kecil (lampu suluh telefon berfungsi) yang ditujukan melalui celah kecil dalam kotak untuk menghasilkan titik kilauan berarah.
Apakah persediaan lampu cincin atau panel LED $50-100 terbaik untuk barang kemas di rumah?
Membelanjakan $50-100 untuk pencahayaan membuka keupayaan yang persediaan percuma dan DIY tidak dapat sediakan: suhu warna konsisten, intensiti boleh kawal, dan fleksibiliti untuk mengubahsuai persediaan pencahayaan anda dengan cepat antara jenis barang kemas yang berbeza.
Pembelian tunggal paling berguna dalam julat ini adalah panel LED dwi-warna. Panel ini membolehkan anda melaraskan suhu warna dari sekitar 3200K (tungsten hangat) ke 6500K (cahaya siang), bermakna anda boleh mengoptimumkan pencahayaan anda untuk emas (lebih hangat) berbanding perak (lebih sejuk) tanpa menukar persediaan fizikal anda. Cari panel dengan penarafan CRI (Indeks Penghasilan Warna) 95 atau lebih tinggi — panel murah dengan CRI di bawah 90 memperkenalkan ketidaktepatan warna yang mempengaruhi ton logam.
Lampu cincin banyak dipasarkan kepada penjual dan pencipta barang kemas, tetapi ia pilihan yang lemah untuk kebanyakan fotografi barang kemas. Lampu cincin menghasilkan pantulan bulat tersendiri pada mana-mana permukaan berkilat — kelihatan sebagai sorotan bulat dalam tetapan logam anda dan lingkaran cahaya dalam faset batu permata digilap. Untuk tangkapan flat lay melihat terus ke bawah pada barang tanpa permukaan berkilat yang ketara, lampu cincin berfungsi dengan munasabah. Untuk apa-apa sahaja yang mempunyai kandungan logam signifikan yang ditangkap pada mana-mana sudut selain terus dari atas, pantulan bulat itu mengganggu dan kelihatan tidak profesional.
Persediaan dua panel 45 darjah adalah tulang belakang fotografi barang kemas studio. Letakkan satu panel LED di bahagian atas kiri barang kemas anda pada kira-kira 45 darjah secara mendatar dan 30-45 darjah secara menegak, dan panel kedua di bahagian atas kanan pada sudut yang sama tetapi dengan kuasa lebih rendah (sekitar 60% daripada cahaya utama). Cahaya utama menghasilkan pencahayaan berarah yang menunjukkan tekstur dan bentuk; cahaya pengisi mengurangkan bayang keras tanpa menghapuskannya. Persediaan ini berfungsi untuk emas, perak, barang yang banyak batu permata, dan bahan campuran.
Tambahkan kad pemantul papan busa putih kecil di bawah dan di hadapan barang kemas untuk melantunkan cahaya kembali ke bahagian bawah — ini menangkap bahagian bawah batang cincin dan sangkut loket yang sebaliknya akan hilang dalam bayang.
Dengan kos di bawah $100, kit permulaan yang baik adalah: satu panel LED dwi-warna 40W dengan softbox ($50-60) + satu panel LED lebih kecil atau pemantul sebagai pengisi ($20-30) + kepingan papan busa putih untuk latar belakang dan pemantul ($5-10). Persediaan ini akan mengendalikan 90% keperluan fotografi barang kemas.
Bagaimana pencahayaan khemah berfungsi untuk permukaan barang kemas yang sangat memantulkan?
Apabila anda berhadapan dengan barang kemas yang sangat memantulkan — gelang emas digilap tinggi, tetapan platinum kemasan cermin, atau barang dengan kaboson batu permata licin yang besar — persediaan pencahayaan konvensional menghasilkan pantulan bilik, kamera, atau jurugambar yang mengganggu. Pencahayaan khemah menyelesaikan ini secara menyeluruh.
Prinsipnya mudah: kelilingi barang kemas sepenuhnya dengan bahan penyebaran putih, kemudian letakkan sumber cahaya di luar khemah untuk meneranginya dari setiap arah. Barang kemas kini tidak memantulkan apa-apa selain putih — persekitaran yang sepenuhnya neutral dan bersih. Hasilnya adalah pencahayaan sekata, tanpa bayang dengan tiada pencemaran persekitaran.
Anda boleh membina khemah ringkas daripada rangka dawai (gelung sulaman atau dawai penyangkut baju yang dibengkokkan berfungsi) yang didrapkan dengan fabrik penyebaran putih atau nilon ripstop. Khemah diletakkan di atas barang kemas dengan lampu di luar. Khemah fotografi komersial dalam julat $15-30 melakukan ini dengan lebih elegan, tetapi versi DIY berfungsi sama baik.
Cabarannya adalah akses — bagaimana anda memasukkan kamera ke dalam adegan tanpa kamera itu sendiri muncul sebagai pantulan gelap dalam permukaan berkilat tinggi anda? Penyelesaian standard adalah lubang kecil di hadapan khemah yang cukup besar untuk kanta anda sahaja. Pastikan semua di belakang kanta (badan kamera, tangan, bilik) gelap, dan pantulan lubang kamera akan menjadi minimum.
Untuk barang yang banyak batu permata, pencahayaan khemah tulen mempunyai batasan ketara. Berlian dan batu potongan cemerlang lain memperoleh kecantikan mereka daripada permainan cahaya — kilauan, api, percikan. Kesan optik ini memerlukan sumber cahaya berarah: titik cahaya kecil dan keras yang menghasilkan titik terang dan bayang gelap dalam batu yang menjadikannya kelihatan hidup. Pencahayaan khemah, kerana begitu sekata dan tanpa arah, menghasilkan batu permata yang kelihatan seperti kaca berbanding batu berharga.
Penyelesaian profesional adalah menggunakan pencahayaan khemah sebagai asas anda — yang mengendalikan tetapan logam dengan sempurna — dan kemudian memperkenalkan satu sumber cahaya keras kecil (lampu gentian optik, lampu pen LED, atau lampu suluh telefon yang ditujukan melalui lubang jarum dalam fabrik khemah) untuk menghasilkan kilauan berarah dalam batu permata anda. Gabungan ini memberikan anda logam bersih dan batu cemerlang serentak, yang merupakan matlamat akhir.
Bagaimana penyuntingan semula AI mengimbangi pencahayaan rumah yang tidak sempurna?
Inilah realiti jujur fotografi barang kemas di rumah: walaupun dengan persediaan DIY terbaik yang diterangkan dalam panduan ini, imej anda akan mempunyai ketidaksempurnaan yang persediaan studio profesional tidak hasilkan. Sumber cahaya campuran (cahaya tingkap dan mentol dalaman) menghasilkan warna terpesong yang kompleks. Persediaan satu cahaya menghasilkan bayang yang lebih sukar diisi dengan sempurna. Fotografi makro di rumah tanpa rel fokus tepat menghasilkan imej yang agak lembut. Batasan ini bukan kegagalan — ia hanya realiti bekerja tanpa persekitaran studio terkawal.
Penyuntingan semula AI menjambatani jurang ini. Alat AI moden yang dilatih khusus pada imej barang kemas memahami bagaimana setiap jenis barang kemas sepatutnya kelihatan, dan mereka menerapkan pembetulan yang menolak imej anda ke arah standard profesional tersebut tanpa mengira keadaan pencahayaan yang menghasilkannya.
Pembetulan warna terpesong adalah di mana AI berprestasi paling dramatik untuk jurugambar rumah. Cincin emas yang difotografi dengan cahaya tingkap pada petang mendung sering mempunyai sedikit warna biru daripada suhu warna langit. Alat AI mengenali logam emas, tahu ia sepatutnya kuning hangat berbanding kuning sejuk, dan membetulkan imbangan putih khusus pada permukaan logam sambil mengekalkan warna latar belakang dan batu permata yang sesuai. Pembetulan tersasar ini adalah sesuatu yang memerlukan penyunting mahir 5-10 minit setiap imej dalam Photoshop.
Keseragaman latar belakang adalah satu lagi masalah biasa fotografi rumah. Permukaan DIY — papan busa, kertas, fabrik — menunjukkan kedutan, bayang, dan tekstur permukaan. Pembetulan latar belakang AI melicinkan dan menyekatakan permukaan ini untuk menghasilkan latar belakang putih bersih bergradien yang digunakan dalam fotografi katalog komersial. Pembetulan tunggal ini menjadikan imej kelihatan jauh lebih profesional tanpa sebarang perubahan pada produk itu sendiri.
Untuk imej yang pencahayaannya secara teknikal tidak sempurna tetapi masih boleh digunakan — sedikit kurang pendedahan, agak rata, kurang kilauan — alat peningkatan AI boleh menambah kehalusan yang mengimbangi batasan peralatan. Pandangan utama adalah penyuntingan semula AI paling berkuasa bukan sebagai pengganti semua kemahiran fotografi, tetapi sebagai pengganda: persediaan rumah yang kompeten ditambah penyuntingan semula AI menghasilkan hasil setanding dengan persediaan profesional tanpa penyuntingan semula.
Aliran kerja praktikal untuk penjual rumah: bina persediaan terbaik yang anda mampu dengan bajet yang ada, tangkap dalam RAW jika kamera anda menyokongnya, dan jalankan imej anda melalui penyuntingan semula AI sebelum diterbitkan. Gabungan ini menghasilkan hasil profesional secara konsisten tanpa memerlukan peralatan profesional.

