Tips för att fotografera guld- och silversmycken: Perfekta metalltoner
Guld- och silversmycken kräver helt olika fotografitekniker. Lär dig att fånga exakta metalltoner, undvika färgstick och uppnå professionella resultat.

Se omvandlingen
Ett retuscherat smyckesfoto, fyra användbara resultat.
Katalogretuschering är grunden: ren bakgrund, polerade ytor, bevarad design. Från den vattenstämpelfria outputen kan du skapa Instagram-liknande scener, modellbilder med True-Scale Placement och 5 sekunders annonsvideor.
Dra för att jämföra
Katalogretuschering
Produktfoton med ren vit bakgrund, polerad metall, förbättrade stenar och marknadsplatsklart resultat.
Instagram-miljöer
Redaktionella miljöer med kreativa rekvisita, stämningsfull ljussättning och varumärkesanpassat berättande.
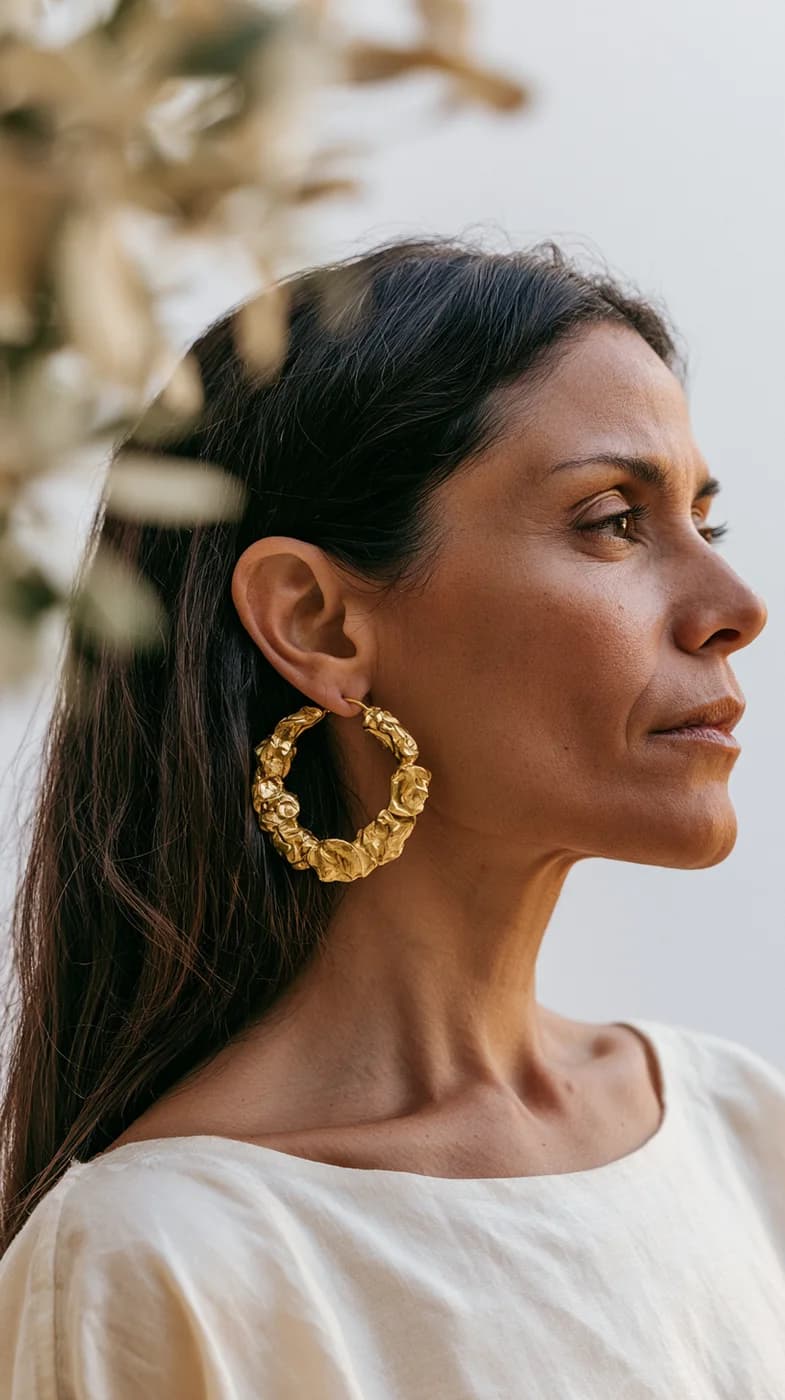
Smycken på modell
Överför din exakta ring, ditt örhänge, halsband eller armband till en modellreferens med realistisk placering på kroppen och bärskala.
01
Varför är det så svårt att fotografera guld- och silversmycken korrekt?
Metaller är unikt utmanande eftersom de reflekterar hela sin miljö — varje ljuskälla, yta och färg i rummet syns i bilden. Guld skiftar lätt mot orange eller grönt beroende på ljuskällan, medan silver blåser ut högdagrarna i det ögonblick exponeringen är ens lite fel. De flesta fotografer löser ett problem och skapar av misstag ett annat.
Om du någonsin har fotograferat en guldring som kom ut och såg ut som ett mässingsdörrvred, eller ett silverhalsband som blev en gestaltslos vit klick, har du upplevt kärnproblemet med metallofotografi: metaller reflekterar inte bara ljus, de förstärker varje brist i din installation.
Metaller har två egenskaper som gör dem till mardrömmar att fotografera. För det första är de spekulära reflektorer — det vill säga de reflekterar ljus i en enda vinkel snarare än att sprida det diffust. Rikta ett ljus mot en guldring och du får en het punkt, inte ett mjukt sken. För det andra tar metaller på sig färgen hos vilken ljuskälla som lyser på dem. Fotografera guld under lysrörsbelysning och det ser grönaktigt ut. Fotografera det under volframbelysning och det blir djuporange. Fotografera silver under en molnig himmel och det plockar upp en blå färgton som uppfattas som smutsig snarare än cool.
Utmaningen förstärks av att kamerasensorer hanterar metaller dåligt. Kamerans automatiska vitbalanssystem är designat för att neutralisera färgstick, vilket är precis fel för guld — du vill ha värmen, bara kontrollerad värme. Samtidigt tenderar mätarsystem som exponeras för starkt reflekterande silveryta att underexponera hela bilden i ett försök att dämpa högdagrarna, vilket krossar skuggor och förlorar detaljer i metallens textur.
Det finns också ett perceptionsgap mellan vad kameror registrerar och vad mänskliga ögon ser. Våra ögon anpassar sig konstant — vi ser guld som guld under nästan alla ljusförhållanden. Kameror anpassar sig inte. Det som ser korrekt ut på din telefonskärm i rummet kommer att se helt annorlunda ut när du tittar på det senare på en kalibrerad monitor.
Att förstå dessa grundorsaker — spekulär reflektion, färgförorening, mätningsfel och öga-till-skärm-anpassning — är vad som skiljer fotografer som konsekvent får exakta metalltoner från dem som förlitar sig på tur.
02
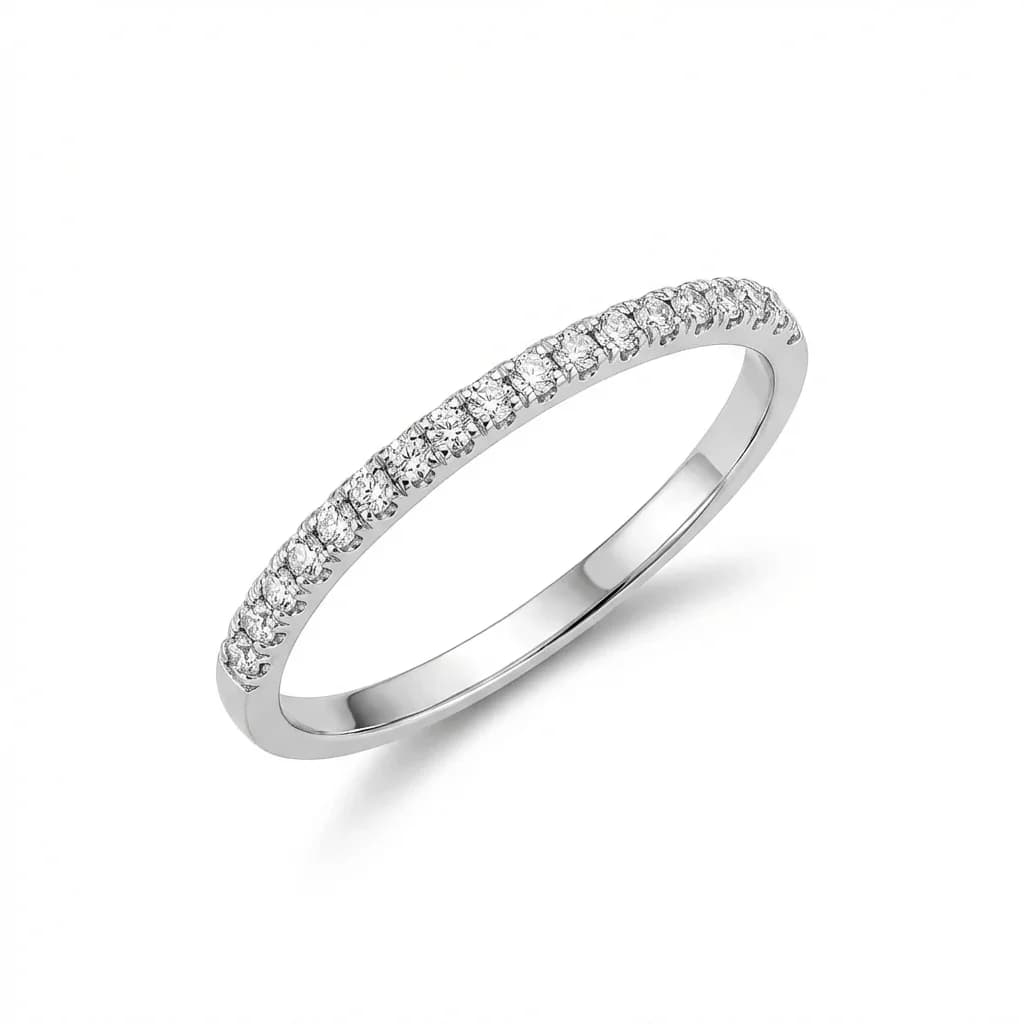
Hur fotograferar du guldsmycken för att få exakta varma toner utan färgstick?
Guld behöver varmt, diffust ljus och en vitbalansinställning på cirka 5000-5500K för att se naturligt ut snarare än orange. Det största misstaget fotografer gör är att använda kylt dagsljus eller LED-paneler som strippar guldet på sin värme och lämnar det platt och livlöst. Håll dina ljuskällor varma, dina bakgrunder neutrala och dina reflektorer vita, inte silver.
Guld befinner sig i ett smalt fönster mellan två misslyckanden: för kylt ser det ut som en billig legering, för varmt ser det ut som orange plast. Målet är att landa i mitten, vilket kräver medvetna val i varje steg.
Börja med ljustemperatur. Kontinuerliga LED-paneler är populära för smyckefotografi, men många är inställda på 6500K dagsljus — alldeles för kylt för guld. Ställ in dina paneler på 4500-5500K, eller använd volframbalanserade glödlampor om du arbetar med kontinuerliga ljus. Om du använder blixt kan ett varmt diffusionsgel på ditt nyckelljus flytta uteffekten till en mer guldvänlig temperatur utan att påverka din övergripande vitbalansinställning.
Diffusion är lika kritiskt. Guld reflekterar hårt ljus som en överexponerad het punkt som utplånar ytdetaljer — den fina texturen hos en hamrad guldmanschett eller kornsättningsmönstret i ett klumphänge försvinner helt enkelt. Använd softboxar, shoot-through-paraplyer eller ett enkelt ark vitt diffusionsmaterial mellan din ljuskälla och smyckena för att sprida ljuset och bevara dessa ytstrukturer.
Bakgrundsval påverkar dramatiskt upplevd guldton. Rent vita bakgrunder är klassiska, men de kan få guld att se mer gult ut genom kontrast. En varm off-white eller ljus crèmebakgrund producerar ofta mer smickrande och korrekt utseende guldtoner. Undvik bakgrunder med ens en antydan till gult — det slår sig visuellt ihop med guldet och plattar ut bilden.
Reflektorer formar skuggsidan av ditt guldstycke. Använd vitt skumkort snarare än silverreflektorer — silverreflektorer introducerar ett svalare fyllningsljus som konkurrerar med de varma tonerna du har byggt in i ditt nyckelljus. Vitt fyllningsljus håller skuggorna varma och bibehåller färgkonsistensen över hela stycket.
Kontrollera slutligen din färgkalibrering innan fotografering. Fotografera ett ColorChecker-kort under din ljusinställning och använd det för att skapa en anpassad kameraprofil. Detta enda steg eliminerar de flesta färgstickproblem innan de uppstår.
03
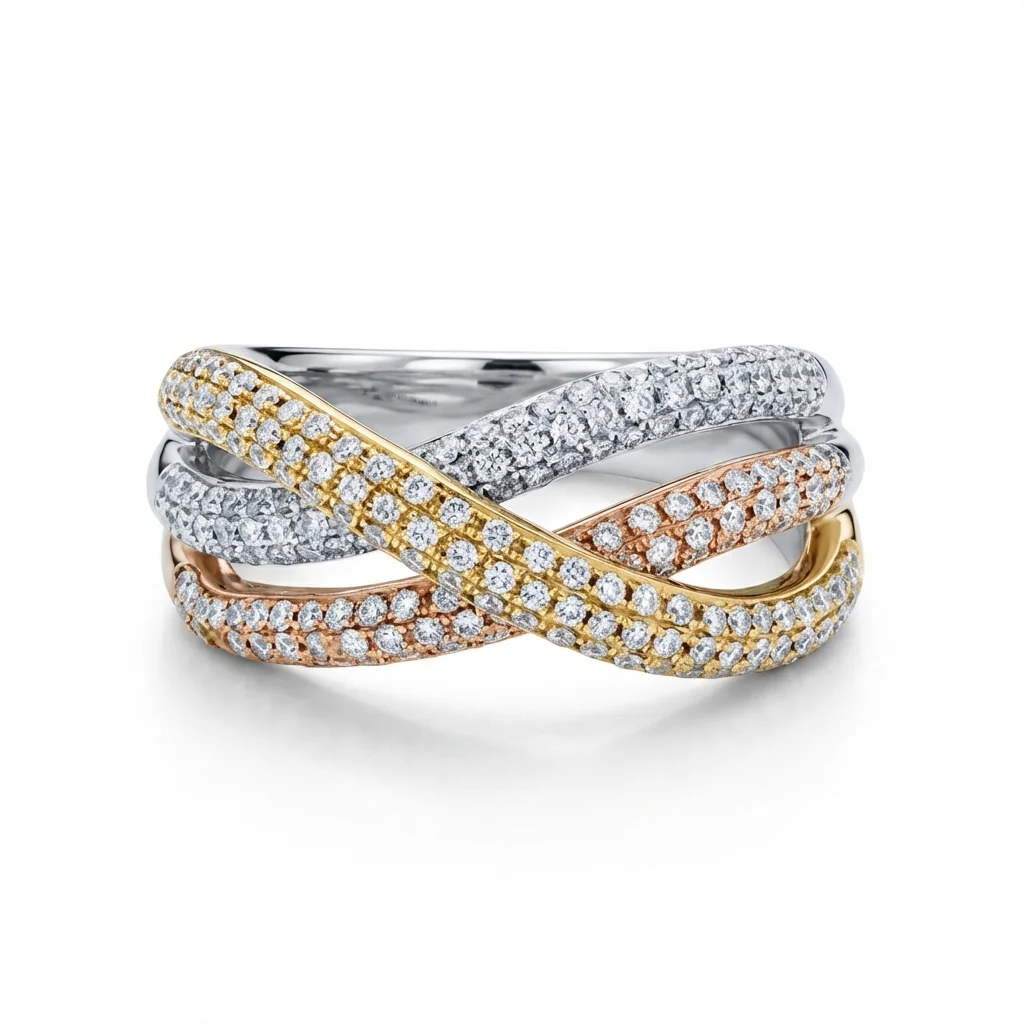
Hur fotograferar du silversmycken utan överexponering och förlust av detaljer?
Silvers mycket reflekterande yta lurar kameramätare att underexponera hela bilden för att kompensera för ljusa högdagrar — vilket innebär att du behöver exponera manuellt och acceptera att ditt histogram kommer att sitta längre till höger än normalt. Fotografera i RAW-format så att du har återhämtningsutrymme för högdagrar, och använd indirekt, omgivande ljus snarare än direkta ljuskällor som skapar heta punkter.
Silver är det tekniskt mest krävande av alla smyckesmetaller att fotografera. Dess spegelliknande yta reflekterar allt med hög intensitet, vilket skapar tre separata problem: utblåsta högdagrar, spekulära heta punkter och miljöfärgförorening från omgivande ytor.
Exponeringskontroll är din första prioritet. Lita aldrig på din kameras utvärderande eller matrixmätning när du fotograferar silversmycken — mätaren läser den ljusa ytan och underexponerar resten av bilden. Byt till manuellt exponeringsläge och ställ in inställningar som håller de ljusaste delarna av silvret vid ungefär 95% luminositet utan att klippa. Använd ditt histogram, inte LCD-förhandsvisningen, som din exponeringsguide. En lite ljusare bild i ditt histogram är korrekt; om histogrammet ser normalt ut är ditt silver förmodligen underexponerat.
Fotografera i RAW-format, alltid. Silverhögdagrar som är nära att klippa kan återställas med 1-2 stopp i efterbearbetning. Silverhögdagrar som är helt utblåsta kan inte återställas alls. RAW ger dig den marginal du behöver för att arbeta med.
Ljusinställning för silver är i princip det motsatta av guld. Du vill ha stora, mjuka, omgivande ljuskällor placerade för att minimera direkt spekulär reflektion. En enkel tältinställning — fyra vita paneler som omger smyckena med ljus som studsar av tältväggar — producerar jämnt, detaljbevarande ljus över silveryta. Om du inte använder ett tält, placera dina softboxar ovanför och på sidorna, aldrig direkt framför.
Miljöförorening är det problem som de flesta fotografer förbiser. Silver plockar upp färg från varje yta i sitt synfält. Röda väggar, färgade kläder, ett blått tak — allt syns som färgstick i dina silversmycken. Arbeta i ett rum med neutralfärgade ytor, eller bygg en liten fotograferingsmiljö av vita skumkortspaneler som omger dina smycken på tre sidor och ovanför.
För graverade eller texturerade silverstycken ökar snedljus — placerat i låg vinkel nästan parallellt med ytan — dramatiskt synligheten av fina detaljer och texturer genom att kasta skuggor i fördjupningar. Detta fungerar bäst som ett sekundärt ljus, med ditt huvudljus fortfarande kommande uppifrån.
04
Hur fotograferar du roseguld, platina och flermaterialsmycken?
Roseguld behöver lite annorlunda behandling än gult guld — det fotograferas närmre koppar och kan lätt se antingen för rosa eller för orange ut. Platina och vitguld är närmre silver men med mindre kontrast, vilket gör dem benägna att se grå och platta ut. Flermaterialstycken kräver noggrann ljusplacering för att säkerställa att varje metall läses som sin egen distinkta färg snarare än att smälta samman.
Spridningen av alternativa metaller i samtida smyckesdesign har gjort metallofotografi avsevärt mer komplex. Roseguld, platina, palladium, titan och stycken som kombinerar flera metaller presenterar alla unika utmaningar.
Roseguld är kanske det knepigaste. Dess varmt rosa färg befinner sig vid skärningspunkten mellan guldets gula och koppars röda, och den skiftar dramatiskt med ljustemperatur. Under kylt ljus ser roseguld nästan kopparfärgat ut — attraktivt men felaktigt. Under mycket varmt ljus skiftar det mot en orange som ser billig ut. Sikta på en vitbalans på circa 5200K för roseguld och använd lite mer neutrala bakgrunder än du skulle för gult guld. En ljusgrå bakgrund får ofta roseguldtoner att framstå mer korrekt än rent vitt.
Platina och vitguld förväxlas ofta i fotografi eftersom de fotograferas på liknande sätt. Båda är svala, silveraktiga metaller, men platina har en lite varmare grå ton jämfört med vitguldets kallare silvervit. För att skilja dem åt korrekt i fotografier, använd kontrollerat kylt ljus (circa 6000K) och neutralgrå bakgrunder. Den viktigaste tekniska utmaningen med båda är densamma som med silver: att förhindra överexponering. Platina har i synnerhet en karakteristisk glans som är mjukare och mindre spegelliknande än silver — bevara detta genom att använda större, mjukare ljuskällor.
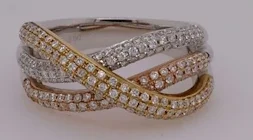
Flermaterialstycken är det ultimata testet av din ljusinställning. En ring med ett gult guldband och en vitgulds- eller platinainfattning har i grunden motsägelsefulla krav — det gula guldet vill ha varmt ljus medan det vita metallet vill ha kylt ljus för att se bäst ut. Lösningen är att sikta på en neutral balans, circa 5000K, och placera dina ljus för att träffa varje metall i en lite annan vinkel så att de läses som distinkta material. Ett litet vitt reflektorkort placerat för att studsa ljus specifikt mot det vita metallpartiet kan hjälpa utan att värma upp guldet.
För vilket stycke som helst som kombinerar metaller, ökar fotografering i en liten vinkel (15-30 grader från horisontellt) snarare än helt plant dramatiskt den dimensionella kvaliteten och hjälper varje metall att visa sin unika reflekterande karaktär.
05
Hur fixar AI-retuschering metalltonproblem automatiskt?
Moderna AI-smyckesretuschverktyg är specifikt tränade för att känna igen metalltyper och tillämpa metallanpassade färgkorrigeringar — värma guldtoner, neutralisera silvertoningar och återhämta förlorade högdagsdetaljer. Till skillnad från allmänna redigeringsprogram som kräver manuell maskering och riktade justeringar, identifierar specialiserade AI-verktyg metallytor i bilden och tillämpar korrigeringar som mänskliga ögon förväntar sig att se för varje specifik metalltyp.
Även med perfekt teknik behöver metallofotografi ofta efterbearbetning för att nå kommersiell kvalitet. Ljusinställningar som fungerar för en metall introducerar subtila problem för en annan. Miljöfärgförorening är nästan omöjlig att eliminera helt i kameran. Och gapet mellan vad en kamera fångar och vad ett mänskligt öga uppfattar i verkligheten förblir en ihållande utmaning.
Traditionell efterbearbetning för metallsmycken är tidskrävande. Att korrigera gulds färgstick kräver att metallytor väljs med precisa maskeringsverktyg, följt av oberoende justering av nyans, mättnad och luminositet för skuggor, mellantoner och högdagrar. Att återhämta silverhögdagsdetaljer kräver luminositetsmaskning och noggrann dodging. Att balansera flera metaller i ett enda stycke innebär att skapa separata maskerade justeringar för varje metallzon. En professionell retuschör kan lägga 15-30 minuter på ett enda komplext stycke.
AI-retuschverktyg specifikt tränade på smyckesbilder angriper problemet annorlunda. De har tränats på hundratusentals smyckesfoton med mänskligt verifierade korrekta metalltoner, så de har lärt sig hur guld, silver, roseguld och platina ska se ut. När du skickar in ett guldringsfoto med en svag grön färgton från lysrörsbelysning, känner AI igen metalltypen, identifierar den felaktiga färgen och tillämpar en korrigering som för metallen mot dess förväntade utseende — utan att påverka bakgrunden eller ädelstensens färger.
För silversmycken är AI-verktyg särskilt effektiva för att återhämta övergångszoner mellan detaljerade och ljusa områden — de platser där mänskliga retuschörer ofta kämpar med att bibehålla textur medan de ljusar upp skuggor. AI har sett tillräckligt med silversmycken för att veta vilka ljusa områden som representerar legitima spekulära högdagrar och vilka som representerar överexponerade ytdetaljer som bör tonas ned.
AI-retuschering är också konsekvent över batcher. Om du fotograferar 50 stycken från samma guldkollektion, kommer AI att tillämpa konsekventa korrigeringar på alla 50 bilder, vilket i princip är omöjligt att uppnå manuellt i hög hastighet. Denna konsistens är avgörande för katalogfotografi där alla stycken måste se ut som att de tillhör samma kollektion.
06
Hur ställer du in vitbalans och färgkalibrering för konsekventa metalltoner?
Anpassad vitbalans — inställd med ett grått kort eller ColorChecker under dina faktiska fotografieringsljus — är det enskilt mest effektiva steget du kan ta för att få konsekventa metalltoner under ett helt fotografieringstillfälle. Automatisk vitbalans skiftar mellan bilder och förstör batchkonsistens. Manuell vitbalans förblir fast, så varje bild i en session börjar från samma kalibrerade baslinje.
Färgkalibrering är proffsets hemliga vapen för metallofotografi. Utan det lägger även erfarna fotografer timmar på batchkorrigering av färginkonsistenser som inte borde finnas. Med det kommer de flesta bilder ut ur kameran och kräver bara mindre justeringar.
Arbetsflödet börjar innan du tar ett enda produktfoto. När din belysning är inställd och stabiliserad (LED-lampor behöver 5-10 minuter för att nå konsekvent färguteffekt), fotografera ett neutralt grått kort eller ett ColorChecker Passport under dina ljus. Använd den här bilden för att ställa in en anpassad vitbalans i kameran om du fotograferar JPEG, eller för att skapa en kameraprofil om du fotograferar RAW.
För RAW-fotografer som använder Lightroom eller Capture One är ColorChecker-arbetsflödet värt att lära sig. Fotografera ColorChecker-kortet, öppna bilden i din redigeringsprogramvara, använd verktyget för skapande av färgkalibreringsprofil för att bygga en anpassad profil för den specifika ljusinställningen, och tillämpa sedan den profilen på varje bild i batchen. Detta korrigerar inte bara den neutrala vitbalansen utan även den underliggande färgresponsen hos din specifika kamerasensor under de specifika ljusen — en djupare korrigering än vad vitbalans ensam ger.
Den praktiska effekten på guldfotografi är betydande. En anpassad profil byggd under dina specifika LED-paneler kommer automatiskt att flytta guldtoner till ett exakt område, utan manuell justering för varje bild. Silver kommer att mätas och färgbalanseras konsekvent i varje bild under sessionen.
Konsistens över flera sessioner är nästa utmaning. Dokumentera din ljusinställning med anteckningar och fotografier: ljuspositioner, avstånd, panelinställningar och din vitbalansavläsning. Om du återskapar samma inställning sex månader senare kan du använda samma färgprofil och få matchande resultat — avgörande för varumärken som fotograferar nya kollektioner för att matcha befintliga katalogbilder.
För säljare som fotograferar smycken under varierande förhållanden — ibland dagsljus, ibland konstgjort ljus — är det snabbaste vägen till professionell färgnoggrannhet att bygga separata profiler för varje ljusscenario och tillämpa dem konsekvent per session.

