
Liste de vérification de retouche photo de bijoux par IA : 15 éléments à corriger avant publication
Avant de publier des photos de bijoux, vérifiez ces 15 éléments. De la suppression de la poussière à la précision des couleurs — et comment la retouche IA gère les 15 automatiquement.
Voir la transformation
Une photo de bijou retouchée, quatre résultats utiles.
La retouche de catalogue est la base : arrière-plan propre, surfaces polies, design préservé. À partir de cette sortie sans filigrane, créez des scènes de style Instagram, des photos de mannequin True-Scale Placement et des vidéos publicitaires de 5 secondes.
Glissez pour comparer
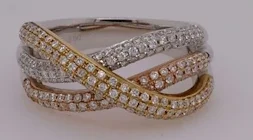
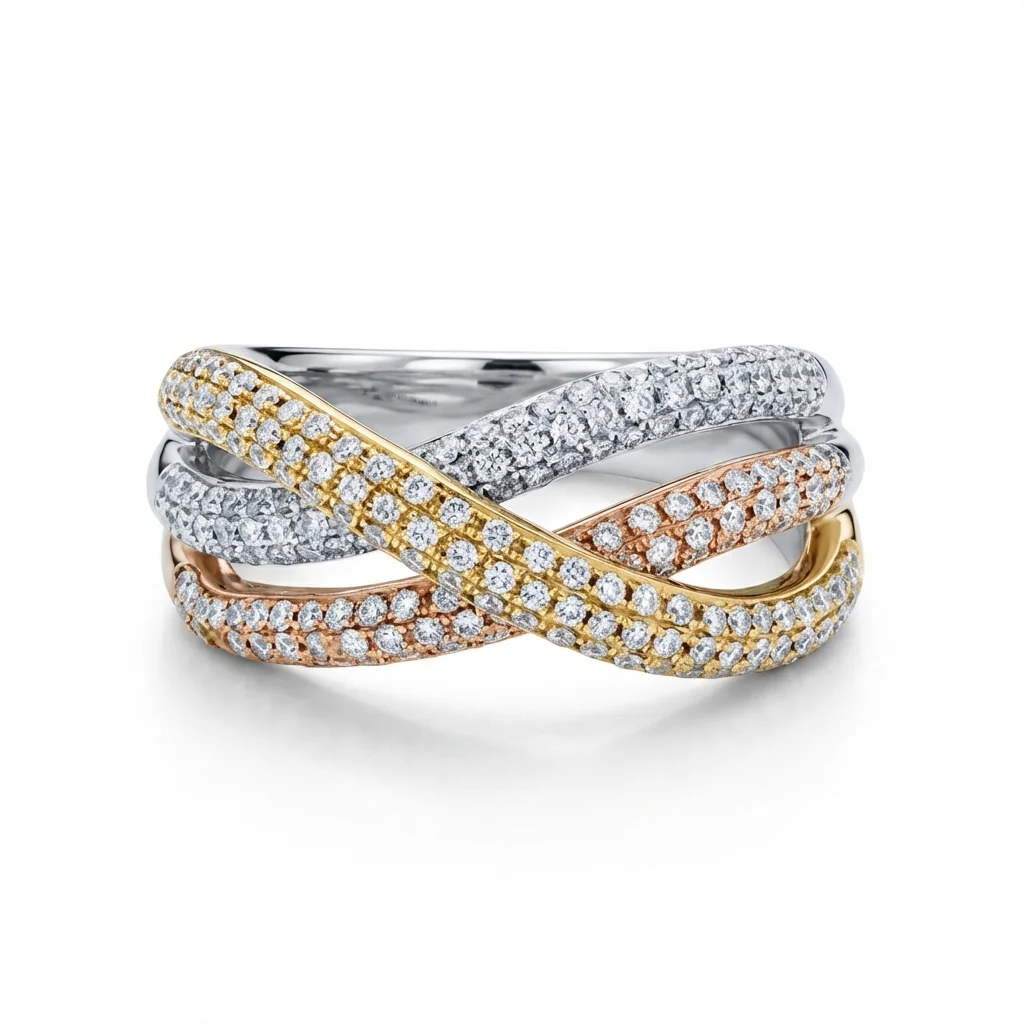
Retouche de catalogue
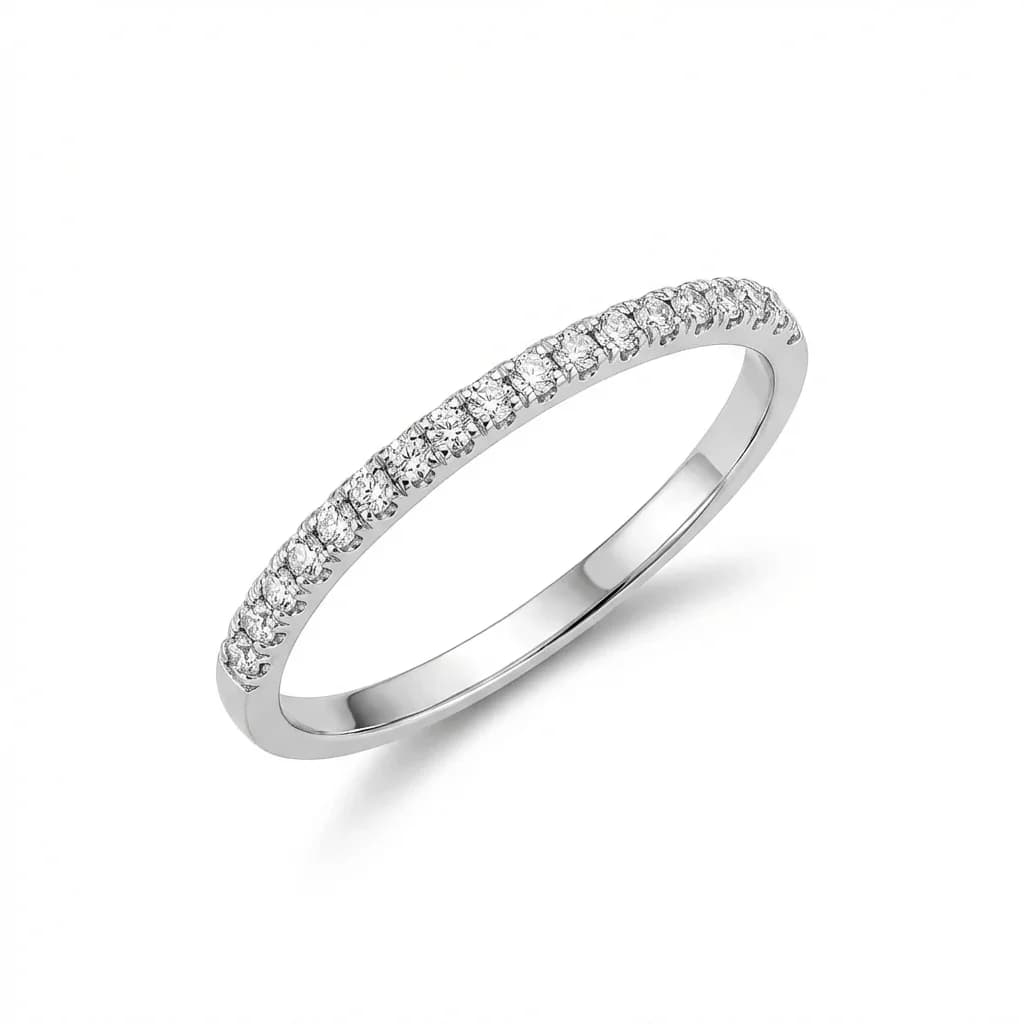
Photos de produit sur fond blanc épuré avec métal poli, pierres rehaussées et résultat prêt pour les places de marché.
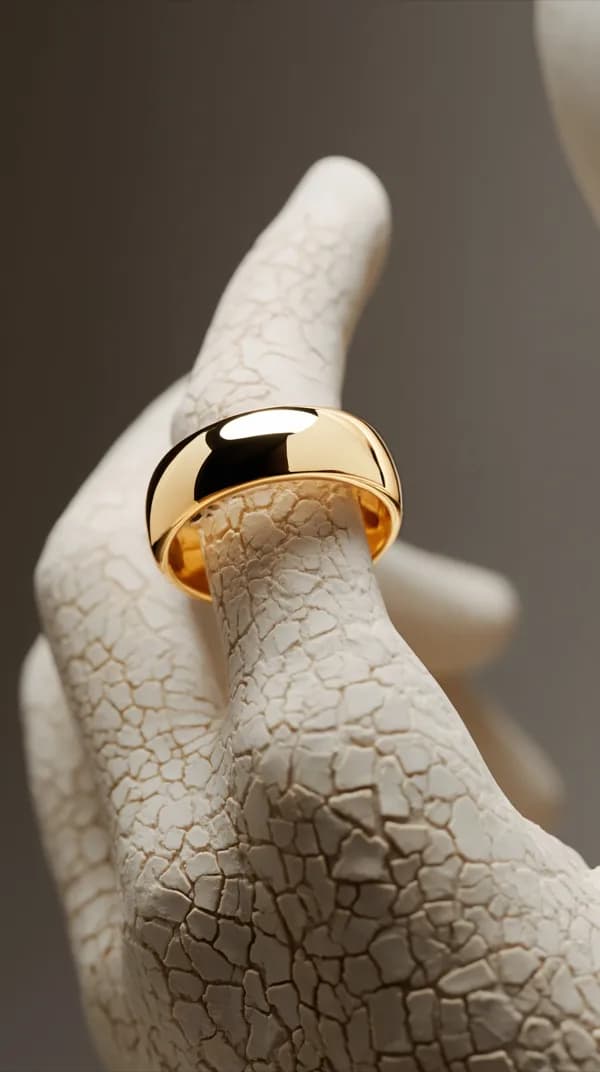
Scènes Instagram
Scènes de style éditorial avec des accessoires créatifs, un éclairage d'ambiance et une narration de marque.
Bijoux sur un mannequin
Transférez exactement votre bague, boucle d'oreille, collier ou bracelet sur une référence de mannequin avec un placement réaliste sur le corps et une échelle de porté réaliste.
Pourquoi la retouche de bijoux est-elle différente de la photographie de produits ordinaire?
La retouche de bijoux est particulièrement exigeante parce que les capteurs de caméra et les objectifs macro amplifient les imperfections de surface invisibles à l'œil nu. Une empreinte digitale à peine visible sur une bague devient une tache proéminente sur une photo de produit. Les reflets métalliques créent des défis d'édition complexes que les outils de retouche photo généraux n'ont pas été conçus pour gérer.
Entrez dans un studio de photographie et regardez un bijou sous un éclairage de photographie intense. Vous verrez immédiatement des choses invisibles sous un éclairage normal :
- Des particules de poussière qui ressemblent à des rochers
- Des huiles d'empreintes digitales qui créent des taches arc-en-ciel sur les surfaces polies
- Des rayures microscopiques qui apparaissent comme des lignes blanches brillantes
- Une texture de surface métallique inégale qui semblait lisse sous un éclairage normal
- Des inclusions de pierres ou des marques de surface qui deviennent proéminentes
Cet effet d'amplification est la raison pour laquelle la retouche de bijoux est une discipline spécialisée. La caméra voit différemment de l'œil :
- Les objectifs macro révèlent des détails au-delà de la vision humaine normale
- L'éclairage intense de photographie élimine les ombres qui cachent les imperfections
- Les capteurs haute résolution capturent la texture à un niveau microscopique
- Les écrans numériques affichent à 96-300 ppp, montrant chaque détail aux acheteurs
Pour les bijoux spécifiquement, la retouche doit aussi gérer :
- Les surfaces réfléchissantes complexes (l'or, l'argent, le platine reflètent l'environnement)
- Les éléments transparents (les diamants, saphirs transmettent la lumière à travers eux)
- L'échelle miniature (griffes, maillons, gravures nécessitent un travail précis)
- La précision des couleurs de marque (l'or devrait correspondre à l'or des autres pièces)
- L'impact émotionnel d'achat (les bijoux s'achètent au sentiment — les photos doivent évoquer cela)
C'est pourquoi la liste ci-dessous couvre 15 éléments spécifiques, et non les 3-5 ajustements de base qui suffisent pour la plupart de la photographie de produits.
Problèmes de surface : poussière, empreintes et rayures (éléments 1-3)
Les particules de poussière, les huiles d'empreintes digitales et les rayures de surface sont invisibles à l'œil nu mais flagrantes sur les photos de produits. Même des bijoux fraîchement nettoyés accumulent de la poussière pendant les 10-15 minutes d'une séance de photographie. Ceux-ci doivent être retirés en post-traitement pour obtenir des résultats de qualité catalogue professionnelle.
Les trois problèmes de surface qui apparaissent dans presque chaque photo de bijou :
Élément 1 : Particules de poussière
- Ce que ça ressemble : Petites taches brillantes, points foncés ou marques fibreuses sur les surfaces
- Source : Particules en suspension se déposant pendant la photographie, l'électricité statique attirant la poussière sur le métal
- Correction dans Photoshop : Tampon de duplication ou pinceau de correction sur chaque particule (5-20 minutes)
- Correction avec l'IA : Détection automatique et suppression pendant le traitement
- Impact si ignoré : Les images paraissent sales et non professionnelles; les acheteurs le remarquent immédiatement
Élément 2 : Empreintes digitales
- Ce que ça ressemble : Zones floues aux couleurs arc-en-ciel sur le métal poli; huiles visibles sur les pierres
- Source : Manipulation des pièces pour l'installation de la photo
- Correction dans Photoshop : Travail soigneux au pinceau de correction, peut nécessiter la séparation de fréquences
- Correction avec l'IA : Détecté comme contamination de surface et lissé
- Conseil de prévention : Utilisez des gants en coton propres pour la manipulation; retouchez quand même par précaution
Élément 3 : Rayures de surface
- Ce que ça ressemble : Lignes brillantes blanches ou foncées traversant les surfaces métalliques
- Source : Usure normale des bijoux; manipulation pendant la photographie; exposition précédente en magasin
- Correction dans Photoshop : Tampon de duplication suivant le grain du métal (5-30 min selon la sévérité)
- Correction avec l'IA : Rayures majeures supprimées; surface métallique polie numériquement
- Note : Les fines rayures capillaires sur les bijoux usagés sont intentionnelles — ne surretouchez pas les pièces vintage
Conseil pro : Nettoyez les bijoux en profondeur avant la prise de vue (nettoyeur ultrasonique ou chiffon de polissage), mais retouchez toujours en post-production — un nettoyage parfait pendant la prise de vue est impossible.
Retouche du métal : reflets, points chauds et précision des couleurs (éléments 4-6)
Les surfaces métalliques nécessitent trois ajustements spécifiques : polir les zones ternes pour restaurer l'éclat, corriger les points chauds (reflets surexposés brillants qui perdent les détails) et corriger le ton de couleur (l'or jaune ne devrait pas paraître orange; l'or blanc ne devrait pas paraître gris ou bleu). Ces ajustements font la différence entre des bijoux qui ont l'air bien et des bijoux qui ont l'air luxueux.
La retouche du métal est la partie la plus techniquement exigeante du post-traitement de bijoux :
Élément 4 : Polissage du métal (mise en valeur)
- Problème : Le métal fraîchement poli a un aspect différent sous l'éclairage de photographie que sous la lumière naturelle
- Souci : Les zones ternes apparaissent grises et sans vie; le « pop » du luxe est absent
- Correction : Éclaircir sélectivement et augmenter le contraste sur les surfaces métalliques pour restaurer l'éclat
- Technique Photoshop : Densification/assombrissement sur les reflets métalliques avec le mode de fusion Luminosité
- Approche IA : Amélioration de surface métallique entraînée sur des normes de référence haute brillance
- Résultat : Le métal a l'air fraîchement poli, haute brillance et qualité premium
Élément 5 : Correction des points chauds
- Problème : L'éclairage intense de photographie crée des reflets spéculaires surexposés — zones blanches sans détail
- Souci : Donne l'impression que le métal est endommagé ou mal photographié
- Correction : Récupérer les détails dans les zones surexposées tout en maintenant la structure naturelle des reflets
- Technique Photoshop : Récupération des hautes lumières + clonage manuel de texture métallique dans les zones cramées
- Approche IA : Points chauds détectés et corrigés automatiquement en utilisant la texture métallique environnante
- Résultat : Surface métallique continue et détaillée avec des reflets naturels mais contrôlés
Élément 6 : Précision des couleurs du métal
- Or jaune : Devrait être jaune-or chaud, pas orange (surchauffé) ni jaune-vert (dominante de couleur)
- Or blanc/platine : Devrait être blanc-argent brillant, pas gris, bleu ni jaune
- Or rose : Devrait être rose-or chaud, pas rouge (sursaturé) ni couleur chair (sous-saturé)
- Pièces bicolores : Les deux métaux doivent être précis simultanément
- Correction : Correction de couleur sélective par Teinte/Saturation sur un masque métallique
- Approche IA : Profils de couleur métallique calibrés par rapport aux valeurs de référence standard pour chaque type de métal
- Impact : Des couleurs de métal imprécises causent des retours quand les acheteurs reçoivent des pièces qui ne correspondent pas aux fiches
Amélioration des pierres : éclat, clarté et couleur (éléments 7-10)
La retouche des pierres couvre quatre éléments : améliorer l'éclat et la brillance (faire que les diamants captent la lumière comme en personne), améliorer la clarté (réduire les inclusions visibles ou le voile), corriger la saturation des couleurs (les rubis devraient être d'un rouge riche, pas délavé) et s'assurer que la couleur de l'arrière-plan ne saigne pas à travers les pierres transparentes.
Les pierres nécessitent les connaissances de retouche les plus spécialisées :
Élément 7 : Amélioration de l'éclat et de la brillance
- Problème : Les caméras capturent la lumière à un seul instant — les pierres changent de brillance avec le mouvement
- Souci : Les photos font paraître les diamants moins brillants qu'ils ne le sont en personne
- Correction : Augmenter sélectivement le contraste dans les reflets de facettes; ajouter des effets de radiance subtils
- Limite : Améliorer ce qui est réel — ne pas ajouter un éclat qui n'existe pas
- Approche IA : Amélioration de la brillance des pierres entraînée sur une photographie idéale de pierres
- Résultat : Des diamants qui sont aussi brillants en photo qu'en lumière naturelle
Élément 8 : Amélioration de la clarté
- Problème : Les inclusions (imperfections naturelles) se photographient plus proéminentes qu'elles n'apparaissent à l'œil
- Ce qu'il faut corriger : Nuages, plumes, cristaux qui apparaissent comme des taches distrayantes
- Limite : Ne jamais retirer les inclusions qui affectent le classement ou l'identification d'une pierre — c'est de la fausse représentation
- Acceptable : Réduire la proéminence des marques de surface; corriger le voile dû à l'éclairage
- Approche IA : Contamination de surface retirée; inclusions internes laissées intactes
Élément 9 : Saturation et précision des couleurs
- Rubis : Rouge riche — pas rouge-brun foncé, pas orange-rouge vif
- Émeraude : Vert profond — les inclusions (jardins) sont caractéristiques; ne pas trop nettoyer
- Saphir : Bleu royal — la profondeur compte plus que la luminosité
- Améthyste : Violet — tendance à sursaturer; gardez le naturel
- Opale : Jeu de couleurs multiples — préservez le changement de couleur qui fait la valeur des opales
- Approche IA : Profils de couleur spécifiques pour plus de 40 types de pierres
Élément 10 : Débordement de couleur d'arrière-plan dans les pierres transparentes
- Problème : Les pierres transparentes (diamants clairs, saphirs clairs) montrent partiellement l'arrière-plan derrière elles
- Si photographié sur bleu : Les pierres apparaissent légèrement bleues
- Correction : Retrait d'arrière-plan + correction de couleur à l'intérieur des zones de pierres transparentes
- Défi IA : Le plus techniquement exigeant — nécessite de comprendre où la pierre finit et l'arrière-plan commence
- Approche Jewels Retouch : Le traitement basé sur la référence reconstruit la transparence correcte de la pierre
Corrections d'arrière-plan et d'ombres (éléments 11-12)
Les problèmes d'arrière-plan et d'ombre sont les plus visuellement perturbateurs dans les fiches de bijoux. Les arrière-plans inégaux (taches grises dans le blanc, dégradés de couleur, bords visibles de la surface de prise de vue) et les ombres incohérentes (nettes d'un côté, douces de l'autre, ou absentes) minent immédiatement la présentation professionnelle et la cohérence de marque.
L'arrière-plan et l'ombre sont le contexte visuel de vos bijoux :
Élément 11 : Uniformité de l'arrière-plan
- Problèmes courants :
- a) Zones grises ou blanc cassé où la surface de prise de vue est courbée (pas du vrai blanc)
- b) Dégradés de couleur — un côté plus foncé que l'autre à cause d'un éclairage inégal
- c) Bords ou coutures visibles dans le papier/matériau d'arrière-plan
- d) Couleur de l'arrière-plan saignant dans les reflets métalliques
- e) Vignetage — coins plus foncés à cause de la chute de l'objectif
- Approche de correction : Remplacement d'arrière-plan en RGB 255/255/255 véritable (pour le blanc) ou valeur de couleur exacte
- Impact plateforme : Amazon rejette les arrière-plans non blancs sur les images principales
- Solution IA : Retrait et remplacement complet de l'arrière-plan selon les spécifications
Élément 12 : Cohérence des ombres
- L'ombre indique au spectateur que le bijou existe dans l'espace physique — sans elle, les pièces ont l'air « flottantes » et fausses
- Bonnes ombres : Douces, directionnelles, cohérentes avec la configuration d'éclairage, intensité appropriée
- Mauvaises ombres : Ombres multiples de sources lumineuses multiples, bords durs, direction incorrecte
- Ombres manquantes : Donne l'impression que le bijou est découpé et irréel
- Correction Photoshop : Style de calque ombre portée (5-10 minutes) ou reconstruction d'ombre naturelle
- Approche IA : Reconstruction d'ombre basée sur le style d'ombre de l'image de référence
- Cohérence de catalogue : Toutes les pièces devraient avoir des ombres provenant de la même direction de lumière virtuelle
- Note plateforme : Amazon autorise les ombres naturelles subtiles sur les arrière-plans blancs
Corrections de composition et de cadrage (éléments 13-14)
Les erreurs de composition — bijou non centré, trop petit ou trop grand dans le cadre, angles incohérents entre les images du catalogue, ou problèmes de rotation — minent le professionnalisme du catalogue. Les directives des plateformes exigent spécifiquement que le produit remplisse 85 % du cadre (norme Amazon). Un cadrage cohérent à travers un catalogue rend l'expérience de navigation plus professionnelle et digne de confiance.
Problèmes de composition nécessitant correction :
Élément 13 : Centrage et remplissage du cadre
- Exigence plateforme : Amazon exige que le produit remplisse 85 % de la surface de l'image
- Erreur courante : Bijou photographié trop petit dans le cadre (apparaît comme un point minuscule)
- Erreur courante : Positionnement décentré (aspect amateur)
- Correction : Recadrer et recomposer — ou utiliser l'ajustement de composition IA
- Cohérence de catalogue : Chaque produit devrait apparaître à la même taille relative dans le cadre
- Norme bagues : La face de la bague remplit les 60 % supérieurs de l'image, l'anneau visible en dessous
- Norme colliers : Pendentif au centre-haut, chaîne tombant naturellement ou façonnée en forme de présentation
Élément 14 : Cohérence d'angle et de rotation
- Problème : Produits photographiés à des angles légèrement différents d'une session à l'autre
- Exemple : Bague photographiée en vue 3/4 dans la collection printemps, vue de face dans la collection automne
- Impact : Le catalogue a l'air désorganisé; des angles différents rendent les comparaisons directes plus difficiles
- Correction : Établir des normes d'angle par catégorie de bijoux et les appliquer en prise de vue
- Post-correction : Corrections mineures de rotation en traitement
- Solution IA : La référence de style établit votre angle standard; le processeur signale les écarts significatifs
Normes de cohérence à établir :
- Bagues : Vue de face avec anneau ou vue 3/4 — choisissez une et utilisez-la toujours
- Boucles d'oreilles : Face à l'avant, en paire ou clou unique présenté
- Colliers : Pendentif centré, chaîne présentée sur un buste en velours noir ou à plat
- Bracelets : À plat ou porté au poignet — choisissez un contexte par usage
- Ensembles : Toutes les pièces arrangées de façon cohérente (sens horaire, haut en bas, ou en rayonnement)
Exigences techniques : profil de couleur, taille de fichier et texte alternatif (élément 15) — Et comment l'IA gère les 15
L'élément 15 couvre la sortie technique : profil de couleur sRGB (requis pour un affichage web correct), optimisation de la taille de fichier (sous les limites des plateformes, chargement rapide sur mobile) et compression JPEG appropriée (qualité 85-92 % pour un rapport taille-qualité optimal). La retouche IA gère les 15 éléments de la liste automatiquement — nettoyage de surface, amélioration du métal, amélioration des pierres, arrière-plan, composition et sortie technique — en moins de 60 secondes.
The final technical items and the complete AI solution:
Item 15: Technical output specifications
a) Color profile:
- Web display standard: sRGB (not Adobe RGB, not ProPhoto)
- Why it matters: Adobe RGB files display incorrectly in most browsers, showing muted, undersaturated colors
- Fix: Convert to sRGB in export settings
- AI output: Always sRGB by default
b) File size optimization:
- Platform limits: Amazon (10MB), Etsy (20MB), eBay (7MB), TikTok Shop (5MB)
- Mobile performance: Every MB adds load time; slow images lose mobile buyers
- Target: 500KB–2MB for typical product image at 2000px
- JPEG quality setting: 85–92% provides optimal quality-to-size ratio
- AI output: Optimized compression as part of export
c) Resolution standards:
- Web listing: 2000×2000px minimum
- Amazon zoom: 2000px+ triggers zoom feature
- Print catalog: 3000px+ at 300dpi
- AI output: Configurable resolution for each use case
How AI retouching handles all 15 checklist items automatically:
1. Dust particles — automatically detected and removed 2. Fingerprints — surface smoothing and contamination removal 3. Scratches — metal surface polishing 4. Metal polish — highlight enhancement on metal areas 5. Hot spots — overexposure recovery 6. Metal color accuracy — calibrated color profiles 7. Gem sparkle — brilliance enhancement 8. Gem clarity — surface mark removal 9. Gem color — stone-specific saturation optimization 10. Background color bleed — corrected during background replacement 11. Background uniformity — complete replacement to specification 12. Shadow consistency — shadow reconstruction matching reference 13. Centering and frame fill — composition optimization 14. Angle consistency — reference-based alignment 15. Technical output — sRGB, optimized file size, correct resolution
Processing time: 30–90 seconds per image. Cost: packs de crédits à paiement unique avec premiers aperçus inclus. Manual equivalent: 45–180 minutes + $15–$80 per image.
Upload your jewelry photo and see all 15 items addressed automatically.


