AI Diamond & Gemstone Jewelry Photo Retouching: Sparkle, Clarity & Color
Diamonds and gemstones are the hardest jewelry subjects to retouch. Here's how AI handles sparkle enhancement, clarity, fire, and color accuracy for every stone type.

See the Transformation
One retouched jewelry photo, four useful outputs.
Catalog retouching is the foundation: clean background, polished surfaces, preserved design. From that HD result, create Instagram-style scenes, True-Scale Placement model shots, and 5-second ad videos.
Drag to compare

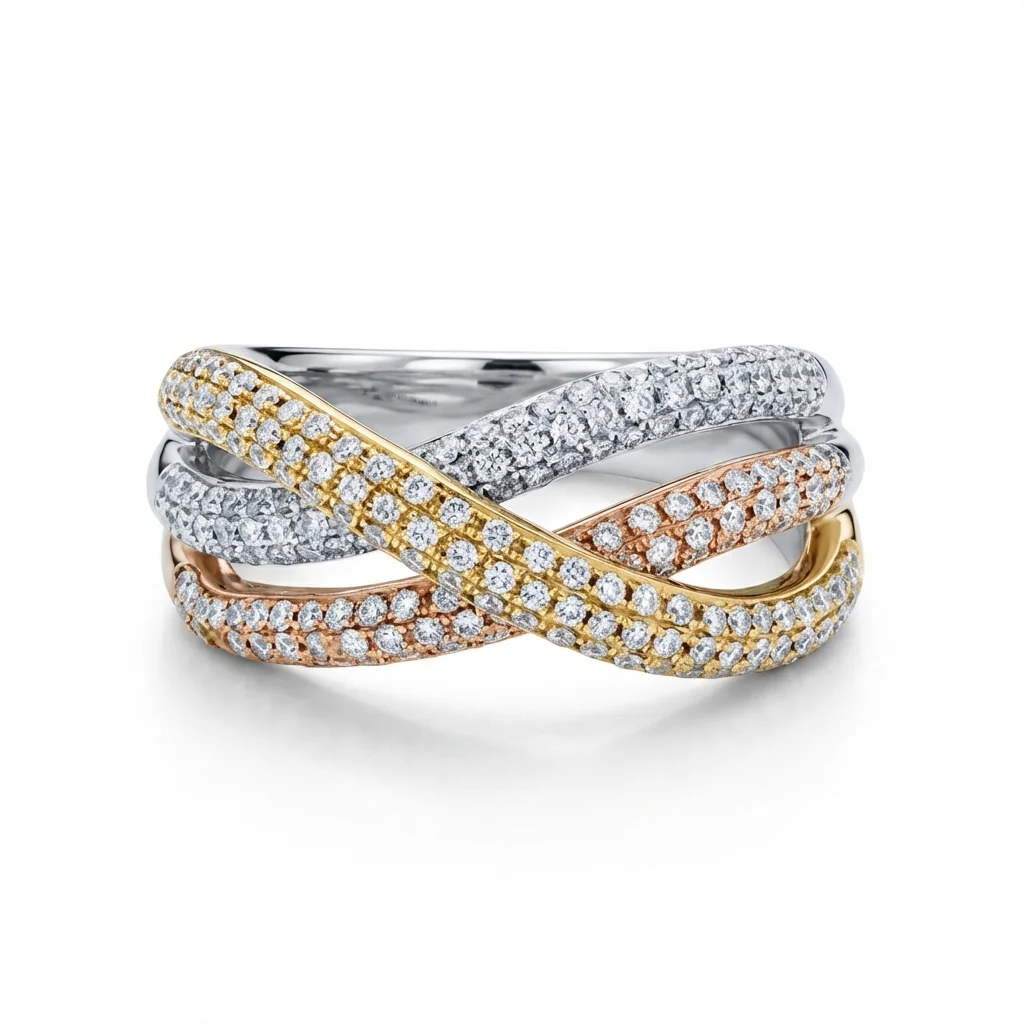
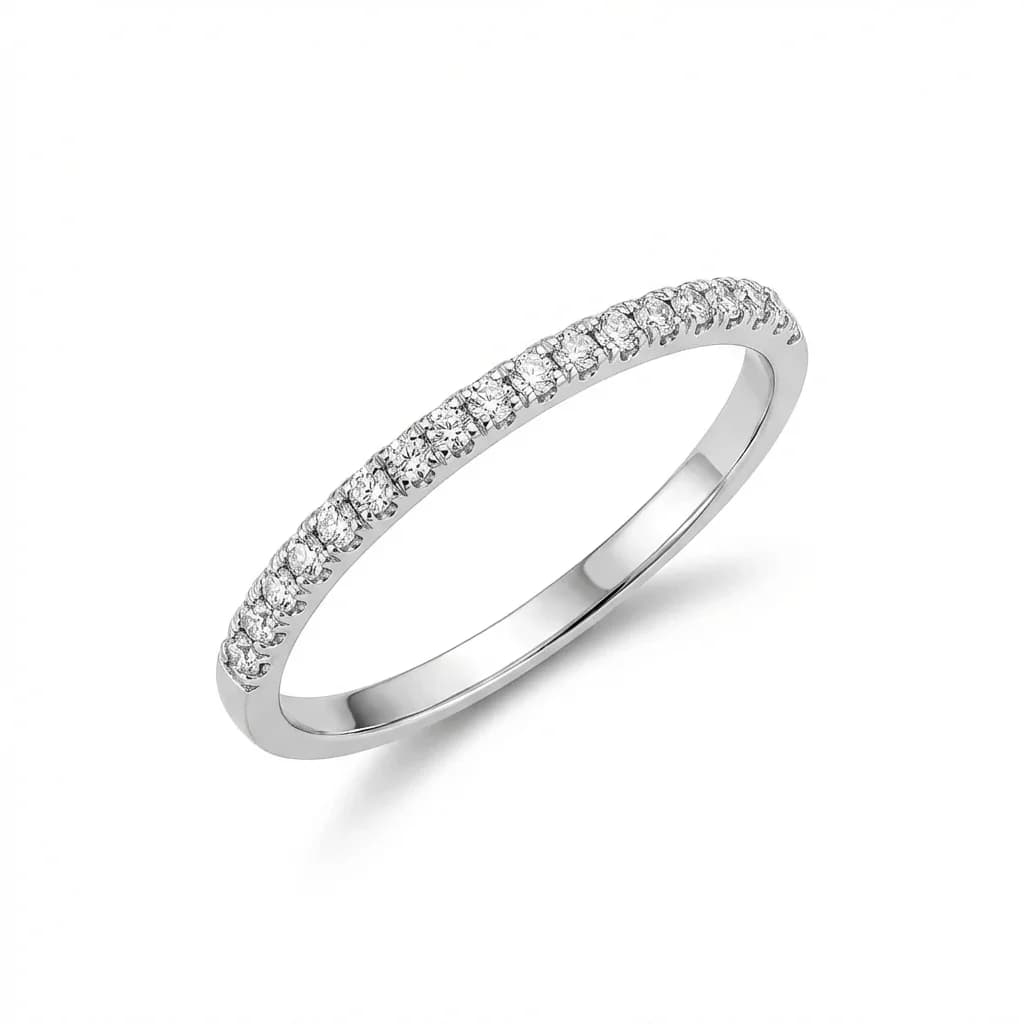
Catalog Retouching
Clean white-background product photos with polished metal, enhanced stones, and marketplace-ready output.
Instagram Scenes
Editorial-style scenes with creative props, mood lighting, and on-brand storytelling.
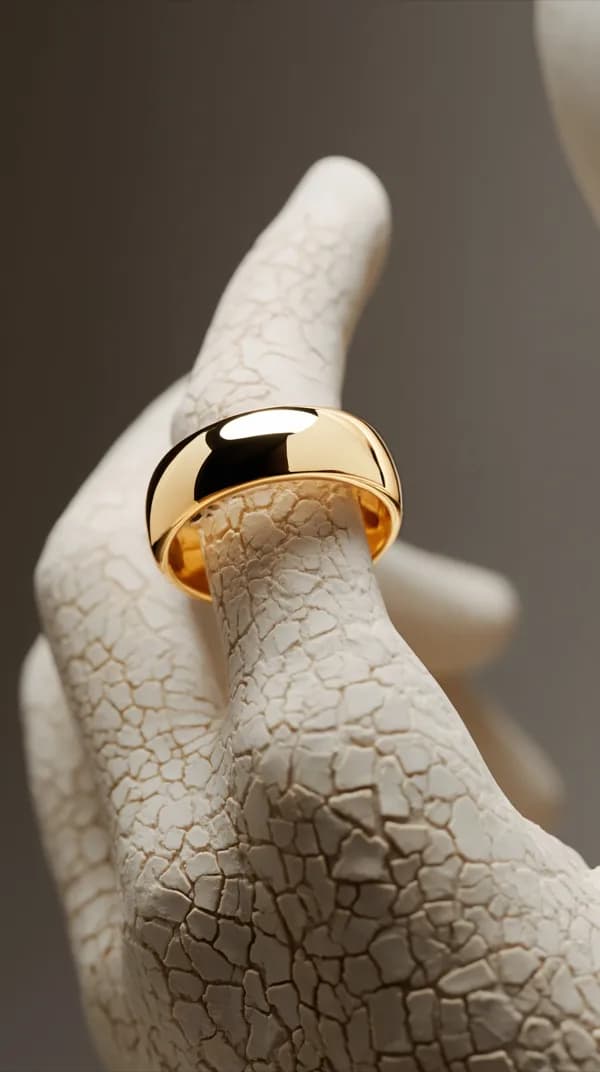
Jewelry on a Model
Transfer your exact ring, earring, necklace, or bracelet onto a model reference with realistic body placement and worn scale.
Why Are Gemstones the Hardest Jewelry Photography Subject to Retouch?
Gemstone photography sits at the intersection of optics, materials science, and photography art. Understanding why gemstones are difficult requires understanding how light interacts with them:
Diamond optical properties:
- Brilliance: Light enters the diamond, reflects off internal facets, and exits as white light
- Fire: Light disperses into spectral colors (similar to a prism effect)
- Scintillation: The flash pattern created by movement relative to light source
- All three must be visible and balanced in a single static photo
Why cameras struggle: 1. Limited dynamic range: Cameras can't simultaneously capture the darkest shadows and brightest reflections in a gem. Human eyes adapt dynamically. 2. Single moment in time: Gems look different at every slight angle — photos capture one moment, missing the full range of brilliance 3. Color casts: Photography lighting imparts its color temperature to gem faces 4. Background transmission: Transparent stones show whatever is behind them
Different gem types present completely different challenges:
- Diamonds: Colorless, maximum brilliance, fire important
- Rubies: Color saturation critical, avoid oversaturation
- Emeralds: Natural inclusions (jardins) are characteristic, not flaws
- Sapphires: Blue depth and consistency across stone
- Opals: Color play (shifting colors) must be preserved
- Pearls: Luster and orient (color overtone) need specific handling
Generic photo editing tools treat gems as colored objects. Jewelry-specific AI understands gem optics.
How to Retouch Diamond Photos: Brilliance, Fire & the 4Cs
Diamond retouching is the most technically demanding gemstone work. Here's how to approach each of the 4Cs:
Cut — enhancing brilliance and fire:
- The goal: Make the diamond look as brilliant as it does when you rotate it in hand
- Technique: Increase micro-contrast in the facet pattern; enhance bright facets; deepen the contrast between light and dark facets
- Fire enhancement: Carefully increase saturation in spectral reflections (the rainbow flashes visible in diamonds)
- Scintillation: In single photos, you can add subtle sparkle catches to enhance the sense of sparkle — must look natural
- Boundary: Don't add sparkle effects that make a lower-quality cut look like an ideal cut
Clarity — improving visual presentation:
- Remove surface contamination (fingerprints, dust on gem surface) — these are not the stone
- Reduce (don't eliminate) prominent inclusions that create significant visual distraction
- Boundary: Never remove inclusions used to identify the stone on a certificate
- Clouds: Slight clarification of cloudy areas is acceptable — it reflects what the diamond looks like when clean and well-lit
Color — accurate grade representation:
- D-F (colorless): Must appear colorless — any warm cast from lighting must be corrected
- G-J (near colorless): Slight warmth acceptable but not yellow
- K-M (faint color): Warmth is accurate and shouldn't be whitened
- Never change a diamond's apparent color grade — this is misrepresentation
Carat — visual presence:
- Photo framing, scale reference, and shadow handling all affect perceived size
- Fill frame appropriately to convey scale accurately
How to Retouch Colored Gemstones: Ruby, Emerald, Sapphire & Beyond
Each colored gemstone type has specific retouching requirements:
Ruby:
- Target color: Rich pigeon-blood red (Burmese standard) to vivid red (most commercial rubies)
- Common photo issue: Rubies photograph too dark (appears garnet-colored) or too orange
- Fix: Selective Hue/Saturation — adjust red hue toward true red; increase saturation to vivid without going neon
- Fluorescence: Some rubies fluoresce under UV — this is characteristic, don't over-correct
- AI approach: Ruby-specific color profile calibrated to gemological red standards
Emerald:
- Target color: Deep, vivid green — bluish-green for Colombian, pure green for Zambian
- Key distinction: Emerald inclusions (jardins = gardens in French) are natural and expected
- What to fix: Lighting casts (blue tones from daylight, orange from tungsten)
- What NOT to fix: Jardins, silk, internal feathers — these are the stone's identity
- Common mistake: Over-cleaning emeralds to look like glass — loses authenticity
Sapphire:
- Target color: Royal blue (Kashmir), vivid blue (Ceylon/Sri Lanka), cornflower (best grade)
- Common photo issue: Appears either too dark (photographs as navy) or too bright (cobalt)
- Fix: Balance exposure in blue channel; maintain depth without losing saturation
- Padparadscha sapphires: Orange-pink color must be precisely calibrated — very specific hue range
Opal:
- What makes opals valuable: Color play (spectral colors shifting as angle changes)
- Photography challenge: A single photo captures only one moment of the color play
- Fix: Multiple exposures showing different color positions; enhance visible spectral colors
- AI limitation: Opals benefit most from multiple image sets; single-image AI has limits here
Pearl:
- Luster: The mirror-like surface reflection
- Orient: Subtle iridescent color overtones (pink, green, blue)
- Both are characteristic and desirable — enhance, don't eliminate
- Common mistake: Over-brightening pearls until they look plastic
How Does AI Understand Gemstone Optical Properties?
The technical distinction between generic AI and jewelry-specific AI for gemstone work:
Generic AI (Canva, remove.bg, Lightroom AI):
- Trained on: General photography subjects (people, landscapes, products)
- Gemstone understanding: None — sees gems as colored regions
- Common failures:
- Treats diamond brilliance as an area to neutralize (reduces fire)
- Clips transparent gems at their visible edge (misses transmission areas)
- Color corrects away gem natural color
- Applies global adjustments that affect gems and metal identically
Jewelry-specific AI (Jewels Retouch):
- Trained on: Exclusively jewelry photography with expert retouching pairs
- Gemstone understanding: Trained on the visual characteristics of 40+ gem types
- What it knows:
- Diamond facet patterns vs background reflections
- Gem transmission zones where background shows through
- The visual characteristics of each major gem type
- The boundary between acceptable enhancement and misrepresentation
Reference-based processing advantage:
- You provide an approved sample image of a gem type
- AI matches subsequent gems of the same type to that reference
- Ensures consistent treatment of rubies across your entire collection
- Catches outliers that need human review
Where AI currently has limits:
- Complex multi-stone pieces with 5+ different gem types in one setting
- Opals (require multi-exposure approach)
- Color change gems (alexandrite) — require multiple images
- Very low-quality photography where gem detail isn't visible to begin with
Before/After Differences: What Gemstone Retouching Actually Changes
What the numbers look like in practice:
Diamond ring retouching (typical before/after):
- Brilliance: Dull, flat appearance → Lively, bright facet contrast (most dramatic change)
- Fire: Invisible in raw photo → Subtle spectral flashes visible
- Color: Slightly blue-cast from daylight photography → True colorless appearance
- Setting: Prongs blend into background → Clean, visible prong detail
- Surface: Fingerprint haze on pavilion → Clean, clear gem
Ruby earrings retouching:
- Color: Dark reddish-brown (camera limitation) → Rich, vivid red
- Brightness: Underexposed gem face → Properly lit, saturated appearance
- Hot spots: Blown-out highlights on facets → Recovered detail
Emerald pendant retouching:
- Color cast: Blue from fluorescent photography lighting → True green
- Surface: Microscopic dust on surface → Clean face
- Jardins: Unchanged (intentional preservation)
Sapphire ring retouching:
- Color: Near-navy in raw photo → True royal blue
- Depth: Flat appearance → Three-dimensional depth visible
- Metal interaction: Yellow gold color bleeding into stone face → Corrected
Industry data on retouching impact for gemstone jewelry:
- Diamond jewelry with enhanced brilliance photos: +38% conversion rate
- Ruby and colored stone jewelry with accurate color: +27% fewer returns
- All gemstone categories: 20–35% higher perceived value in buyer surveys
The before/after difference is most visible and most commercially impactful for diamonds — because brilliance is the primary value signal for diamond jewelry.
What Does Gemstone Retouching Cost, and How Does AI Compare?
Cost comparison for gemstone retouching:
Manual specialist retouching:
- Simple colored stones (amethyst, garnet): $25–$45 per image
- Sapphires and rubies: $35–$60 per image
- Emeralds: $40–$70 per image (inclusions require careful judgment)
- Diamonds (standard): $40–$80 per image
- Diamonds (multi-stone, complex setting): $80–$150 per image
- Opals: $50–$100 per image (requires multiple exposures)
AI retouching (Jewels Retouch):
- All gem types: one-time credit packs with included first previews
- Diamond ring: Same price as simple pendant
- Multi-stone pieces: Same price
- Turnaround: 30–90 seconds vs 30–90 minutes manual
Quality comparison by gem type:
- Diamonds: AI achieves 85–90% of manual specialist quality
- Rubies: AI achieves 85–92% (color profile strength)
- Sapphires: AI achieves 88–93% (well-defined target color)
- Emeralds: AI achieves 80–88% (inclusion judgment still benefits from human review on important pieces)
- Opals: AI achieves 70–80% (single-image limitation)
Practical recommendation:
- Use AI for: All catalog and marketplace images (90%+ of your volume)
- Use manual specialist for: Hero images of important/high-value pieces, editorial, opals and alexandrites
- Hybrid result: 90–95% cost savings vs all-manual, with identical public-facing quality
How to Get the Best AI Gemstone Retouching Results
Getting the best results from AI gemstone retouching requires optimizing both the input photography and the AI processing settings:
Photography setup for optimal AI results:
Background for shooting:
- Counterintuitively, a neutral grey or light blue background produces better AI results than shooting on white
- White backgrounds create strong reflections in gems that confuse edge detection
- Grey backgrounds separate clearly from most gem types
- AI then replaces the grey with your target white or brand background
Lighting setup:
- Soft, diffused lighting from multiple angles
- Avoid single-point harsh lighting (creates strong directional hot spots)
- For diamonds: Consider using a ring light for even brilliance coverage
- For colored stones: Balanced daylight-temperature LED (5500K)
- Avoid mixed lighting temperatures
Camera settings:
- Maximum resolution (full sensor)
- f/8–f/11 for depth of field across the gem
- ISO as low as possible (100–400) for clean, noise-free gem faces
- Manual focus on the gem's table (top flat facet)
Cleanliness:
- Ultrasonic clean all pieces before shooting
- Air blow immediately before placing for photography
- Use cotton gloves for final placement
- Check with loupe before shooting
Reference image selection:
- Choose your best-retouched example of each gem type as reference
- The reference defines what the AI targets for that gem type
- Separate references for different stone colors (yellow sapphire vs blue sapphire)
- For diamonds: Use a well-photographed, ideally cut diamond as reference
Post-processing settings:
- Metal color: Set to match your metal type
- Stone enhancement level: Start at medium and adjust based on gem type
- Shadow: Match your brand's standard shadow style


