
AI ಆಭರಣ ರಿಟಚಿಂಗ್: ಸಂಪೂರ್ಣ ಆರಂಭಿಕರ ಮಾರ್ಗದರ್ಶಿ 2026
AI ಆಭರಣ ಫೋಟೋ ಸಂಪಾದನೆಗೆ ಹೊಸಬರೇ? ಕಚ್ಚಾ ಸ್ಮಾರ್ಟ್ಫೋನ್ ಫೋಟೋಗಳನ್ನು ವೃತ್ತಿಪರ ಉತ್ಪನ್ನ ಚಿತ್ರಗಳಾಗಿ ಪರಿವರ್ತಿಸುವುದು ಹೇಗೆ ಎಂದು ಕಲಿಯಿರಿ — ಹಂತ ಹಂತವಾಗಿ, ಯಾವುದೇ ಅನುಭವ ಅಗತ್ಯವಿಲ್ಲ.
ರೂಪಾಂತರ ನೋಡಿ
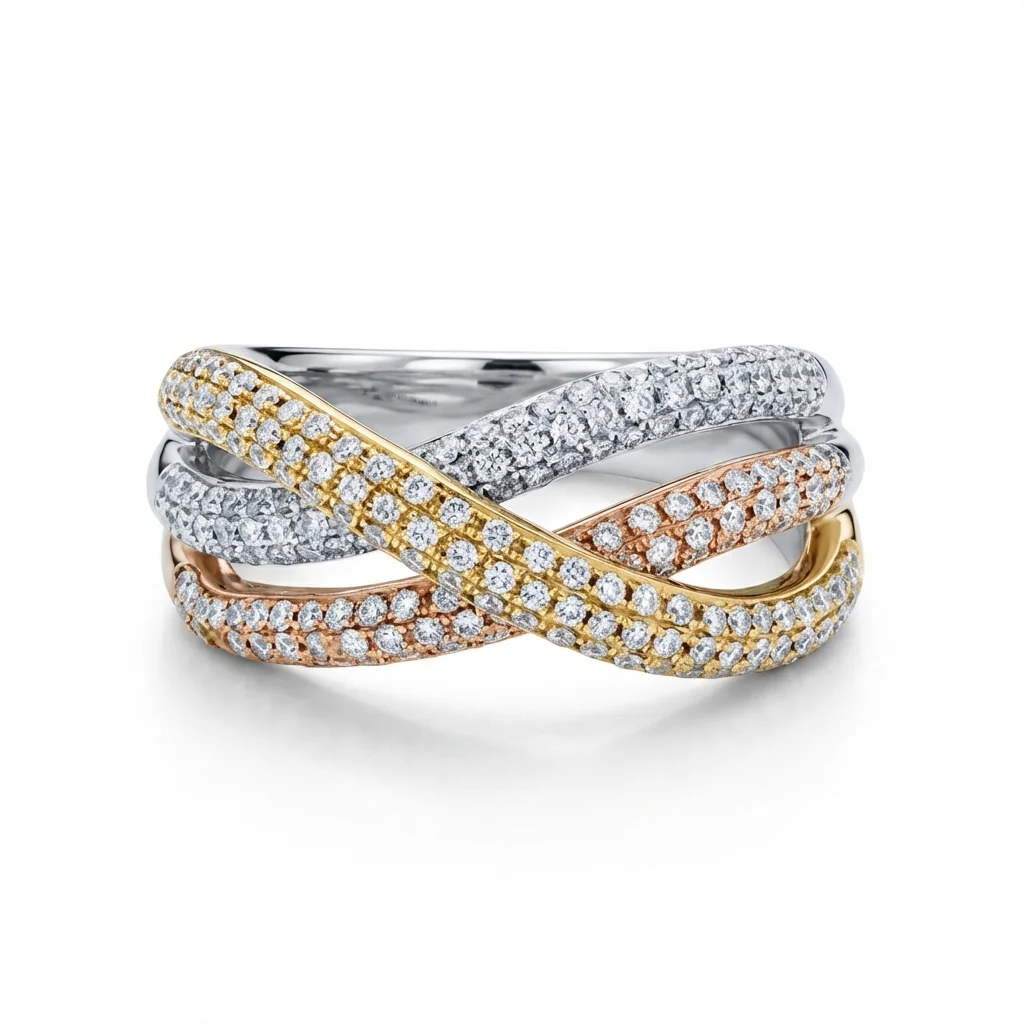
ಒಂದು ರಿಟಚ್ ಮಾಡಿದ ಆಭರಣ ಫೋಟೋ, ನಾಲ್ಕು ಉಪಯುಕ್ತ ಫಲಿತಾಂಶಗಳು.
ಕ್ಯಾಟಲಾಗ್ ರಿಟಚ್ ಅಡಿಪಾಯವಾಗಿದೆ: ಸ್ವಚ್ಛ ಹಿನ್ನೆಲೆ, ಪಾಲಿಶ್ ಮಾಡಿದ ಮೇಲ್ಮೈಗಳು, ಉಳಿಸಲಾದ ವಿನ್ಯಾಸ. ಆ ವಾಟರ್ಮಾರ್ಕ್-ರಹಿತ ಔಟ್ಪುಟ್ನಿಂದ, Instagram-ಶೈಲಿಯ ದೃಶ್ಯಗಳು, True-Scale Placement ಮಾಡೆಲ್ ಶಾಟ್ಗಳು, ಮತ್ತು 5-ಸೆಕೆಂಡ್ ಜಾಹೀರಾತು ವೀಡಿಯೊಗಳನ್ನು ರಚಿಸಿ.
ಹೋಲಿಸಲು ಎಳೆಯಿರಿ

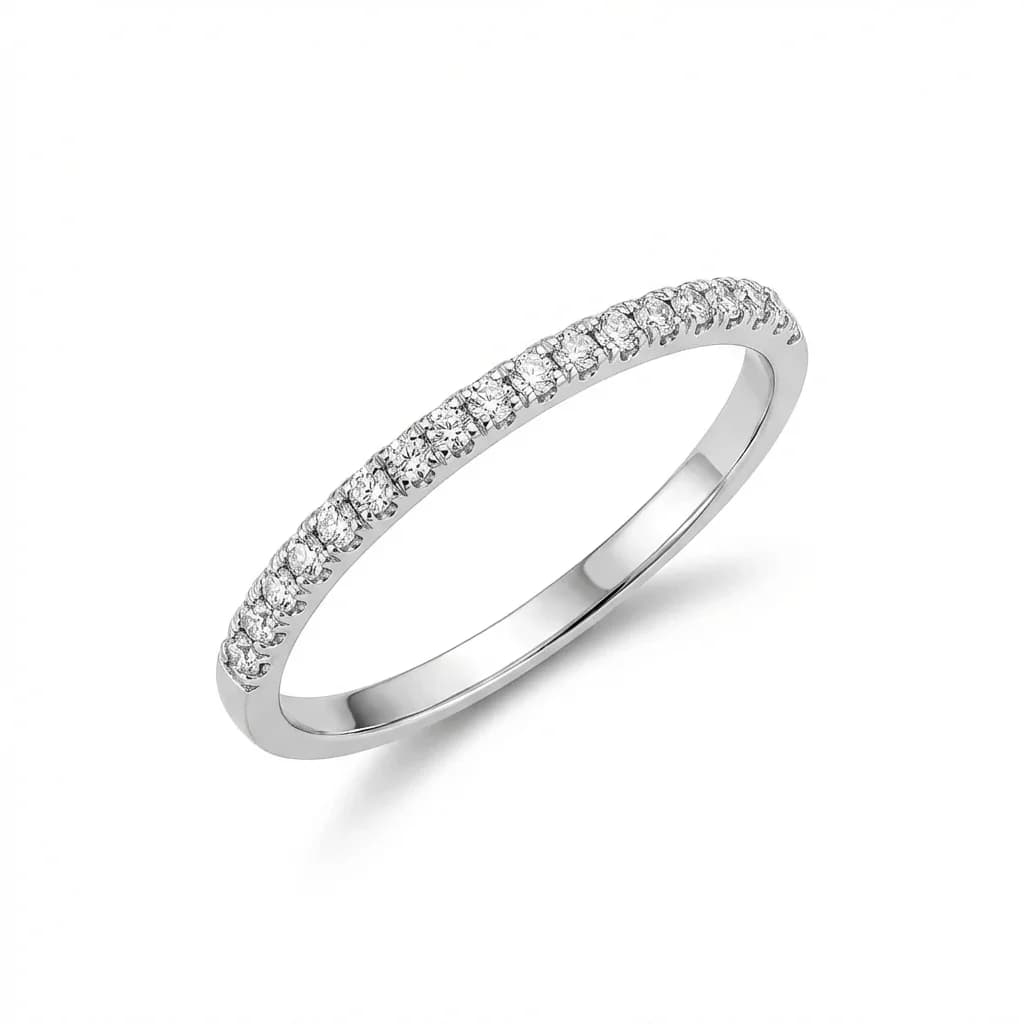
ಕ್ಯಾಟಲಾಗ್ ರಿಟಚಿಂಗ್
ಮೆರಗಿನ ಲೋಹ, ಉತ್ತೇಜಿತ ರತ್ನಗಲ್ಲು, ಮತ್ತು ಮಾರ್ಕೆಟ್ಪ್ಲೇಸ್-ಸಿದ್ಧ ಔಟ್ಪುಟ್ನೊಂದಿಗೆ ಸ್ವಚ್ಛ ಬಿಳಿ-ಹಿನ್ನೆಲೆ ಉತ್ಪನ್ನ ಫೋಟೋಗಳು.
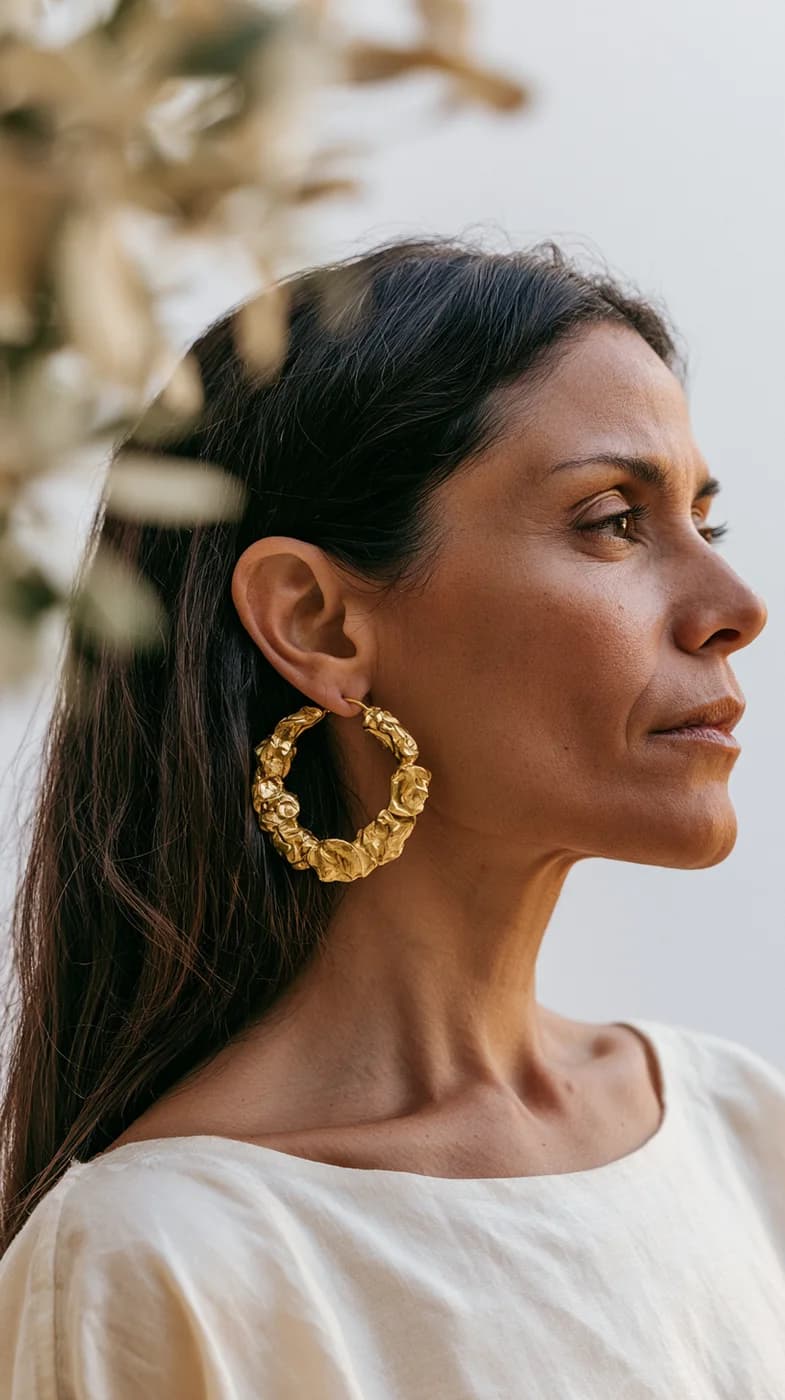
Instagram ದೃಶ್ಯಗಳು
ಸೃಜನಾತ್ಮಕ ಪ್ರಾಪ್ಸ್, ಮನಸ್ಥಿತಿ ಬೆಳಕು, ಮತ್ತು ಬ್ರ್ಯಾಂಡ್-ಸ್ಥಿರ ಕಥನದೊಂದಿಗೆ ಸಂಪಾದಕೀಯ ಶೈಲಿಯ ದೃಶ್ಯಗಳು.
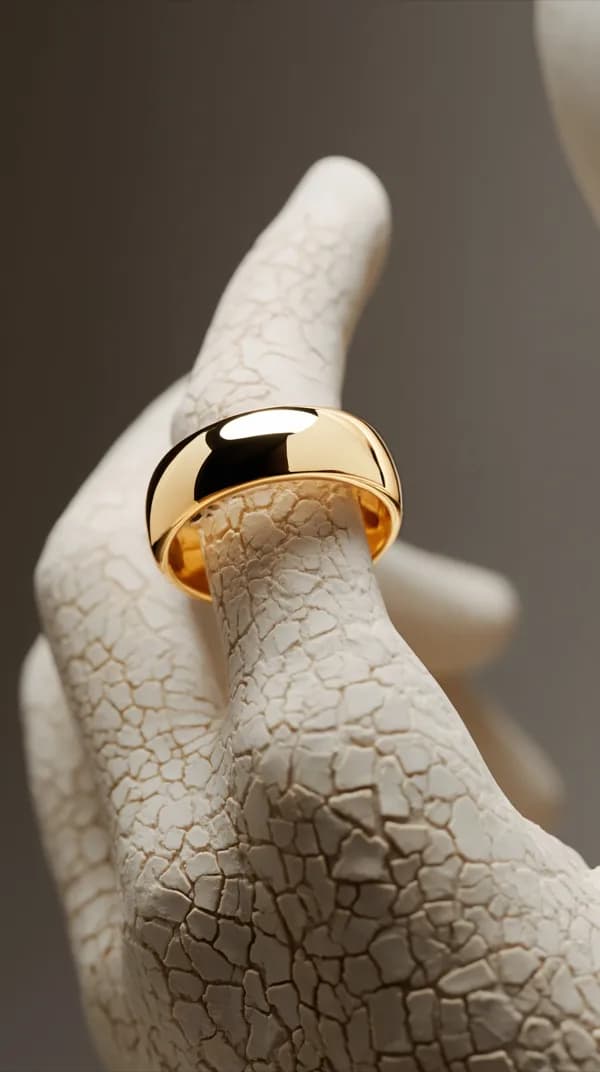
ಮಾಡೆಲ್ ಮೇಲೆ ಆಭರಣ
ನಿಮ್ಮ ನಿಖರ ಉಂಗುರ, ಕಿವಿ ಆಭರಣ, ನೆಕ್ಲೇಸ್, ಅಥವಾ ಬ್ರೇಸ್ಲೆಟ್ ಅನ್ನು ವಾಸ್ತವಿಕ ದೇಹ ಇರಿಸುವಿಕೆ ಮತ್ತು ಧರಿಸಿದ ಪ್ರಮಾಣದೊಂದಿಗೆ ಮಾಡೆಲ್ ಉಲ್ಲೇಖದ ಮೇಲೆ ವರ್ಗಾಯಿಸಿ.
AI ಆಭರಣ ರಿಟಚಿಂಗ್ ಎಂದರೇನು ಮತ್ತು ಅದು ಹೇಗೆ ಕೆಲಸ ಮಾಡುತ್ತದೆ?
AI ಆಭರಣ ರಿಟಚಿಂಗ್ ಎಂಬುದು ಸ್ವಯಂಚಾಲಿತ ಚಿತ್ರ ಸಂಪಾದನೆ ಪ್ರಕ್ರಿಯೆಯಾಗಿದ್ದು, ಸಾವಿರಾರು ಆಭರಣ ಫೋಟೋಗಳ ಮೇಲೆ ತರಬೇತಿ ಪಡೆದ ಯಂತ್ರ ಕಲಿಕೆ ಮಾದರಿಗಳು ಆಭರಣ ಚಿತ್ರದ ಪ್ರತಿಯೊಂದು ಅಂಶವನ್ನು ಪತ್ತೆಹಚ್ಚುತ್ತವೆ, ಪ್ರತ್ಯೇಕಿಸುತ್ತವೆ ಮತ್ತು ವರ್ಧಿಸುತ್ತವೆ. Photoshop ನಲ್ಲಿ ಗಂಟೆಗಳ ಕಾಲ ಕಳೆಯುವ ಬದಲು, ನೀವು ಫೋಟೋ ಅಪ್ಲೋಡ್ ಮಾಡಿ ಮತ್ತು AI ಹಿನ್ನೆಲೆ ತೆಗೆಯುವಿಕೆ, ಬೆಳಕಿನ ತಿದ್ದುಪಡಿ, ಬಣ್ಣ ಹೊಂದಾಣಿಕೆ ಮತ್ತು ವಿವರ ತೀಕ್ಷ್ಣಗೊಳಿಸುವಿಕೆಯನ್ನು ಸೆಕೆಂಡುಗಳಲ್ಲಿ ನಿಭಾಯಿಸುತ್ತದೆ.
ಸಾಂಪ್ರದಾಯಿಕ ಆಭರಣ ಫೋಟೋ ಸಂಪಾದನೆಗೆ ವರ್ಷಗಳ Photoshop ಅನುಭವ ಹೊಂದಿರುವ ವೃತ್ತಿಪರ ರಿಟಚರ್ ಅಗತ್ಯ. ಒಂದೇ ಚಿತ್ರವನ್ನು ಸಂಪಾದಿಸಲು 30–90 ನಿಮಿಷಗಳು ಬೇಕಾಗಬಹುದು ಮತ್ತು ಹೊರಗುತ್ತಿಗೆ ನೀಡಿದಾಗ ಪ್ರತಿ ಫೋಟೋಗೆ – ವೆಚ್ಚವಾಗಬಹುದು. 50 SKU ಗಳನ್ನು ಹೊಂದಿರುವ ಮಾರಾಟಗಾರರಿಗೆ, ಒಂದೇ ವಸ್ತು ಕಳುಹಿಸುವ ಮೊದಲು –,500 ಸಂಪಾದನೆ ಬಿಲ್ ಆಗುತ್ತದೆ.
AI ರಿಟಚಿಂಗ್ ವಿಭಿನ್ನವಾಗಿ ಕೆಲಸ ಮಾಡುತ್ತದೆ. Jewels Retouch ನಂತಹ ಉಪಕರಣಗಳನ್ನು ಶಕ್ತಿಗೊಳಿಸುವ ಮಾದರಿಗಳು ನಿರ್ದಿಷ್ಟವಾಗಿ ಆಭರಣಗಳ ಮೇಲೆ ತರಬೇತಿ ಪಡೆದಿವೆ — ಉಂಗುರಗಳು, ಹಾರಗಳು, ಕಂಕಣಗಳು, ಕಿವಿಯೋಲೆಗಳು, ಗಡಿಯಾರಗಳು — ಸಾಮಾನ್ಯ ಉತ್ಪನ್ನ ಫೋಟೋಗಳ ಮೇಲಲ್ಲ. ಈ ವಿಶೇಷೀಕರಣ ಮುಖ್ಯ ಏಕೆಂದರೆ ಆಭರಣವು ಅನನ್ಯ ಸವಾಲುಗಳನ್ನು ಒಡ್ಡುತ್ತದೆ:
- **ಪ್ರತಿಫಲಿತ ಮೇಲ್ಮೈಗಳು** ಹಿನ್ನೆಲೆ ಅಥವಾ ಬೆಳಕಿನಲ್ಲಿರುವ ಪ್ರತಿ ಅಪೂರ್ಣತೆಯನ್ನು ಹಿಡಿಯುತ್ತವೆ
- **ಸೂಕ್ಷ್ಮ ವಿವರಗಳು** ಪ್ರಾಂಗ್ ಸೆಟ್ಟಿಂಗ್ಗಳು ಮತ್ತು ಕೆತ್ತನೆಯಂತಹವು ಸಾಮಾನ್ಯ AI ಮಸುಕು ಮಾಡುತ್ತದೆ ಅಥವಾ ಕಳೆದುಕೊಳ್ಳುತ್ತದೆ
- **ಬಣ್ಣ ನಿಖರತೆ** ರತ್ನಗಳಿಗಾಗಿ ಖರೀದಿದಾರರು ಖರೀದಿ ಮೊದಲು ಗುಣಮಟ್ಟವನ್ನು ನಿರ್ಣಯಿಸಲು ಬಳಸುತ್ತಾರೆ
- **ಪಾರದರ್ಶಕ ವಸ್ತುಗಳು** ಗಾಜು ಅಥವಾ ಸ್ಫಟಿಕದಂತಹವು ಅಪಾರದರ್ಶಕ ವಸ್ತುಗಳಿಗಿಂತ ವಿಭಿನ್ನವಾಗಿ ವರ್ತಿಸುತ್ತವೆ
ನೀವು ಫೋಟೋ ಅಪ್ಲೋಡ್ ಮಾಡಿದಾಗ, AI ಹಲವಾರು ಕಾರ್ಯಗಳನ್ನು ಅನುಕ್ರಮವಾಗಿ ನಿರ್ವಹಿಸುತ್ತದೆ:
1. **ವಿಭಜನೆ** — ಮಾದರಿಯು ಆಭರಣ ವಸ್ತುವನ್ನು ಗುರುತಿಸುತ್ತದೆ ಮತ್ತು ಅದನ್ನು ಹಿನ್ನೆಲೆಯಿಂದ ಪಿಕ್ಸೆಲ್ ಪ್ರಕಾರ ಪ್ರತ್ಯೇಕಿಸುತ್ತದೆ 2. **ಹಿನ್ನೆಲೆ ಬದಲಾವಣೆ** — ಸ್ವಚ್ಛ ಬಿಳಿ, ಬೂದು ಅಥವಾ ಕಸ್ಟಮ್ ಹಿನ್ನೆಲೆಯನ್ನು ಸಹಜವಾಗಿ ಅನ್ವಯಿಸಲಾಗುತ್ತದೆ 3. **ಬೆಳಕಿನ ಸಮೀಕರಣ** — ಅಸಮ ನೆರಳುಗಳು ಮತ್ತು ಹಾಟ್ಸ್ಪಾಟ್ಗಳನ್ನು ಸ್ಟುಡಿಯೋ ಬೆಳಕನ್ನು ಅನುಕರಿಸಲು ಸುಗಮಗೊಳಿಸಲಾಗುತ್ತದೆ 4. **ವಿವರ ವರ್ಧನೆ** — ಲೋಹದ ವಿನ್ಯಾಸಗಳು ಮತ್ತು ಕಲ್ಲಿನ ಮುಖಗಳ ಮೇಲೆ ಸೂಕ್ಷ್ಮ-ವ್ಯತ್ಯಾಸವನ್ನು ಹೆಚ್ಚಿಸಲಾಗುತ್ತದೆ 5. **ಬಣ್ಣ ತಿದ್ದುಪಡಿ** — ಚಿನ್ನ ಚಿನ್ನವಾಗಿ, ಬೆಳ್ಳಿ ಬೆಳ್ಳಿಯಾಗಿ, ಮತ್ತು ರತ್ನಗಳ ಬಣ್ಣಗಳು ನೈಜ ಕಾಣುವಿಕೆಗೆ ಹೊಂದುತ್ತವೆ
ಸಂಪೂರ್ಣ ಪ್ರಕ್ರಿಯೆ ಕ್ಲೌಡ್ನಲ್ಲಿ ನಡೆಯುತ್ತದೆ, ಆದ್ದರಿಂದ ನಿಮ್ಮ ಸಾಧನವು ಅಪ್ಲೋಡ್ ಮತ್ತು ಫಲಿತಾಂಶವನ್ನು ಡೌನ್ಲೋಡ್ ಮಾಡುವುದನ್ನು ಮಾತ್ರ ನಿಭಾಯಿಸಬೇಕು. 5 ವರ್ಷ ಹಳೆಯ ಮಧ್ಯಮ ಶ್ರೇಣಿಯ ಸ್ಮಾರ್ಟ್ಫೋನ್ ಸಹ ಈ ಕಾರ್ಯಪ್ರವಾಹದ ಮೂಲಕ ಮಾರುಕಟ್ಟೆ-ಸಿದ್ಧ ಚಿತ್ರಗಳನ್ನು ಉತ್ಪಾದಿಸಬಹುದು. ಪ್ರಾಯೋಗಿಕ ಫಲಿತಾಂಶವೆಂದರೆ ಶೂನ್ಯ ಸಂಪಾದನೆ ಅನುಭವ ಹೊಂದಿರುವ ಆರಂಭಿಕರು ತಮ್ಮ ಮೊದಲ ಅವಧಿಯಲ್ಲೇ ವೃತ್ತಿಪರ ಸ್ಟುಡಿಯೋ ಶೂಟ್ನಿಂದ ಭೇದಿಸಲಾಗದ ಫೋಟೋಗಳನ್ನು ಉತ್ಪಾದಿಸಬಹುದು.
ಪ್ರಾರಂಭಿಸಲು ನಿಮಗೆ ಯಾವ ಉಪಕರಣಗಳು ಬೇಕು?
ಆಧುನಿಕ ಸ್ಮಾರ್ಟ್ಫೋನ್ ಪ್ರಾರಂಭಿಸಲು ನಿಜವಾಗಿಯೂ ಸಾಕು. iPhone 11 ನಂತರದ ಯಾವುದೇ iPhone ಅಥವಾ 2020 ನಂತರದ ಯಾವುದೇ Android ಫ್ಲ್ಯಾಗ್ಶಿಪ್ AI ರಿಟಚಿಂಗ್ಗೆ ಫೀಡ್ ಮಾಡಲು ಸಾಕಷ್ಟು ರೆಸಲ್ಯೂಶನ್ ಮತ್ತು ಡೈನಾಮಿಕ್ ರೇಂಜ್ನೊಂದಿಗೆ ಫೋಟೋಗಳನ್ನು ಶೂಟ್ ಮಾಡುತ್ತದೆ ಮತ್ತು ವೃತ್ತಿಪರವಾಗಿ ಕಾಣುತ್ತದೆ.
ಆಭರಣ ಛಾಯಾಗ್ರಹಣದಲ್ಲಿ ಅತಿದೊಡ್ಡ ತಪ್ಪು ನಂಬಿಕೆ ಎಂದರೆ ಸ್ಪರ್ಧಿಸಲು ನಿಮಗೆ ದುಬಾರಿ ಉಪಕರಣಗಳು ಬೇಕು. ನಿಮಗೆ ಬೇಕಿಲ್ಲ. ನಿಮಗೆ ನಿಜವಾಗಿ ಏನು ಬೇಕು ಮತ್ತು ಏನು ಐಚ್ಛಿಕ ಎಂಬುದು ಇಲ್ಲಿದೆ:
**ಅವಶ್ಯಕ (ಉಚಿತ ಅಥವಾ ಒಳಗೆ)**
- 12MP+ ಕ್ಯಾಮೆರಾ ಹೊಂದಿರುವ ಸ್ಮಾರ್ಟ್ಫೋನ್ (ನೀವು ಈಗಾಗಲೇ ಇದನ್ನು ಹೊಂದಿರಬಹುದು)
- ಸ್ಥಿರ ಮೇಲ್ಮೈ — ಒಂದು ಮೇಜು, ಪುಸ್ತಕಗಳ ರಾಶಿ, ಅಥವಾ ಮಿನಿ ಟ್ರೈಪಾಡ್
- ಉತ್ತರ ಮುಖ ಕಿಟಕಿಯಿಂದ ನೈಸರ್ಗಿಕ ಹಗಲು ಬೆಳಕು, ಅಥವಾ ಒಂದು ಬಿಳಿ LED ಡೆಸ್ಕ್ ಲ್ಯಾಂಪ್
- ಹಿನ್ನೆಲೆಯಾಗಿ ಸಾಮಾನ್ಯ ಬಿಳಿ ಕಾಗದ ಅಥವಾ ಕಾರ್ಡ್
**ಇದ್ದರೆ ಒಳ್ಳೆಯದು ( ಒಳಗೆ)**
- ಸ್ಥಿರ ವಿಸರಿತ ಬೆಳಕಿಗಾಗಿ ಲೈಟ್ಬಾಕ್ಸ್ ಅಥವಾ ಫೋಟೋ ಟೆಂಟ್ (– Amazon ನಲ್ಲಿ)
- ಒಂದು ಬದಿಯ ನೆರಳುಗಳನ್ನು ತೆಗೆಯಲು ಎರಡನೇ ಸಣ್ಣ LED ಬೆಳಕು
- ಆಭರಣ ಸ್ಟ್ಯಾಂಡ್ಗಳು ಅಥವಾ ಪ್ರಾಪ್ಸ್ (ಉಂಗುರ ಕೋನ್ಗಳು, ನೆಕ್ಲೇಸ್ ಬಸ್ಟ್ಗಳು) ಸ್ಥಿರ ಸ್ಥಾನೀಕರಣಕ್ಕಾಗಿ
- ತೀವ್ರ ಕ್ಲೋಸ್-ಅಪ್ ವಿವರ ಶಾಟ್ಗಳಿಗಾಗಿ ನಿಮ್ಮ ಫೋನ್ಗೆ ಜೋಡಿಸುವ ಮ್ಯಾಕ್ರೋ ಕ್ಲಿಪ್ ಲೆನ್ಸ್ (–)
**ಆರಂಭಿಕರಿಗೆ ಅಗತ್ಯವಿಲ್ಲ**
- DSLR ಅಥವಾ ಮಿರರ್ಲೆಸ್ ಕ್ಯಾಮೆರಾ — ಉತ್ತಮ ಸೆನ್ಸರ್ ನೀಡುವ ಹೆಚ್ಚಿನದನ್ನು AI ನಿಭಾಯಿಸುತ್ತದೆ
- Adobe Lightroom ಅಥವಾ Photoshop — ಉತ್ಪನ್ನ ಶಾಟ್ಗಳಿಗೆ AI ಇವುಗಳನ್ನು ಬದಲಿಸುತ್ತದೆ
- ವೃತ್ತಿಪರ ಛಾಯಾಗ್ರಹಣ ಸ್ಟುಡಿಯೋ — AI ಹಿನ್ನೆಲೆ ತೆಗೆಯುವಿಕೆ ಅಗತ್ಯವನ್ನು ನಿವಾರಿಸುತ್ತದೆ
ಹೆಚ್ಚಿನ ಹೊಸ ಮಾರಾಟಗಾರರನ್ನು ಆಶ್ಚರ್ಯಪಡಿಸುವ ಒಂದು ಡೇಟಾ ಅಂಶ: 2024 Etsy ಮಾರಾಟಗಾರ ಸಮೀಕ್ಷೆಯಲ್ಲಿ, AI-ವರ್ಧಿತ ಸ್ಮಾರ್ಟ್ಫೋನ್ ಫೋಟೋಗಳನ್ನು ಬಳಸಿದ ಪಟ್ಟಿಗಳು ಸಂಪಾದನೆ ಇಲ್ಲದೆ ಎಂಟ್ರಿ-ಲೆವೆಲ್ DSLR ಕ್ಯಾಮೆರಾಗಳಲ್ಲಿ ಶೂಟ್ ಮಾಡಿದ ಪಟ್ಟಿಗಳಿಗಿಂತ ಉತ್ತಮ ಕಾರ್ಯಕ್ಷಮತೆ ತೋರಿಸಿದವು. ಆನ್ಲೈನ್ ಮಾರುಕಟ್ಟೆಗಳಿಗೆ ಅಂತಿಮ ಚಿತ್ರ ಗುಣಮಟ್ಟವನ್ನು ನಿರ್ಧರಿಸುವುದು ಸಂಪಾದನೆ ಹಂತ, ಕ್ಯಾಪ್ಚರ್ ಹಂತವಲ್ಲ.
ನೀವು ಶೂನ್ಯದಿಂದ ಪ್ರಾರಂಭಿಸುತ್ತಿದ್ದರೆ, ಉಪಕರಣಗಳಿಗೆ /bin/zsh ಮತ್ತು ನಿಮ್ಮ ಮೊದಲ AI ರಿಟಚಿಂಗ್ ಸೇವೆಯ ಉಚಿತ ಪ್ರಯೋಗಕ್ಕೆ /bin/zsh ಖರ್ಚು ಮಾಡಿ. ನಿಮ್ಮ ಫೋಟೋಗಳಲ್ಲಿ ನಿಜವಾಗಿ ಯಾವ ನಿರ್ದಿಷ್ಟ ಮಿತಿಗಳಿವೆ ಎಂದು ಅರ್ಥವಾದ ನಂತರವೇ ಉಪಕರಣಗಳನ್ನು ಅಪ್ಗ್ರೇಡ್ ಮಾಡಿ — ಹೆಚ್ಚಿನ ಆರಂಭಿಕರು ಆ ಮಿತಿಗಳನ್ನು ಎಂದಿಗೂ ತಲುಪುವುದಿಲ್ಲ.
ಅತ್ಯುತ್ತಮ AI ಫಲಿತಾಂಶಗಳಿಗಾಗಿ ಆಭರಣವನ್ನು ಹೇಗೆ ಛಾಯಾಗ್ರಹಿಸಬೇಕು?
AI ರಿಟಚಿಂಗ್ ಅನೇಕ ಸಮಸ್ಯೆಗಳನ್ನು ಸರಿಪಡಿಸಬಹುದು, ಆದರೆ ಇನ್ಪುಟ್ ಫೋಟೋ ಸ್ಪಷ್ಟ, ಸಮಾನ ಬೆಳಕಿನ ಮತ್ತು ಸರಳ ವ್ಯತ್ಯಾಸದ ಹಿನ್ನೆಲೆಯ ಮೇಲೆ ಶೂಟ್ ಮಾಡಿದಾಗ ಅತ್ಯುತ್ತಮವಾಗಿ ಕಾರ್ಯನಿರ್ವಹಿಸುತ್ತದೆ. ಸೆಟಪ್ನಲ್ಲಿ ಎರಡು ಹೆಚ್ಚುವರಿ ನಿಮಿಷಗಳನ್ನು ಕಳೆಯುವುದು ಹತ್ತು ನಿಮಿಷಗಳ AI ಟಚ್-ಅಪ್ ಅನ್ನು ಉಳಿಸುತ್ತದೆ ಮತ್ತು ಗಮನಾರ್ಹವಾಗಿ ಸ್ವಚ್ಛ ಅಂತಿಮ ಫಲಿತಾಂಶಗಳನ್ನು ಉತ್ಪಾದಿಸುತ್ತದೆ.
AI ರಿಟಚಿಂಗ್ ಅನ್ನು ಕುಶಲ ಸಂಪಾದಕನೆಂದು ಯೋಚಿಸಿ, ಮಾಂತ್ರಿಕನಲ್ಲ. ಮಸುಕಾದ ಫೋಟೋಗಳನ್ನು ಸ್ಪಷ್ಟತೆಯಾಗಿ ತೀಕ್ಷ್ಣಗೊಳಿಸಲಾಗುವುದಿಲ್ಲ, ಮತ್ತು ಕಿತ್ತಳೆ ಮೋಂಬತ್ತಿ ಬೆಳಕಿನಲ್ಲಿ ತೆಗೆದ ಫೋಟೋಗೆ ಯಾವ ಉಪಕರಣವೂ ಪರಿಪೂರ್ಣವಾಗಿ ತೆಗೆಯಲಾಗದ ಬಣ್ಣ ವ್ಯತ್ಯಾಸಗಳಿರುತ್ತವೆ. ಈಗ ನೀವು ಅನುಸರಿಸಬಹುದಾದ ಪ್ರಾಯೋಗಿಕ ಸೆಟಪ್ ಮಾರ್ಗದರ್ಶಿ ಇಲ್ಲಿದೆ:
**ಹಂತ 1: ನಿಮ್ಮ ಹಿನ್ನೆಲೆಯನ್ನು ಆರಿಸಿ** ನಿಮ್ಮ ಆಭರಣವನ್ನು ಮ್ಯಾಟ್ ಬಿಳಿ ಮೇಲ್ಮೈ ಮೇಲೆ ಇರಿಸಿ — ಬಿಳಿ ಕಾರ್ಡ್ಸ್ಟಾಕ್, ಬಿಳಿ ಸೆರಾಮಿಕ್ ಟೈಲ್, ಅಥವಾ ಬಿಳಿ ಬಟ್ಟೆ ಸ್ವೀಪ್. ಹೊಳಪು ಬಿಳಿ (ಪ್ರತಿಫಲನ ಸೃಷ್ಟಿಸುತ್ತದೆ), ಕಪ್ಪು (ಹೊರತೆಗೆಯುವಿಕೆ ಕಷ್ಟ), ಅಥವಾ ವಿನ್ಯಾಸದ ಮೇಲ್ಮೈಗಳನ್ನು (ತುಣುಕಿನಿಂದ ಗಮನ ಸೆಳೆಯುತ್ತದೆ) ತಪ್ಪಿಸಿ. ಬೆಳ್ಳಿ ಆಭರಣಕ್ಕೆ ಬೂದು ಹಿನ್ನೆಲೆಗಳೂ ಚೆನ್ನಾಗಿ ಕೆಲಸ ಮಾಡುತ್ತವೆ.
**ಹಂತ 2: ನಿಮ್ಮ ಬೆಳಕನ್ನು ಸ್ಥಾಪಿಸಿ** ಕಿಟಕಿ ಅಥವಾ ಲ್ಯಾಂಪ್ ಅನ್ನು ಆಭರಣಕ್ಕೆ 45-ಡಿಗ್ರಿ ಕೋನದಲ್ಲಿ ಇರಿಸಿ, ನೇರವಾಗಿ ಮೇಲೆ ಅಲ್ಲ. ಇದು ಲೋಹದಲ್ಲಿ ವಿನ್ಯಾಸ ಮತ್ತು ಕಲ್ಲುಗಳಲ್ಲಿ ಹೊಳಪು ಬಹಿರಂಗಪಡಿಸುವ ಮೃದು ಪಕ್ಕದ ಬೆಳಕನ್ನು ಸೃಷ್ಟಿಸುತ್ತದೆ. ನಿಮ್ಮ ಫೋನ್ನಿಂದ ನೇರ ಫ್ಲ್ಯಾಶ್ ಅನ್ನು ತಪ್ಪಿಸಿ — ಅದು ಆಭರಣವನ್ನು ಸುಂದರವಾಗಿಸುವ ಎಲ್ಲ ವಿವರಗಳನ್ನು ಚಪ್ಪಟೆ ಮಾಡುತ್ತದೆ.
**ಹಂತ 3: ನಿಮ್ಮ ಕ್ಯಾಮೆರಾವನ್ನು ಸ್ಥಿರಗೊಳಿಸಿ** ಸ್ವಲ್ಪ ಕೈ ಅಲುಗಾಟವೂ ಪ್ರಾಂಗ್ ತುದಿಗಳು ಮತ್ತು ಕಲ್ಲಿನ ಮುಖಗಳಂತಹ ಸೂಕ್ಷ್ಮ ವಿವರಗಳನ್ನು ಮಸುಕುಗೊಳಿಸುತ್ತದೆ. ನಿಮ್ಮ ಫೋನ್ ಅನ್ನು ಗ್ಲಾಸ್ ವಿರುದ್ಧ ಆನಿಸಿ ಅಥವಾ ಮಿನಿ ಟ್ರೈಪಾಡ್ ಬಳಸಿ. ನಿಮ್ಮ ಕೈ ಬಟನ್ ಬಿಟ್ಟ ನಂತರ ಶಟರ್ ಒತ್ತುವಂತೆ ನಿಮ್ಮ ಕ್ಯಾಮೆರಾದ ಟೈಮರ್ ಸಕ್ರಿಯಗೊಳಿಸಿ.
**ಹಂತ 4: ಹತ್ತಿರ ಮತ್ತು ಸ್ಪಷ್ಟವಾಗಿ ತೆಗೆಯಿರಿ** ಫ್ರೇಮ್ನ 60–80% ಆಭರಣದಿಂದ ತುಂಬಿಸಿ. ತುಣುಕಿನ ಮೇಲೆ ನೇರವಾಗಿ ಫೋಕಸ್ ಮಾಡಲು ನಿಮ್ಮ ಫೋನ್ ಕ್ಯಾಮೆರಾದಲ್ಲಿ ಪರದೆಯನ್ನು ಟ್ಯಾಪ್ ಮಾಡಿ. ಉಂಗುರಗಳಿಗೆ, ಮಧ್ಯದ ಕಲ್ಲಿನ ಮೇಲೆ ಫೋಕಸ್ ಮಾಡಿ. ಸರಪಳಿಗಳಿಗೆ, ಕ್ಲಾಸ್ಪ್ ಅಥವಾ ಪ್ರಮುಖ ಪೆಂಡೆಂಟ್ ಮೇಲೆ ಫೋಕಸ್ ಮಾಡಿ.
**ಹಂತ 5: ಅನೇಕ ಕೋನಗಳಿಂದ ಶೂಟ್ ಮಾಡಿ** ಪ್ರತಿ ತುಣುಕಿಗೆ, ಕನಿಷ್ಠ ಇವನ್ನು ಸೆರೆಹಿಡಿಯಿರಿ:
- ನೇರ ಮೇಲಿನಿಂದ ಫ್ಲ್ಯಾಟ್ ಲೇ (ಹೀರೋ ಶಾಟ್)
- ಆಳ ಮತ್ತು ಎತ್ತರ ತೋರಿಸುವ 45-ಡಿಗ್ರಿ ಕೋನ
- ಕಲ್ಲು ಅಥವಾ ಪ್ರಾಥಮಿಕ ವಿನ್ಯಾಸ ಅಂಶದ ಕ್ಲೋಸ್-ಅಪ್ ವಿವರ
**ಸಾಮಾನ್ಯ ಬೆಳಕಿನ ತಪ್ಪುಗಳು ಮತ್ತು ಪರಿಹಾರಗಳು:**
- ಹಳದಿ/ಕಿತ್ತಳೆ ಬಣ್ಣ: ಹಗಲು ಬೆಳಕಿಗೆ ಸ್ಥಳಾಂತರಿಸಿ ಅಥವಾ ಹಗಲು-ಸಮತೋಲಿತ LED (5000K–6500K) ಬಳಸಿ
- ಕಲ್ಲುಗಳ ಕೆಳಗೆ ಕಠಿಣ ನೆರಳುಗಳು: ಎದುರು ಬದಿಯಲ್ಲಿ ಎರಡನೇ ಬೆಳಕಿನ ಮೂಲ ಅಥವಾ ರಿಫ್ಲೆಕ್ಟರ್ ಸೇರಿಸಿ
- ಲೋಹದ ಮೇಲೆ ಹೆಚ್ಚು ಪ್ರಕಾಶಮಾನವಾದ ಹೈಲೈಟ್ಗಳು: ಬೆಳಕನ್ನು ದೂರ ಸರಿಸಿ ಅಥವಾ ಡಿಫ್ಯೂಸರ್ ಸೇರಿಸಿ (ಬಿಳಿ ಟಿಶ್ಯೂ ಪೇಪರ್ ಕೆಲಸ ಮಾಡುತ್ತದೆ)
ಸ್ವಚ್ಛ ಮೂಲ ಫೋಟೋಗಳೊಂದಿಗೆ, AI ರಿಟಚಿಂಗ್ ಸಾಮಾನ್ಯವಾಗಿ Etsy ನಂತಹ ಪ್ಲಾಟ್ಫಾರ್ಮ್ಗಳಲ್ಲಿ ಫೋಟೋ ಗುಣಮಟ್ಟ ಸ್ಕೋರ್ಗಳನ್ನು ಕಳಪೆ ಬೆಳಕಿನ ಶಾಟ್ನಿಂದ ಪ್ರಾರಂಭಿಸುವುದಕ್ಕೆ ಹೋಲಿಸಿ 25–40% ಹೆಚ್ಚಿಸುತ್ತದೆ.
ಹಂತ-ಹಂತವಾಗಿ: Jewels Retouch ಅನ್ನು ಮೊದಲ ಬಾರಿ ಬಳಸುವುದು
ಸಂಪೂರ್ಣ Jewels Retouch ಕಾರ್ಯಪ್ರವಾಹ ಅಪ್ಲೋಡ್ನಿಂದ ಡೌನ್ಲೋಡ್ವರೆಗೆ ಎರಡು ನಿಮಿಷಗಳಿಗಿಂತ ಕಡಿಮೆ ಸಮಯ ತೆಗೆದುಕೊಳ್ಳುತ್ತದೆ. ನಿಮ್ಮ ಮೊದಲ ಚಿತ್ರವನ್ನು ಪ್ರಯತ್ನಿಸಲು ನಿಮಗೆ ಖಾತೆ ಅಗತ್ಯವಿಲ್ಲ — ಸೈಟ್ಗೆ ಹೋಗಿ, ನಿಮ್ಮ ಫೋಟೋವನ್ನು ಹಾಕಿ, ಮತ್ತು AI 30 ಸೆಕೆಂಡುಗಳಲ್ಲಿ ರಿಟಚ್ ಮಾಡಿದ ಆವೃತ್ತಿಯನ್ನು ಹಿಂತಿರುಗಿಸುತ್ತದೆ.
ನಿಮ್ಮ ಮೊದಲ ರಿಟಚ್ಗಾಗಿ ನಿಖರ ಪ್ರಕ್ರಿಯೆ ಇಲ್ಲಿದೆ:
**ಹಂತ 1: ನಿಮ್ಮ ಫೋಟೋವನ್ನು ತಯಾರಿಸಿ** ನಿಮ್ಮ ಫೋನ್ನಿಂದ ಅತ್ಯುತ್ತಮ ಶಾಟ್ ಅನ್ನು ನಿಮ್ಮ ಕಂಪ್ಯೂಟರ್ಗೆ ರಫ್ತು ಮಾಡಿ, ಅಥವಾ ನಿಮ್ಮ ಫೋನ್ ಬ್ರೌಸರ್ನಿಂದ ನೇರವಾಗಿ ಕೆಲಸ ಮಾಡಿ. JPEG ಅಥವಾ PNG ಎರಡೂ ಕೆಲಸ ಮಾಡುತ್ತವೆ. 25MB ವರೆಗಿನ ಫೈಲ್ ಗಾತ್ರ ಸ್ವೀಕರಿಸಲಾಗುತ್ತದೆ, ಆದ್ದರಿಂದ ಮೊದಲು ಕುಗ್ಗಿಸುವ ಅಗತ್ಯವಿಲ್ಲ.
**ಹಂತ 2: ಅಪ್ಲೋಡ್ ಮಾಡಿ** ನಿಮ್ಮ ಚಿತ್ರವನ್ನು jewelsretouch.com ನಲ್ಲಿ ಅಪ್ಲೋಡ್ ಪ್ರದೇಶಕ್ಕೆ ಎಳೆದು ಬಿಡಿ, ಅಥವಾ ಮೊಬೈಲ್ನಲ್ಲಿ ಅಪ್ಲೋಡ್ ಬಟನ್ ಟ್ಯಾಪ್ ಮಾಡಿ. ಫೈಲ್ ತಕ್ಷಣ ಅಪ್ಲೋಡ್ ಆಗುತ್ತದೆ — ನಿಮ್ಮ ಮೊದಲ ಉಚಿತ ಚಿತ್ರಕ್ಕೆ ಖಾತೆ ಅಗತ್ಯವಿಲ್ಲ.
**ಹಂತ 3: ನಿಮ್ಮ ಶೈಲಿ ಉಲ್ಲೇಖವನ್ನು ಆರಿಸಿ (ಐಚ್ಛಿಕ)** Jewels Retouch ಔಟ್ಪುಟ್ ಶೈಲಿಯನ್ನು ಹೊಂದಿಸಲು ಉಲ್ಲೇಖ ಚಿತ್ರವನ್ನು ಆಯ್ಕೆ ಮಾಡಲು ಅನುಮತಿಸುತ್ತದೆ — ನಿಮ್ಮ ಫೋಟೋಗಳನ್ನು ಅಸ್ತಿತ್ವದಲ್ಲಿರುವ ಕ್ಯಾಟಲಾಗ್ ಸೌಂದರ್ಯಶಾಸ್ತ್ರಕ್ಕೆ ಹೊಂದಿಸಲು ಉಪಯುಕ್ತ. ಆರಂಭಿಕರಿಗೆ, ಇದನ್ನು ಬಿಟ್ಟು ಡೀಫಾಲ್ಟ್ ಸ್ವಚ್ಛ ಬಿಳಿ ಹಿನ್ನೆಲೆ ಬಳಸಿ.
**ಹಂತ 4: AI ಗಾಗಿ ಕಾಯಿರಿ** ಪ್ರಕ್ರಿಯೆ ಪೈಪ್ಲೈನ್ ಚಿತ್ರ ಸಂಕೀರ್ಣತೆಯನ್ನು ಅವಲಂಬಿಸಿ 20–45 ಸೆಕೆಂಡುಗಳನ್ನು ತೆಗೆದುಕೊಳ್ಳುತ್ತದೆ. ಒಂದೇ ಕಲ್ಲಿನ ಉಂಗುರ ಸಂಕೀರ್ಣ ಬಹು-ಕಲ್ಲಿನ ಝುಮುಕಿ ಕಿವಿಯೋಲೆಗಿಂತ ವೇಗವಾಗಿ ಪ್ರಕ್ರಿಯೆಗೊಳ್ಳುತ್ತದೆ. ನೀವು ಪ್ರಗತಿ ಸೂಚಕವನ್ನು ನೋಡುತ್ತೀರಿ.
**ಹಂತ 5: ಫಲಿತಾಂಶವನ್ನು ಪರಿಶೀಲಿಸಿ** ಮೊದಲು/ನಂತರ ಹೋಲಿಕೆ ನಿಮ್ಮ ಬ್ರೌಸರ್ನಲ್ಲಿ ಲೋಡ್ ಆಗುತ್ತದೆ. ಪರಿಶೀಲಿಸಬೇಕಾದ ಮುಖ್ಯ ವಿಷಯಗಳು:
- ಹಿನ್ನೆಲೆ ಸಂಪೂರ್ಣವಾಗಿ ಸ್ವಚ್ಛವಾಗಿದೆಯೇ (ಪ್ರಾಂಗ್ಗಳ ಸುತ್ತ ಯಾವುದೇ ಘೋಸ್ಟಿಂಗ್ ಅಥವಾ ಅಲೆದಾಡುವ ಪಿಕ್ಸೆಲ್ಗಳಿಲ್ಲ)?
- ಲೋಹದ ಬಣ್ಣ ನಿಖರವಾಗಿ ಕಾಣುತ್ತಿದೆಯೇ?
- ಕಲ್ಲಿನ ಬಣ್ಣಗಳು ಮೂಲಕ್ಕೆ ಸರಿಯಾಗಿವೆಯೇ?
- ಆಭರಣದ ಅಂಚು ಸ್ಪಷ್ಟ ಮತ್ತು ನೈಸರ್ಗಿಕವಾಗಿ ಕಾಣುತ್ತಿದೆಯೇ?
**ಹಂತ 6: ಡೌನ್ಲೋಡ್ ಮಾಡಿ ಮತ್ತು ಬಳಸಿ** ಪಾರದರ್ಶಕ ಹಿನ್ನೆಲೆಯೊಂದಿಗೆ ಹೈ-ರೆಸಲ್ಯೂಶನ್ PNG (ಗರಿಷ್ಠ ಹೊಂದಿಕೊಳ್ಳುವಿಕೆಗಾಗಿ) ಅಥವಾ Amazon, Etsy, ಅಥವಾ Shopify ಗೆ ಸಿದ್ಧವಾದ ಬಿಳಿ ಹಿನ್ನೆಲೆ ಆವೃತ್ತಿಯನ್ನು ಡೌನ್ಲೋಡ್ ಮಾಡಿ. ಫೈಲ್ ಸಾಮಾನ್ಯವಾಗಿ 2000×2000px ಆಗಿರುತ್ತದೆ, ಇದು ಎಲ್ಲಾ ಪ್ರಮುಖ ಪ್ಲಾಟ್ಫಾರ್ಮ್ಗಳ ಚಿತ್ರ ಗಾತ್ರ ಅವಶ್ಯಕತೆಗಳನ್ನು ಪೂರೈಸುತ್ತದೆ.
**ಹೊಂದಾಣಿಕೆಗಳು ಬೇಕಾದರೆ ಏನು ಮಾಡಬೇಕು** ಹೆಚ್ಚಿನ ಮೊದಲ ಬಾರಿಯ ಬಳಕೆದಾರರು ಡೀಫಾಲ್ಟ್ ಫಲಿತಾಂಶದಿಂದ ತೃಪ್ತರಾಗಿರುತ್ತಾರೆ. ಹಿನ್ನೆಲೆ ತೆಗೆಯುವಿಕೆಯು ಸಣ್ಣ ಪ್ರದೇಶವನ್ನು ತಪ್ಪಿಸಿದರೆ, ಅಥವಾ ಬಣ್ಣ ಸ್ವಲ್ಪ ತಪ್ಪಾಗಿ ಕಂಡರೆ, ಹೆಚ್ಚು ನಿರ್ದಿಷ್ಟ ರೂಪಕ್ಕೆ AI ಅನ್ನು ಮಾರ್ಗದರ್ಶಿಸಲು ಶೈಲಿ ಉಲ್ಲೇಖ ಹೊಂದಾಣಿಕೆ ವೈಶಿಷ್ಟ್ಯವನ್ನು ಬಳಸಿ. ನೀವು ಸ್ವಲ್ಪ ವಿಭಿನ್ನ ಕ್ರಾಪ್ ಅಥವಾ ಕೋನದೊಂದಿಗೆ ಮರು-ಅಪ್ಲೋಡ್ ಮಾಡಬಹುದು.
ಕಲಿಕೆ ವಕ್ರರೇಖೆ ನಿಜವಾಗಿಯೂ ಸಮತಟ್ಟಾಗಿದೆ. ಹೆಚ್ಚಿನ ಹೊಸ ಬಳಕೆದಾರರು ತಮ್ಮ ಮೊದಲ ಪ್ರಯತ್ನದಲ್ಲೇ ಮಾರುಕಟ್ಟೆ-ಸಿದ್ಧ ಚಿತ್ರವನ್ನು ಉತ್ಪಾದಿಸುತ್ತಾರೆ.
ಅತ್ಯಂತ ಸಾಮಾನ್ಯ ಆರಂಭಿಕ ತಪ್ಪುಗಳು ಯಾವುವು?
ಮೂರು ಅತ್ಯಂತ ಸಾಮಾನ್ಯ ಆರಂಭಿಕ ತಪ್ಪುಗಳೆಂದರೆ ಕಳಪೆ ಬೆಳಕಿನಲ್ಲಿ ಶೂಟ್ ಮಾಡಿ AI ಅದನ್ನು ಸರಿಪಡಿಸುತ್ತದೆ ಎಂದು ನಿರೀಕ್ಷಿಸುವುದು, ಕಡಿಮೆ-ರೆಸಲ್ಯೂಶನ್ ಚಿತ್ರಗಳನ್ನು ಅಪ್ಲೋಡ್ ಮಾಡುವುದು, ಮತ್ತು ಪಟ್ಟಿ ಮಾಡುವ ಮೊದಲು ಗುಣಮಟ್ಟ ಪರಿಶೀಲನೆ ಹಂತವನ್ನು ಬಿಟ್ಟುಬಿಡುವುದು. ಪ್ರತಿಯೊಂದೂ ಅಸ್ತಿತ್ವದಲ್ಲಿದೆ ಎಂದು ತಿಳಿದ ನಂತರ ತಪ್ಪಿಸಲು ಸುಲಭ.
AI ಆಭರಣ ರಿಟಚಿಂಗ್ನಿಂದ 90% ನಿರಾಶಾದಾಯಕ ಫಲಿತಾಂಶಗಳಿಗೆ ಕಾರಣವಾಗುವ ಆರು ತಪ್ಪುಗಳು ಇಲ್ಲಿವೆ:
**ತಪ್ಪು 1: ಬೆಚ್ಚನೆಯ ಒಳಾಂಗಣ ಬೆಳಕಿನಲ್ಲಿ ಶೂಟ್ ಮಾಡುವುದು** ಟಂಗ್ಸ್ಟನ್ ಮತ್ತು ಬೆಚ್ಚನೆಯ LED ಬಲ್ಬ್ಗಳು ಎಲ್ಲದರ ಮೇಲೆ ಹಳದಿ-ಕಿತ್ತಳೆ ಬಣ್ಣ ಬದಲಾವಣೆಯನ್ನು ಹಾಕುತ್ತವೆ — ವಿಶೇಷವಾಗಿ ಬೆಳ್ಳಿ ಮತ್ತು ಬಿಳಿ ಚಿನ್ನ, ಇವು ಫೋಟೋದಲ್ಲಿ ಹಳದಿಯಾಗಿ ಕಾಣುತ್ತವೆ. AI ಮಧ್ಯಮ ಬಣ್ಣ ವ್ಯತ್ಯಾಸಗಳನ್ನು ಸರಿಪಡಿಸಬಹುದು, ಆದರೆ ತೀವ್ರವಾದವು ಅಸ್ವಾಭಾವಿಕ ಫಲಿತಾಂಶಗಳನ್ನು ಉತ್ಪಾದಿಸುತ್ತವೆ. ಪರಿಹಾರ: ಹಗಲು ಬೆಳಕಿನಲ್ಲಿ ಕಿಟಕಿ ಬಳಿ ಶೂಟ್ ಮಾಡಿ, ಅಥವಾ 5000K+ LED ಬಲ್ಬ್ ಬಳಸಿ.
**ತಪ್ಪು 2: ಡಿಜಿಟಲ್ ಝೂಮ್ ಬಳಸುವುದು** ಸ್ಮಾರ್ಟ್ಫೋನ್ನಲ್ಲಿ ಡಿಜಿಟಲ್ ಝೂಮ್ ಚಿತ್ರ ಗುಣಮಟ್ಟವನ್ನು ಗಮನಾರ್ಹವಾಗಿ ಕುಗ್ಗಿಸುತ್ತದೆ. ಕ್ಯಾಮೆರಾದಿಂದ ಝೂಮ್ ಇನ್ ಮಾಡುವ ಬದಲು, ಆಭರಣಕ್ಕೆ ಭೌತಿಕವಾಗಿ ಹತ್ತಿರ ಹೋಗಿ, ಅಥವಾ ಮುಖ್ಯ 1x ಲೆನ್ಸ್ ಬಳಸಿ ನಂತರ ಕ್ರಾಪ್ ಮಾಡಿ. ಉನ್ನತ-ಗುಣಮಟ್ಟದ 1x ಶಾಟ್ನಿಂದ AI ಗೆ ಕೆಲಸ ಮಾಡಲು ಹೆಚ್ಚಿನ ವಿವರಗಳಿರುತ್ತವೆ.
**ತಪ್ಪು 3: ಪರಿಶೀಲಿಸದೆ ಮೊದಲ ಫಲಿತಾಂಶವನ್ನು ಸ್ವೀಕರಿಸುವುದು** AI ಹಿನ್ನೆಲೆ ತೆಗೆಯುವಿಕೆ ಅತ್ಯುತ್ತಮವಾಗಿದೆ ಆದರೆ ಸಂಕೀರ್ಣ ತುಣುಕುಗಳಲ್ಲಿ ತಪ್ಪಿಲ್ಲದ್ದಲ್ಲ — ವಿಶೇಷವಾಗಿ ಹಿನ್ನೆಲೆಯನ್ನು ದಾಟುವ ಸರಪಳಿಗಳು ಅಥವಾ ಪಾರದರ್ಶಕ ಕಲ್ಲುಗಳನ್ನು ಹೊಂದಿರುವ ತುಣುಕುಗಳು. ಡೌನ್ಲೋಡ್ ಮಾಡಿ ಪಟ್ಟಿ ಮಾಡುವ ಮೊದಲು ಯಾವಾಗಲೂ ಔಟ್ಪುಟ್ ಚಿತ್ರದಲ್ಲಿ ಆಭರಣದ ಅಂಚುಗಳನ್ನು ಝೂಮ್ ಇನ್ ಮಾಡಿ ನೋಡಿ.
**ತಪ್ಪು 4: ಪ್ರತಿ ಪ್ಲಾಟ್ಫಾರ್ಮ್ಗೆ ಒಂದೇ ಫೋಟೋ ಬಳಸುವುದು** Amazon ಶುದ್ಧ ಬಿಳಿ ಹಿನ್ನೆಲೆ ಅಗತ್ಯವಿರಿಸುತ್ತದೆ. Etsy ಜೀವನಶೈಲಿ ಶಾಟ್ಗಳೊಂದಿಗೆ ಉತ್ತಮವಾಗಿ ಕಾರ್ಯನಿರ್ವಹಿಸುತ್ತದೆ. Instagram ಉಸಿರಾಟದ ಜಾಗದೊಂದಿಗೆ ಚೌಕ ಕ್ರಾಪ್ಗಳನ್ನು ಆದ್ಯತೆ ನೀಡುತ್ತದೆ. Jewels Retouch ಔಟ್ಪುಟ್ ಅನ್ನು ಪಾರದರ್ಶಕ PNG ಆಗಿ ಡೌನ್ಲೋಡ್ ಮಾಡಿ, ನಂತರ ಒಂದೇ ಮಾಸ್ಟರ್ ಫೈಲ್ನಿಂದ ಪ್ಲಾಟ್ಫಾರ್ಮ್-ನಿರ್ದಿಷ್ಟ ಆವೃತ್ತಿಗಳನ್ನು ರಚಿಸಿ.
**ತಪ್ಪು 5: ಎಲ್ಲಾ SKU ಗಳನ್ನು ಸ್ಥಿರವಾಗಿ ಛಾಯಾಗ್ರಹಿಸದಿರುವುದು** ಖರೀದಿದಾರರು ವರ್ಗ ಪುಟಗಳನ್ನು ಬ್ರೌಸ್ ಮಾಡುತ್ತಾರೆ ಮತ್ತು ಫೋಟೋಗಳು ವಿಭಿನ್ನ ಕೋನಗಳಿಂದ, ವಿಭಿನ್ನ ಪ್ರಮಾಣದಲ್ಲಿ, ವಿಭಿನ್ನ ಹಿನ್ನೆಲೆಗಳೊಂದಿಗೆ ಶೂಟ್ ಆದಾಗ ಗಮನಿಸುತ್ತಾರೆ. ನಿಮ್ಮ ಮೊದಲ ತುಣುಕನ್ನು ಶೂಟ್ ಮಾಡುವ ಮೊದಲು ನಿಮ್ಮ ಪ್ರಮಾಣಿತ ಕೋನ ಮತ್ತು ಕ್ರಾಪ್ ಅನ್ನು ನಿರ್ಧರಿಸಿ, ಮತ್ತು ಅದಕ್ಕೆ ಅಂಟಿಕೊಳ್ಳಿ. ಸ್ಥಿರತೆ ಬ್ರ್ಯಾಂಡ್ ನಂಬಿಕೆಯನ್ನು ನಿರ್ಮಿಸುತ್ತದೆ.
**ತಪ್ಪು 6: ಅತಿಯಾಗಿ ವರ್ಧಿಸುವುದು** ಕೆಲವು ಮಾರಾಟಗಾರರು ತಮ್ಮ ಫೋಟೋಗಳನ್ನು ಒಂದರ ಮೇಲೊಂದು ಪೇರಿಸಿದ ಅನೇಕ AI ಉಪಕರಣಗಳ ಮೂಲಕ ಓಡಿಸುತ್ತಾರೆ, ಮತ್ತು ಫಲಿತಾಂಶಗಳು ಕೃತಕವಾಗಿ ಕಾಣುತ್ತವೆ. Jewels Retouch ನಂತಹ ಉದ್ದೇಶ-ನಿರ್ಮಿತ ಆಭರಣ ರಿಟಚರ್ ಮೂಲಕ ಒಂದೇ ಪಾಸ್ ಸಾಮಾನ್ಯ ವರ್ಧನೆ ಉಪಕರಣಗಳನ್ನು ಪೇರಿಸುವುದಕ್ಕಿಂತ ಬಹುತೇಕ ಯಾವಾಗಲೂ ಉತ್ತಮ. ಖರೀದಿದಾರರು ನಿಜ ವಸ್ತುವಿನಂತೆ ಕಾಣುವ ಫೋಟೋಗಳನ್ನು ನಂಬುತ್ತಾರೆ.
ನೀವು ವಾಸ್ತವವಾಗಿ ಯಾವ ಫಲಿತಾಂಶಗಳನ್ನು ನಿರೀಕ್ಷಿಸಬಹುದು?
ವಾಸ್ತವವಾಗಿ, AI ರಿಟಚಿಂಗ್ ಆಭರಣ ಪಟ್ಟಿಗಳಿಗೆ ಕ್ಲಿಕ್-ಥ್ರೂ ದರಗಳು ಮತ್ತು ಪರಿವರ್ತನೆ ದರಗಳನ್ನು ಸ್ಥಿರವಾಗಿ ಹೆಚ್ಚಿಸುತ್ತದೆ, ಆದರೆ ಇದು ಉತ್ತಮ ಉತ್ಪನ್ನ ಅಥವಾ ಆಕರ್ಷಕ ಬೆಲೆಗೆ ಬದಲಿಯಲ್ಲ. ಫೋಟೋಗಳು ಖರೀದಿದಾರರನ್ನು ನೋಡಲು ಪ್ರೇರೇಪಿಸುತ್ತವೆ — ಉತ್ಪನ್ನ ಮತ್ತು ಬೆಲೆ ಅವರನ್ನು ಖರೀದಿಸಲು ಪ್ರೇರೇಪಿಸುತ್ತವೆ.
ಮಾರಾಟಗಾರ ಡೇಟಾದ ಆಧಾರದ ಮೇಲೆ ವಾಸ್ತವಿಕ ಮಾನದಂಡಗಳು ಇಲ್ಲಿವೆ:
**ಕ್ಲಿಕ್-ಥ್ರೂ ದರ ಸುಧಾರಣೆ** ಸಂಪಾದಿಸದ ಫೋನ್ ಫೋಟೋಗಳಿಂದ AI-ರಿಟಚ್ ಮಾಡಿದ ಚಿತ್ರಗಳಿಗೆ ಬದಲಾಯಿಸುವ ಮಾರಾಟಗಾರರು ಸಾಮಾನ್ಯವಾಗಿ ಮೊದಲ 30 ದಿನಗಳಲ್ಲಿ Etsy ಮತ್ತು Amazon ನಲ್ಲಿ ಕ್ಲಿಕ್-ಥ್ರೂ ದರದಲ್ಲಿ 30–60% ಹೆಚ್ಚಳವನ್ನು ಕಾಣುತ್ತಾರೆ. ಇದು ಅತ್ಯಂತ ನೇರ ಪರಿಣಾಮ — ಸ್ವಚ್ಛ, ವೃತ್ತಿಪರ ಫೋಟೋಗಳು ಥಂಬ್ನೇಲ್-ಭಾರೀ ಹುಡುಕಾಟ ಫಲಿತಾಂಶಗಳಲ್ಲಿ ಎದ್ದು ಕಾಣುತ್ತವೆ.
**ಪರಿವರ್ತನೆ ದರ ಸುಧಾರಣೆ** ಫೋಟೋ ಅಪ್ಗ್ರೇಡ್ಗಳ ನಂತರ ಪರಿವರ್ತನೆ ದರ (ಖರೀದಿಸುವ ಸಂದರ್ಶಕರು) ಸಾಮಾನ್ಯವಾಗಿ 15–35% ಸುಧಾರಿಸುತ್ತದೆ, ಏಕೆಂದರೆ ಖರೀದಿದಾರರು ವಸ್ತುವು ಫೋಟೋದಂತೆ ಕಾಣುತ್ತದೆ ಎಂದು ನಂಬುತ್ತಾರೆ. ಹೆಚ್ಚಿನ ಬೆಲೆ ಅಂಕಗಳಲ್ಲಿ ಪರಿಣಾಮ ಬಲವಾಗಿರುತ್ತದೆ — ಉಂಗುರಕ್ಕೆ ಚಾರ್ಮ್ಗಿಂತ ಉತ್ತಮ ಫೋಟೋ ಬೇಕು.
**ಸಮಯ ಹೂಡಿಕೆ**
- ಛಾಯಾಗ್ರಹಣ ಸೆಟಪ್: ನಿಮ್ಮ ವ್ಯವಸ್ಥೆ ಸಿದ್ಧವಾದ ನಂತರ ಪ್ರತಿ ಅವಧಿಗೆ 15–30 ನಿಮಿಷಗಳು
- 10 ತುಣುಕುಗಳನ್ನು ಶೂಟ್ ಮಾಡುವುದು: 30–60 ನಿಮಿಷಗಳು
- 10 ಚಿತ್ರಗಳ AI ರಿಟಚಿಂಗ್: 10–15 ನಿಮಿಷಗಳು
- ಪ್ರತಿ 10 SKU ಗಳಿಗೆ ಒಟ್ಟು: ಸಾಂಪ್ರದಾಯಿಕ ಹಸ್ತಚಾಲಿತ ಸಂಪಾದನೆಗೆ 8–10 ಗಂಟೆಗಳಿಗೆ ಹೋಲಿಸಿ 2 ಗಂಟೆಗಳಿಗಿಂತ ಕಡಿಮೆ
**ವೆಚ್ಚ ಹೋಲಿಕೆ**
- AI ಉಪಕರಣದೊಂದಿಗೆ DIY: ಚಂದಾದಾರಿಕೆ ಶ್ರೇಣಿಯನ್ನು ಅವಲಂಬಿಸಿ ಪ್ರತಿ ಚಿತ್ರಕ್ಕೆ /bin/zsh.30–/bin/zsh.80
- ಫ್ರೀಲಾನ್ಸ್ ರಿಟಚರ್: ಪ್ರತಿ ಚಿತ್ರಕ್ಕೆ –
- ಛಾಯಾಗ್ರಹಣ + ಸಂಪಾದನೆ ಏಜೆನ್ಸಿ: ಪ್ರತಿ ಚಿತ್ರಕ್ಕೆ –
**AI ಸರಿಪಡಿಸದ ವಿಷಯಗಳು:**
- ಮೊದಲು ಭೌತಿಕ ಶುಚಿಗೊಳಿಸುವಿಕೆ ಅಗತ್ಯವಿರುವ ಗೀರಿದ ಅಥವಾ ಹಾನಿಗೊಳಗಾದ ಆಭರಣ
- ವರ್ಧಿಸಲು ಯಾವುದೇ ವಿವರವಿಲ್ಲದಷ್ಟು ಮಸುಕಾದ ಫೋಟೋಗಳು
- ಮೂಲಭೂತ ಸಂಯೋಜನೆ ಸಮಸ್ಯೆಗಳು (ಉತ್ಪನ್ನ ಪ್ರಕಾರಕ್ಕೆ ತಪ್ಪು ಕೋನ)
ತಿಂಗಳಿಗೆ 20 ಹೊಸ ತುಣುಕುಗಳನ್ನು ಹೊಂದಿರುವ ಮಾರಾಟಗಾರರಿಗೆ, AI ರಿಟಚಿಂಗ್ಗೆ ಬದಲಾಯಿಸುವುದು ಮೊದಲ ತಿಂಗಳಲ್ಲೇ ಹಲವು ಪಟ್ಟು ಹೆಚ್ಚು ಪ್ರತಿಫಲ ನೀಡುತ್ತದೆ — ನೇರ ವೆಚ್ಚ ಉಳಿತಾಯದಲ್ಲಿ ಮತ್ತು ಹೆಚ್ಚು ಪರಿವರ್ತನೆಯಾಗುವ ಪಟ್ಟಿಗಳಿಂದ ಹೆಚ್ಚಿದ ಆದಾಯದಲ್ಲಿ.

